
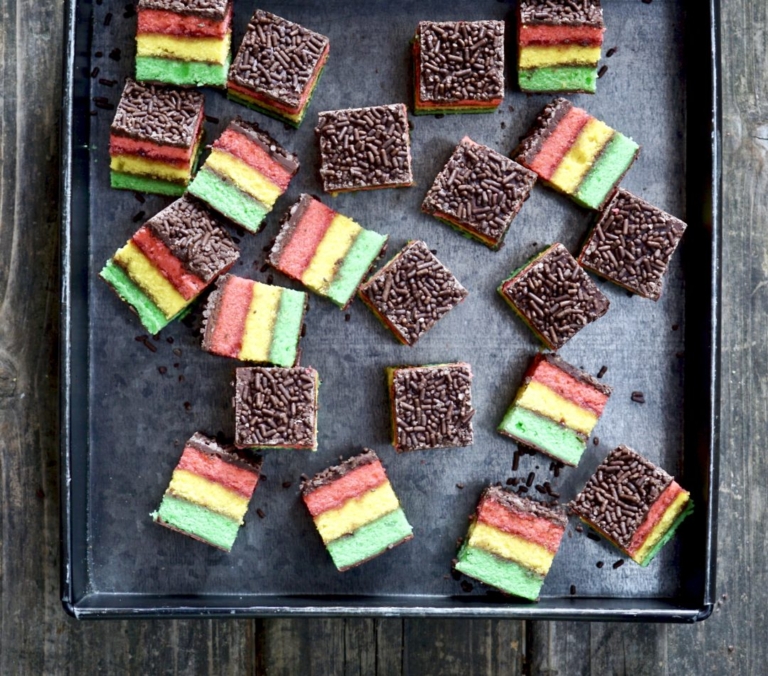
Before leaving NY, we lived in Brooklyn, Cobble Hill to be exact, on a quaint treelined street called Clinton. It was a lovely old Italian area filled with old-school butchers, bakeries, lovely people, and Italian rainbow cookies.
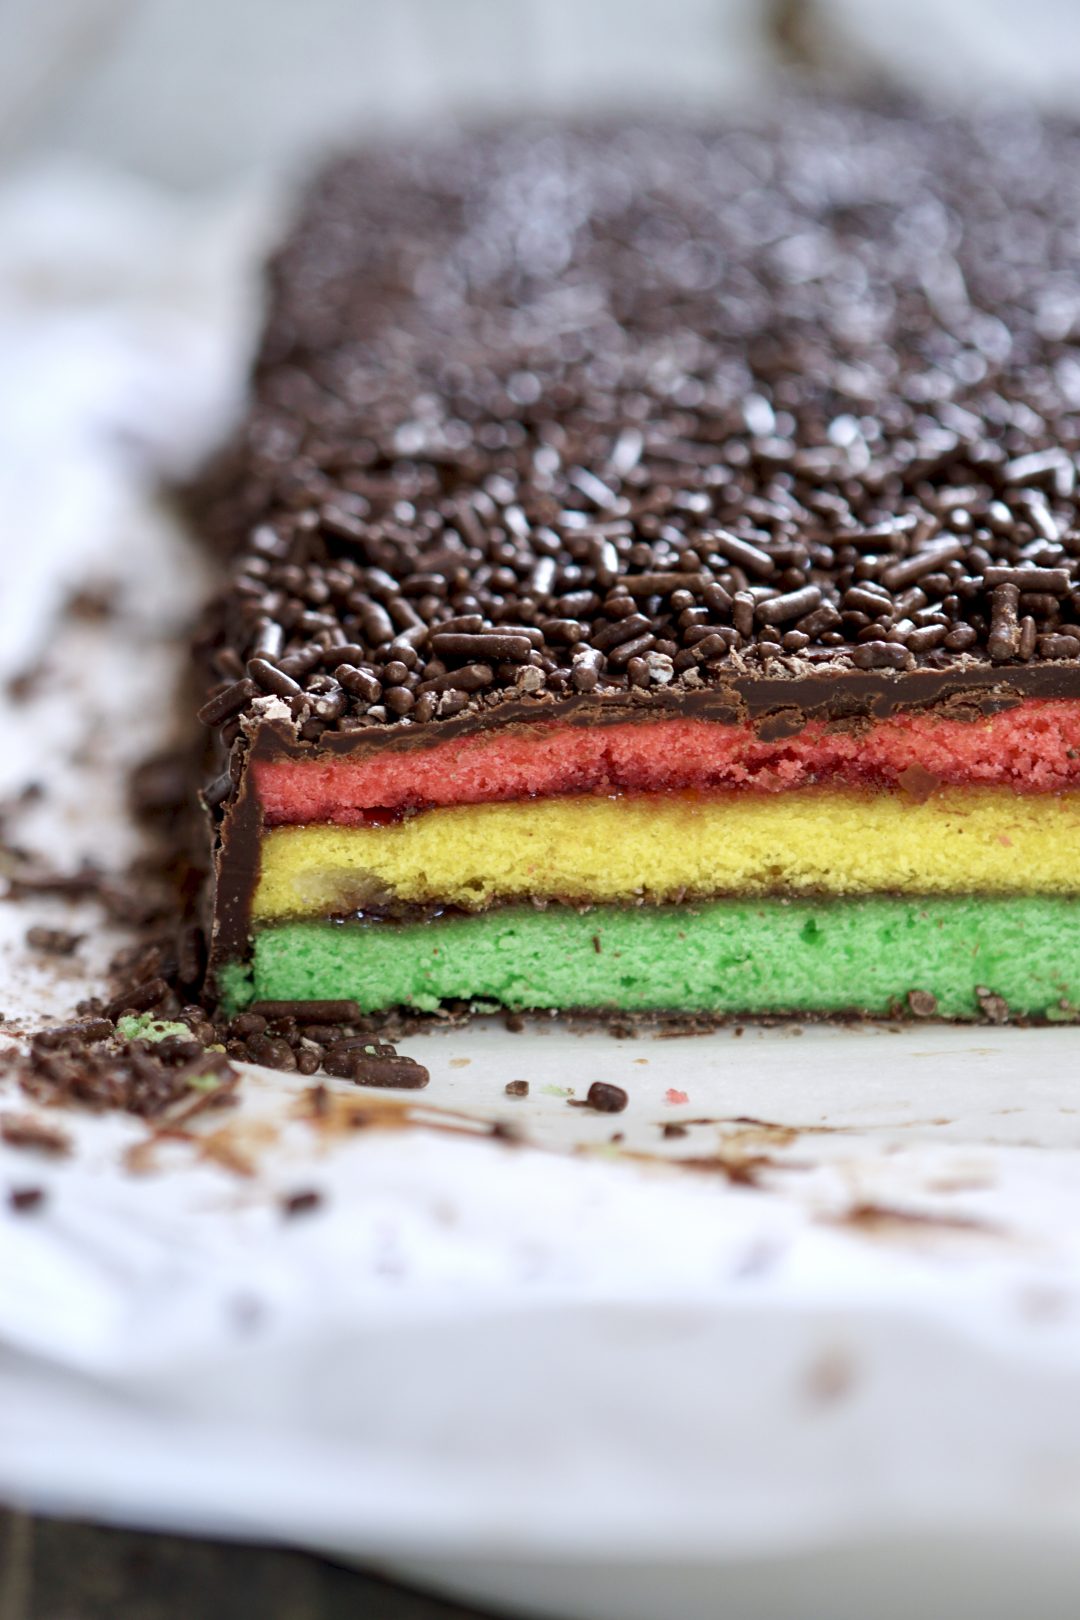
Not your typical “cookie” more cake-like, but something I love and have fond memories of. Brightly colored, almond-based sponge cake with raspberry jam and a chocolate coating, these little cake cookies have character. Although many Italian cookies use almond paste as their base, rainbow cookies or “flag cookies“, as they are often called, are, said to be, according to well-known Italian celebrity chef personality Lidia Bastianich, cookies that were created by early Italian immigrants during the 1900’s in homage to the colors of their native flag.
Despite an exhaustive search, I have never found these cookies in Northern California, so I simply taught myself how to make them. I will warn you, this is a labor-intensive recipe so beware. Soft but hearty, rainbow cookies which actually feel more like a cake cookie, have a pronounced almond flavor that nicely compliments the sweet jam filling and chocolate coating.
Because of their time-consuming nature (and the fact that my kids don’t actually like them as much as I do), I don’t make them all that often, but my husband and I adore them and they will forever remind me of Brooklyn so I’ll keep making them.
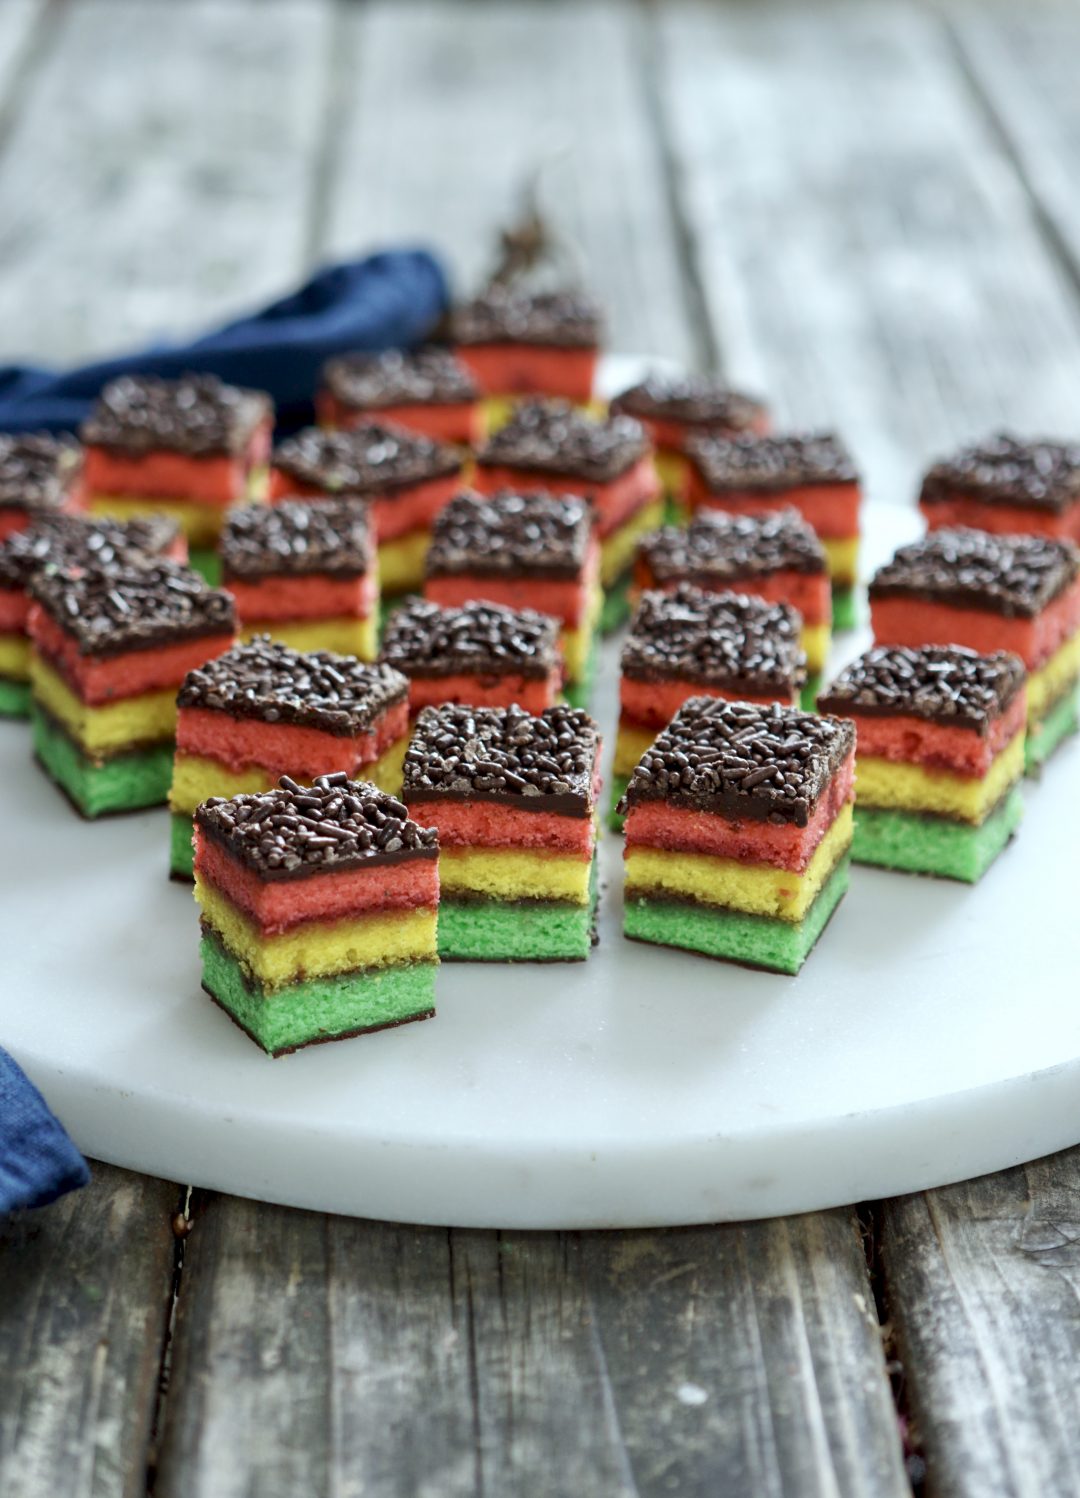
This cake will not be perfect so don’t panic, that’s completely ok. A pressed tri-level cake such as this will have unevenness and inconsistencies and that is completely fine. This is a fun recipe to play around with. I have made all kinds of shapes and sizes with it including a large 40th birthday cake cut out in the shape of actual numbers. Go ahead, get creative.
Italian Rainbow Cookies

Ingredients:
For The Cake:
- 3 disposable 9×11″ aluminum pans
- One (12-ounce can) almond paste
- 1 cup unsalted butter, softened
- 1 cup sugar
- 4 eggs
- 2 cups all-purpose flour
- 1 tablespoon almond extract
- Red, Green, and Yellow food coloring
- 1 cup seedless raspberry jam
For The Topping:
- 1/2 cup semi-sweet chocolate chips
- 2 tablespoons unsalted butter
- Chocolate sprinkles
Directions:
- Preheat the oven to 350 degrees F. Lightly grease and flour the three baking pans. Set aside.
- In the bowl of a kitchen mixer, such as a KitchenAid, fitted with a whisk attachment, add the butter and sugar and mix well on medium speed. With the mixer running, add eggs. Add the almond filling and almond extract and mix well to incorporate until smooth (don’t worry about the lumps from the almond pieces).
- With the mixer on low, gradually add the flour to form a loose-looking dough.
- Divide the dough into 3 equal portions in separate bowls. Mix each with appropriate food coloring and then spread into a greased pan. The mixture may be hard to spread, do your best to evenly cover the bottom of the baking pan as best as possible.
- Place in the oven and bake for 12-15 minutes until the cakes are set. Cool completely.
- Once cool, very gently remove the cakes from the pan and place them on top of parchment paper. Using a serrated knife, lightly trim the cakes on all sides making them flat and even in size.
- To Assemble the Cookies: Place a piece of clear plastic wrap long enough to cover all the layers on the kitchen counter. Lay the GREEN layer down on the plastic wrap. Spread about 1/2 cup of jam on top of the green layer.
- Place the YELLOW layer on top of the green layer. Spread the yellow layer with the raining raspberry jam.
- Place the PINK layer on top of the yellow layer. Wrap the layers of cake up with plastic wrap. Compress the cake with something heavy (a Pyrex dish or a heavy cutting board works well) and place it in the refrigerator to chill for about 3 hours.
- Frosting the Cake: Once chilled, remove the plastic wrap and place the cake on a piece of parchment paper.
- Place the chocolate chips and butter in a small saucepan and heat over a low flame. When melted, using an offset spatula, quickly spread a thin layer the size of the cake on the wax paper. Note: this will be the bottom layer of the cake.
- Next, place the cake on top of the chocolate. Begin spreading the melted chocolate on the top and sides of the cake. Note: you may have to reheat the chocolate if it gets too firm to spread.
- Once the cake is covered in chocolate, cover generously in chocolate sprinkles pricing lightly to get them to adhere to the melted chocolate.
- Refrigerate the cake for an additional 30 minutes to allow the chocolate to harden.;;Use a large slicer or serrate knife to slice the cake into small squares

I always search for these when I travel … I usually find them dipped in chocolate, but this looks like it would let the cake/cookie really shien through.
Thanks so much for your comment. We must be related, I look for them everywhere as well 🙂 You can completely cover them in chocolate, but this is how I know them best and like you said, it allows the cake to shine through.
I found this recipe in a magazine about 25 yrs. ago and have made them -only at Christmas – every year since. I have never added the sprinkles but it looks like a good idea. They are WORTH the time and effort to mae. Del in Canada
Love hearing this Del. These are special cookies indeed and worth the effort if you ask my boys. The sprinkles make the world of difference. Happy baking to you. Stay safe.