My younger son, Noah, has always been a fish fan. At one point, I thought I had a pescatarian (someone who eats fish but not meat) on my hands. Thankfully, I don’t–I say that only because my other son is a huge carnivore and will not eat fish. Fortunately, Noah eats almost everything, but he loves fish the most. By “fish” I mean almost anything from the sea, from salmon to soft-shell crabs. He is willing to try almost anything, except octopus–he likes those way too much to eat them.
I developed this recipe at my first job right out of culinary school as an alternative to crab cakes. The recipe was so well-received by the club members that it went on to become a signature dish. What came with that glory was the honor of making lots and lots of cod cakes, daily. I made so many cod cakes during my time there that, I rarely enjoy them anymore. They are, however, a big hit when I make them.

I made these for Noah when he was very little, and I have not stopped since. He asks for these more than smoked salmon from Zabar’s and ribs from Carson’s in Chicago. The recipe is easy and you can substitute other fish if you wish, or if cod is unavailable–I’ve been known to use frozen fish. What works best is a flaky, non-oily mild fish.
You can also add crab to it if you desire. The recipe also holds up if made in advance, which works great for dinner parties. The cakes can be served as hors d’oeuvre, an appetizer, or an entree. Noah will also join me in the kitchen to make these: he’s happy to roll up his sleeves and dig right in to mix and form the cakes. Now that he’s older, he can probably make them all by himself. I may just need to test that out.
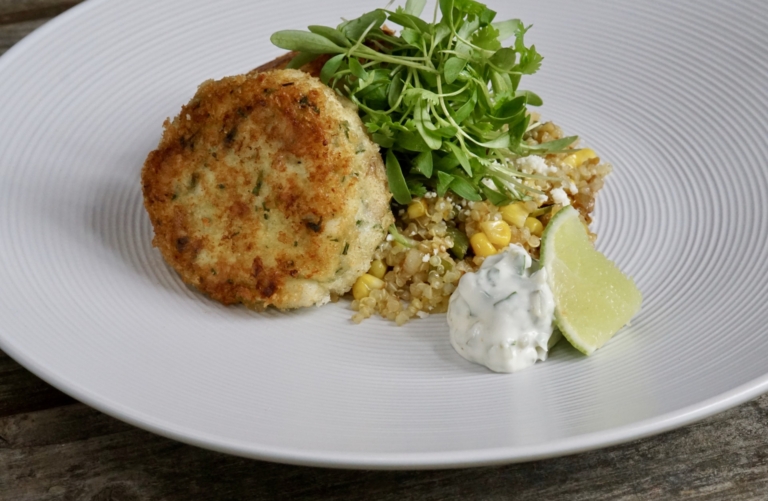
Cod Cakes and Tartar Sauce

Ingredients:
For the Cod Cakes:
- 1 1/2 pounds cod fish (boneless and skinless)
- 1/2 cup panko bread crumbs (plus an additional 3/4 cup for coating)
- 1/2 cup mayonnaise
- 2 limes, juiced;1 egg, beaten
- 2 tablespoons unsalted butter
- 1/2 teaspoon salt
- Freshly ground black pepper, to taste
- 1/2 cup vegetable oil, for cooking
- 1/2 cup flat-leaf parsley, finely chopped
For the Tarter Sauce:
- 1/2 cup mayonnaise
- 2 teaspoons red onion, finely chopped
- 4 cornichons, finely chopped
- 1 tablespoon capers, finely chopped
- 1 teaspoon parsley, finely chopped
- 1/2 teaspoon fresh lime juice (optional)
- Salt and freshly ground black pepper to taste
Directions:
- For the Cod Cakes, place about 10 cups of water in a stockpot over high heat and bring to a boil. When boiling, add fish and lightly simmer for 2-3 minutes until the cod is cooked. Drain and cool in a colander. Set aside.
- When the cod is cool enough to handle, place it in a medium-sized mixing bowl. Gently flake with a fork (or your hands) looking for any possible bones.
- Add 1/2 cup panko bread crumbs, mayonnaise, lime juice, and parsley, and mix well with a rubber tip spatula. Season the mixture with salt and pepper to taste. Once the seasoning has been adjusted, add the egg.
- Make into 8 (or 10, depending on the desired size) equal, well-formed patties and set aside.
- Add an additional 3/4 cup bread crumbs to a separate mixing bowl. Gently coat the cod cakes in the bread crumbs, making sure to get the sides, and place on a plate. Repeat with the remaining cakes. Note: once coated in bread crumbs, cod cakes can be wrapped well and refrigerated for 1 day or until you are ready to cook them.
- For the Tartar Sauce, mix all of the ingredients together in a small bowl until blended. Cover and refrigerate till needed.
- To Cook the Cod Cakes, working in batches, heat about 1/4 cup vegetable oil and 1 tablespoon butter in a large shallow sauté pan over medium heat. When the oil is hot but not smoking (butter will be bubbling), add the cakes and sauté for 4-5 minutes per side, or until golden in color. Carefully turn the cakes over and cook on the other side. When the cakes are cooked through, remove them from the pan and place them on a plate lined with a paper towel to drain. Add the additional oil and butter and repeat with the remaining cakes. Note: the cod cakes can be re-heated in the oven should the need arise.
- Serve cod cakes hot with a dollop of tartar sauce
General rule, cakes need to be trimmed before frosting. This is especially important if you are making a layer cake of any kind. It is not your fault when you bake a cake, it does not come out of the oven with uniform height: one part may bulge, or some other part may sink, Making it even and flat is important. The sides also require some attention, the harder outer edges should be removed.
Why Trim a Cake?
- Even Surface: Trimming levels out any unevenness or doming that may have occurred during the baking process. This ensures that the cake has a flat, stable surface to work with.
- Better Adhesion: Trimming creates a fresh, clean edge that allows the frosting to adhere more evenly and smoothly to the cake. This helps prevent any gaps or air bubbles between the cake and the frosting.
- Professional Presentation: A trimmed cake looks more polished and professional. It provides a clean canvas for decorating and makes the finished product visually appealing.
- Improved Layering: If you’re stacking multiple layers of cake, trimming helps create a stable foundation. This prevents any leaning or tilting of the layers and helps maintain the overall structure of the cake.
- Enhanced Flavor and Texture: Trimming can remove any dry or over-baked edges, ensuring that every bite of the cake is moist and delicious.
- Easier Handling: A trimmed cake is easier to handle, especially when you’re assembling layers or applying a crumb coat. It reduces the risk of the cake breaking or crumbling during the frosting process.
- Customization: Trimming allows you to shape the cake to your desired size and shape. This is particularly useful if you’re creating specialty cakes or need specific dimensions for a particular design.
Overall, trimming a cake is a crucial step in the cake-decorating process. It sets the foundation for a beautifully frosted and decorated cake, ensuring both aesthetic appeal and a delightful eating experience. Every bite of cake should be consistently soft and moist, there should not be hard pieces in your way. This is an especially important technique when making an all-white cake such as in my favorite Coconut Cake. You should not see brown edges peeking through the white frosting. Below are some relatively simple steps to follow to try to make cake layers more uniform and even.
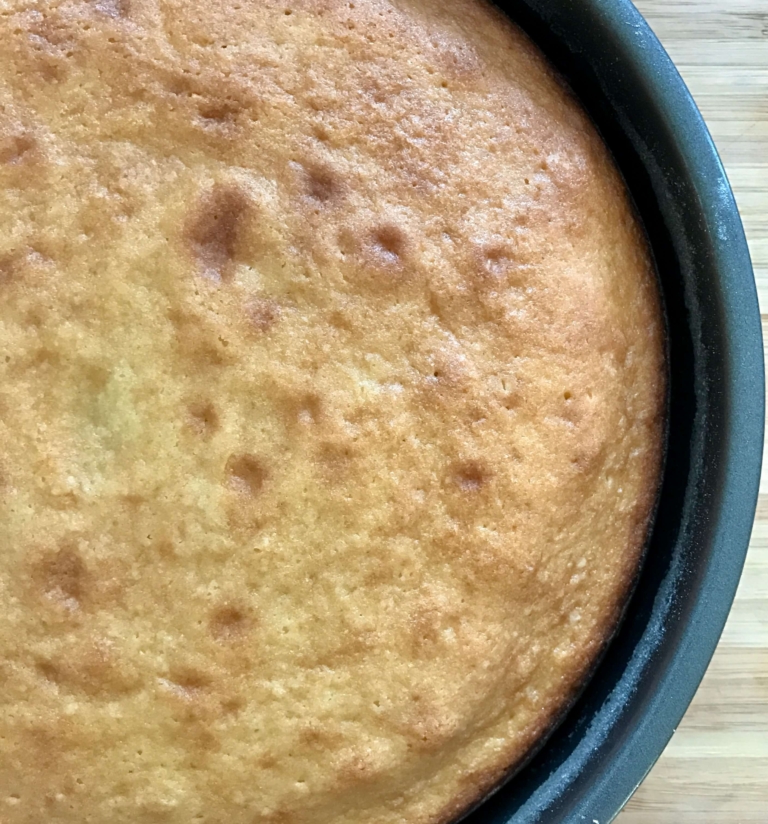
Step 1: When cool, carefully remove the cake from the baking pan.
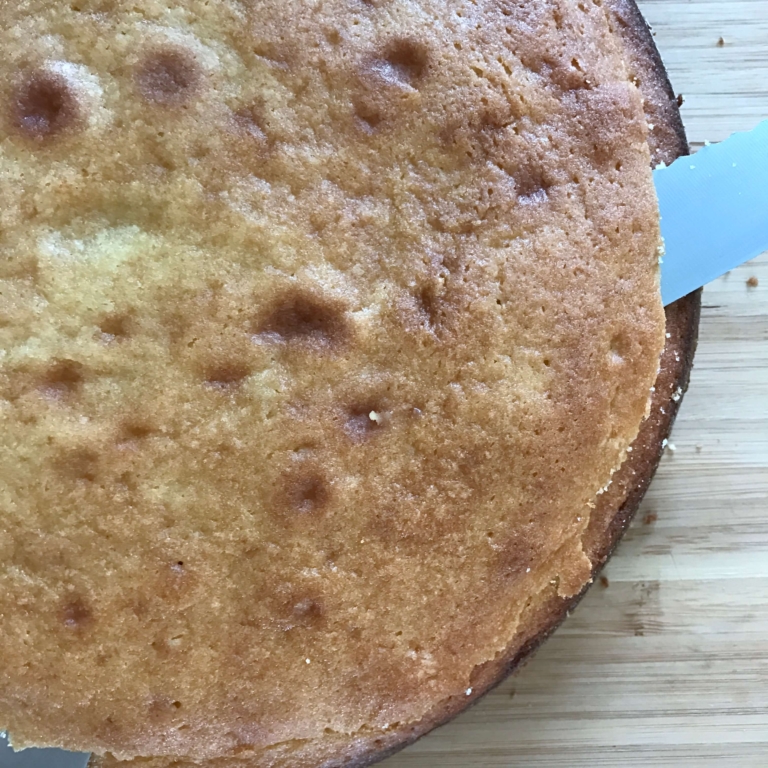
Step 2: Using a long serrated knife, gently trim the top of the cake.
Step 3: Using your knife, make the cake as flat as possible.
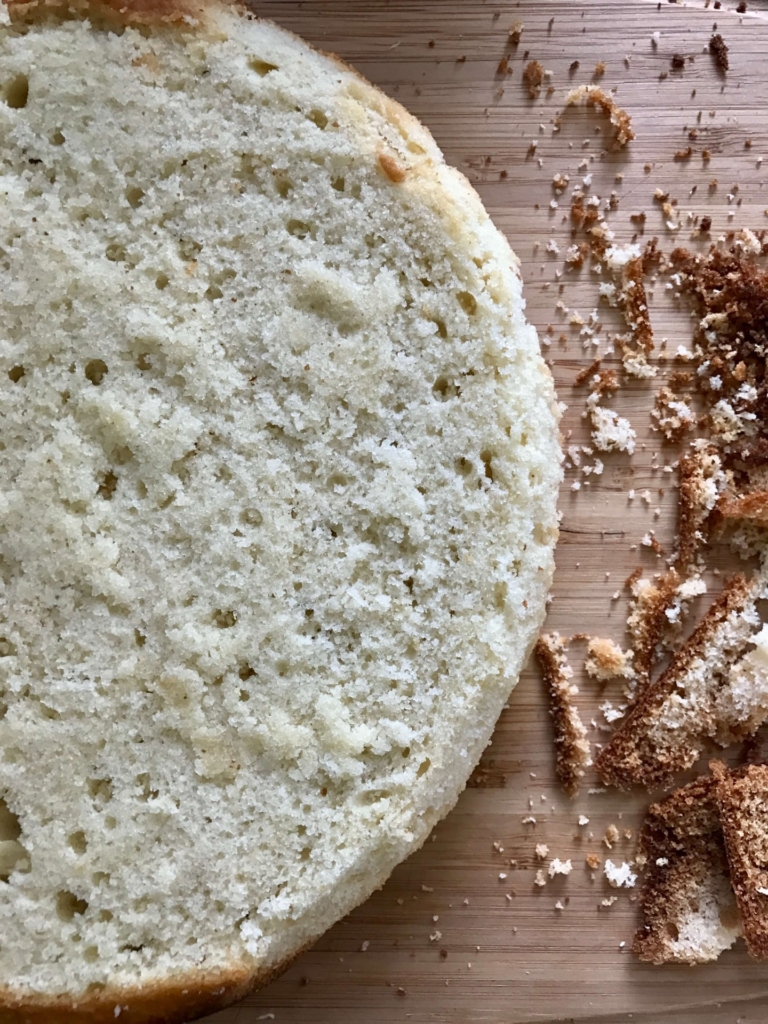
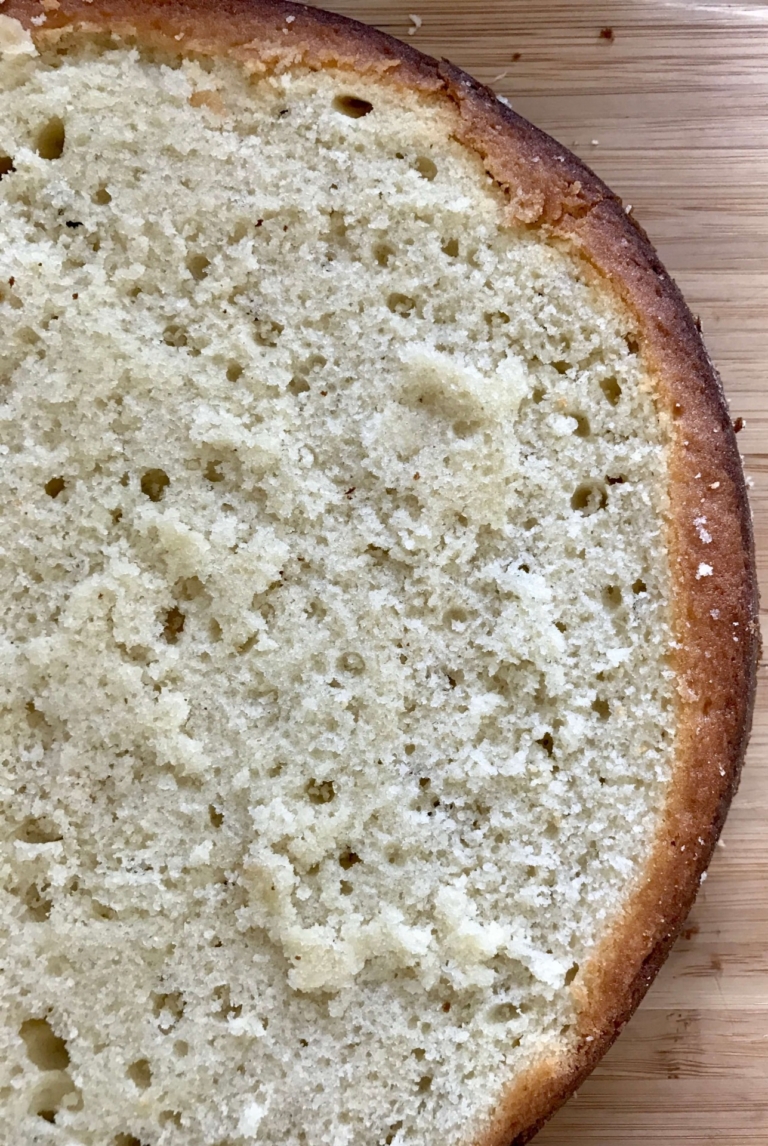
Step 4: Carefully and slowly trim the cake sides, removing the hard crusts.
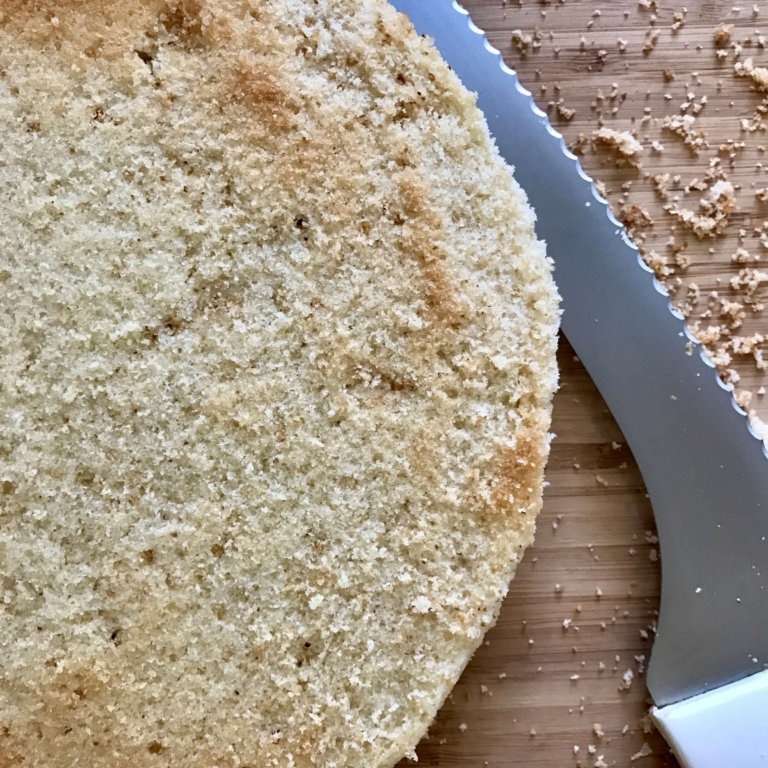
Step 5: Turn the cake over. Trim and flatten the cake bottom.
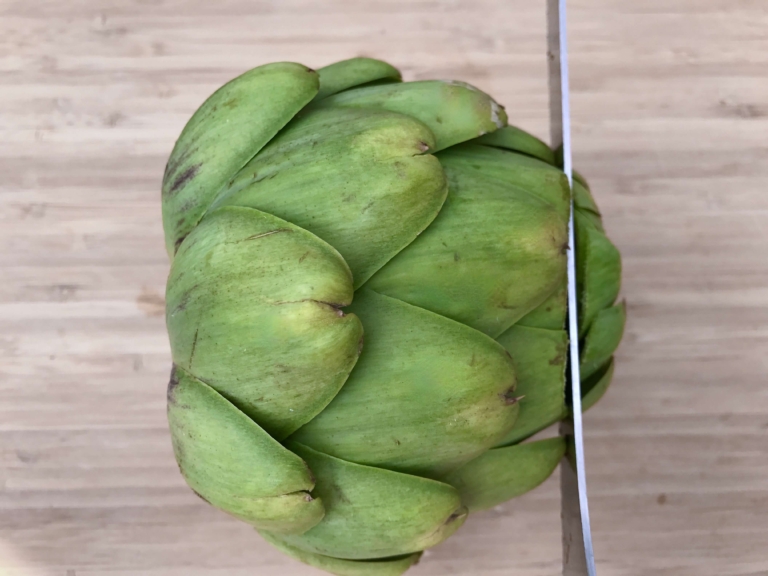
Since I was a young kid, I have always enjoyed artichokes. I liked them because, unlike everything else I ate, they did not require a fork (and the melted butter too!). Now I make artichokes often. My kids now enjoy them for the very same reasons. It was not until I was a grown-up that I learned the proper way to trim them. Life changer. A simple technique, but your family will thank you for not getting poked by the prickly tips anymore.
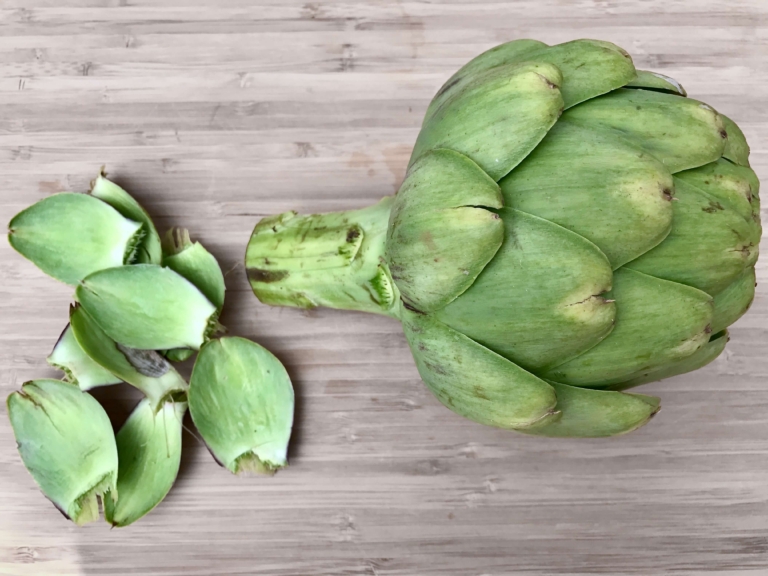
Step 1: Remove the outer bottom leaves
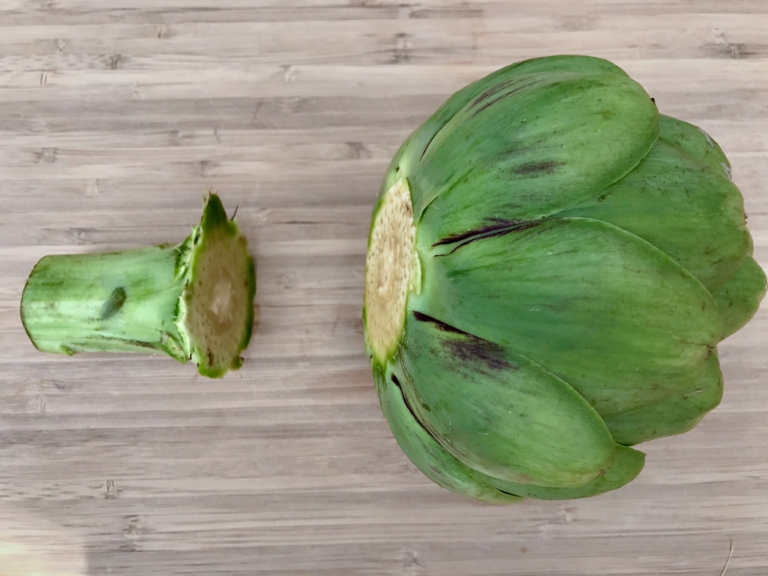
Step 2: Using a chef’s knife, cut off the stem, creating a flat surface that will allow the artichoke to stand upright without tipping.
Step 3: Using a serrated knife, cut off the top quarter (or so) of the artichoke.
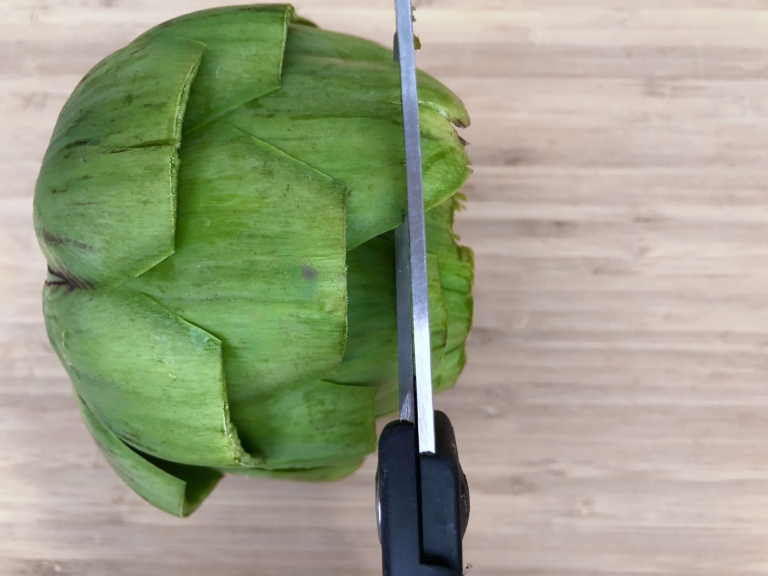
Step 4: Using kitchen shears, carefully trim the tips of each accessible leaf, removing the pointy tops and replacing them with a flat edge.
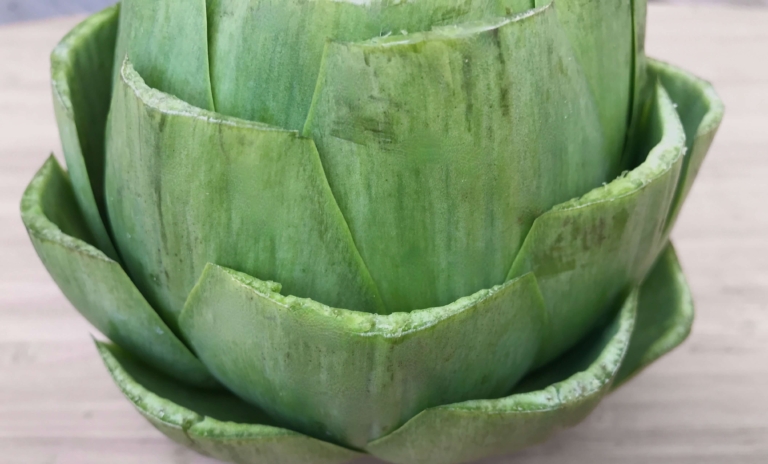
Step 5: A properly trimmed artichoke ready for steaming.
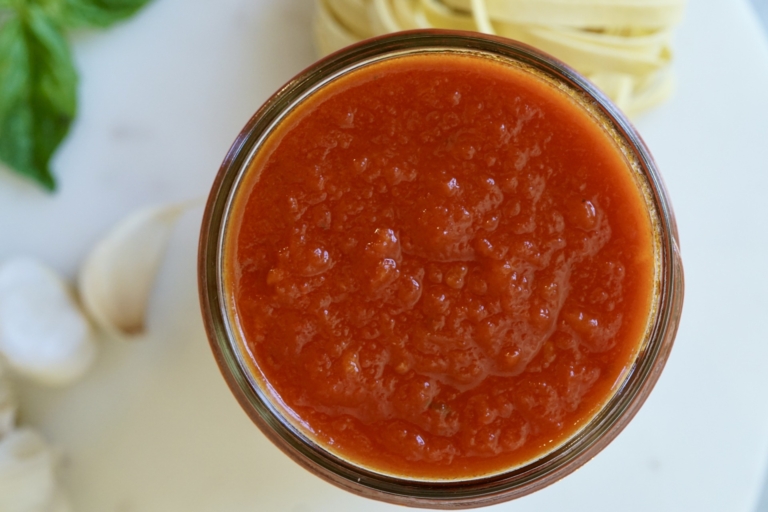
A good classic homemade tomato sauce is the cornerstone of countless culinary creations. Its essence lies in the quality of the tomatoes. Ripe, flavorful tomatoes bring a natural sweetness and depth that no store-bought version can match. Good quality canned tomatoes or ripe fresh tomatoes are the heart and soul of any tomato sauce. Their natural sweetness, balanced acidity, and rich flavor create a base that transforms ordinary pasta or tomato sauce-based dishes into extraordinary feasts.

I prefer a simple and pure tomato sauce. This sauce’s true magic lies in its versatility. It’s a canvas for an array of dishes. From the hearty comfort of lasagna to the zesty zing of pizza, this sauce elevates each creation to new heights. A homemade sauce allows for a personal touch, from selecting the finest tomatoes to infusing it with your favorite herbs and spices. It’s a labor of love that resonates in every spoonful.
This sauce is extremely versatile and can be used for almost any Italian recipe. Made a day or two in advance or frozen for future use, this sauce holds up without losing flavor. In the summer, during peak tomato season, try using fresh tomatoes for maximum flavor. In the realm of culinary prowess, a classic homemade tomato sauce is your steadfast ally. With the right tomatoes, it transcends mere condiment status, becoming a transformative elixir that breathes life into your recipes. Elevate your dishes; let the tomato sauce shine.
Simple Tomato Sauce
Ingredients:
- 1/4 cup Extra Virgin olive oil
- 1 small yellow onion, small dice
- 1 large carrot, peeled, small dice
- 1 stalk celery, small dice
- 4 garlic cloves, peeled and smashed
- Two (28-ounce cans) whole tomatoes, chopped (San Marzano preferably)
- Salt to taste
Directions:
- Place a 3-quart saucepan over medium-high heat. Add the olive oil. When hot, but not smoking, add the onion and garlic and sauté until soft and just beginning to brown, about 5-6 minutes. Add the carrot and celery and cook for another 5 minutes. Add the tomatoes and their juice and bring to a boil, stirring occasionally.
- Once boiling, lower the heat, cover, and simmer for about 30 minutes, until the sauce begins to thicken. Remove from the heat and let cool slightly. When cool enough to handle, place the sauce in the bowl of a Cuisinart mixer with a standard chopping blade attachment. Purée the sauce for about 1 minute until smooth and slightly orange in color. Remove from the mixer and season with salt to taste
You know what I’m talking about right? You reach for some bananas, but in doing so, your arm grazes a vast assortment of odd-looking specialty fruit. Brightly colored, with spikes, prickly, some even flower-like in appearance. What are these crazy-looking fruits and what the heck do you do with them if you are adventurous enough to buy them? Here are a few helpful tips just in case you feel like picking up some the next time you go shopping.
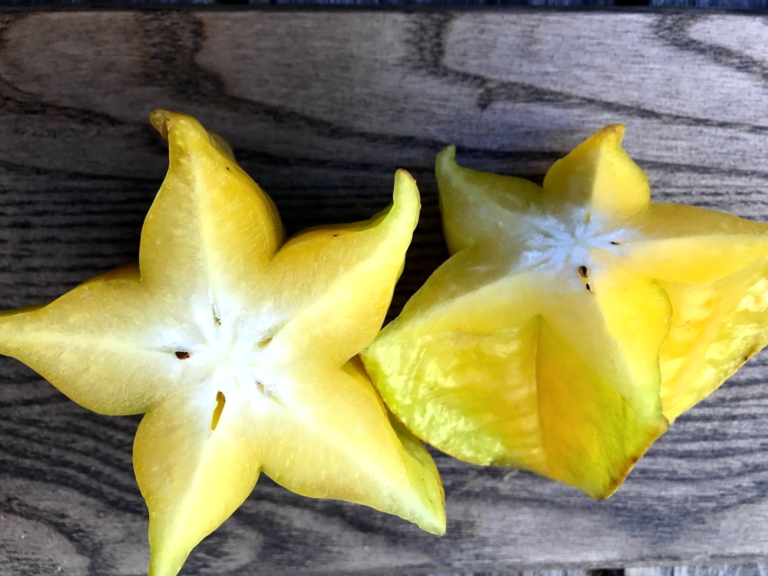
Star Fruit: Native to the Philippines, Indonesia, Malaysia, and Nepal. Typically the fruit has 5 (sometimes 4) ridges; so when you cut a cross-section, it resembles a star. The whole fruit is edible and is typically eaten straight from one’s hand. In cooking, it is made into relishes, preserves, and beverages. Rich in antioxidants, potassium, and vitamin C.
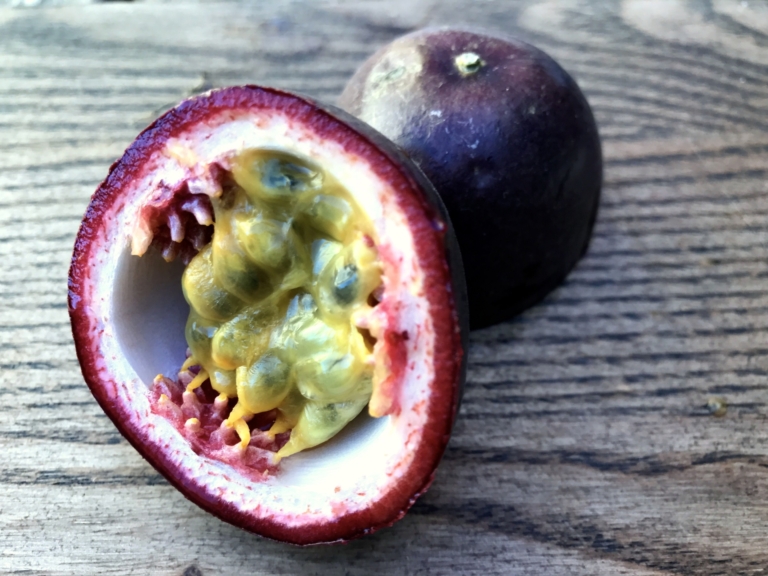
Passion Fruit: Native to southern Brazil. A sweet, seedy fruit that is considered a berry. Round or oval, yellow or dark purple with a soft to firm juicy inside. The skin is not eaten, but the seedy pulp inside is. In cooking, it can be found in salads to add crunch, in juice/or juiced or drizzled over a dessert as garnish. Rich source of antioxidants.
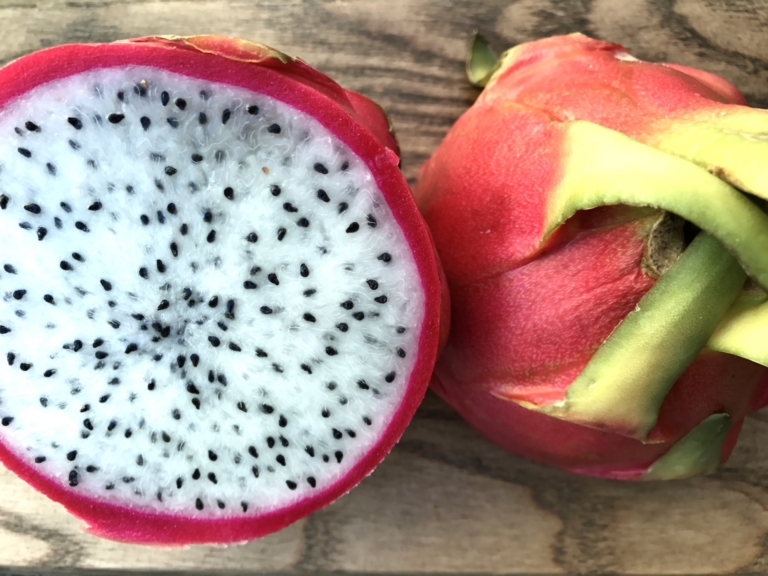
Dragon Fruit: Likely native to Central America and Mexico, but there is still some uncertainty about that. Red or yellow skin, which is not to be eaten, with white or red flesh. A blend of a kiwi and pear, the flesh is mildly sweet with crunchy nutty seeds giving it a crunchy texture. In cooking, it is used in fruit salads, salsa, salad dressings, smoothies, and mocktails. Rich in antioxidants and vitamin C.
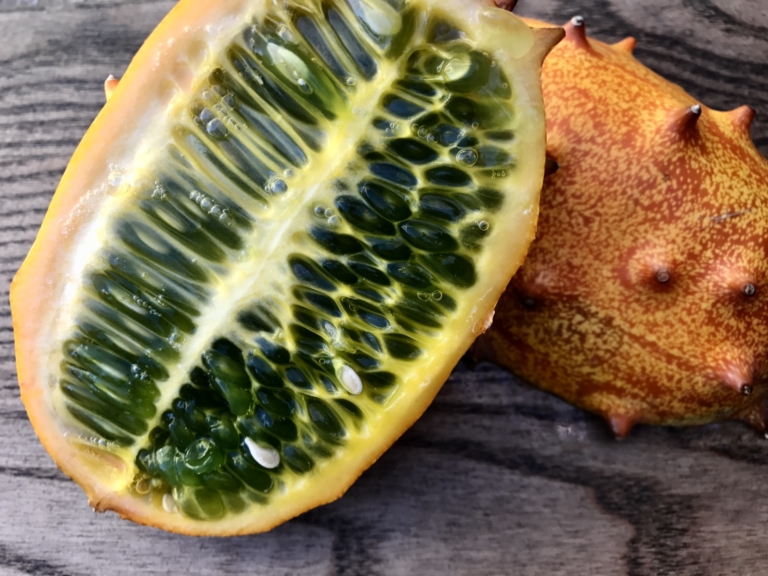
Kiwano Melon: Native to Southern Africa, this is also referred to as “the horned melon” or “African horned melon.” Edible yellow-orange skin with horn-like spines, with a tart lime jelly-like flesh. The texture and taste are similar to a cucumber, banana, and lemon combination. In cooking, it is used to make dressings and sauces. Rich in antioxidants, vitamin E, and vitamin A.
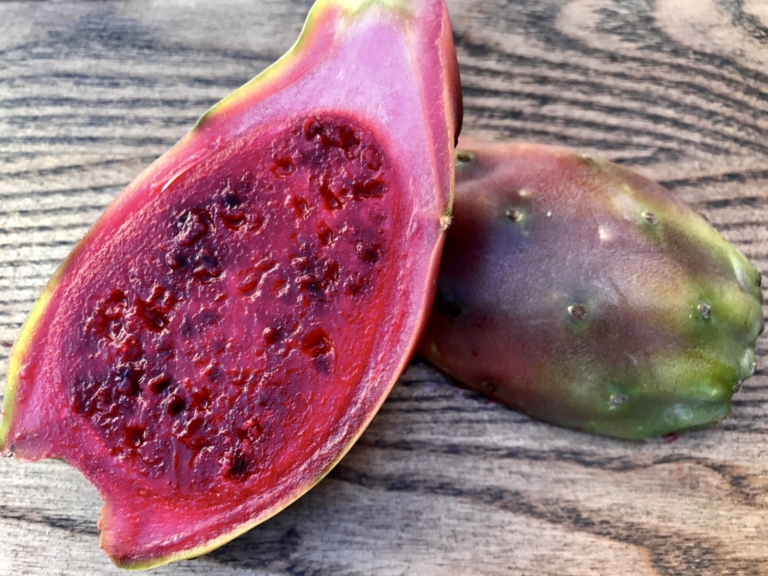
Cactus Pear: Native of Mexico. Also known as “the prickly pear.” Red, green, or yellow-orange skin, which is typically removed before eating. The flesh is deep purple and sweet with a taste similar to watermelon. In cooking, the juices are used to make salad dressings, jams, candy, or cocktails. High in vitamin C.
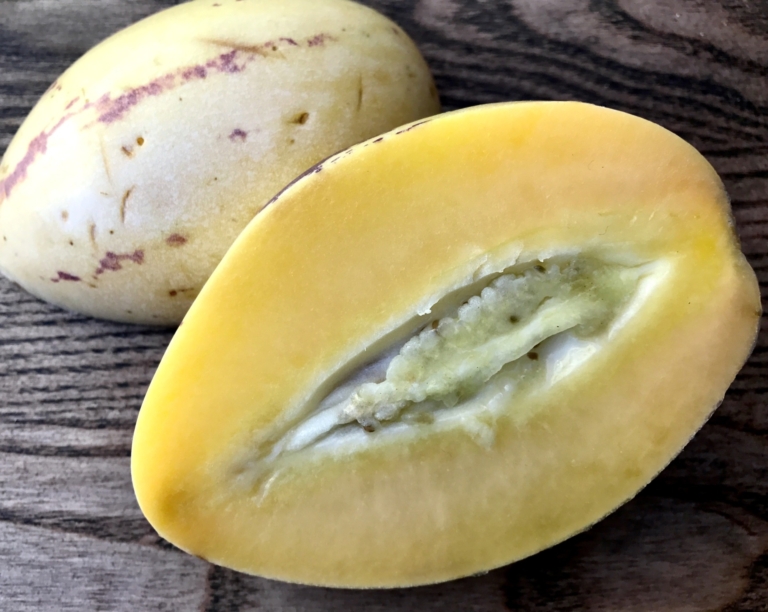
Pepino Melon: Native to South America. Also known as “tree melons” or “Mellon pears.” Teardrop in shape, light yellow or green with beautiful stripes, they are a fruit related to tomato and eggplant. The skin is edible, but often peeled; the flesh is a mix of banana and pear and is slightly bitter. In cooking, it is typically eaten raw or in salads. High in fiber.
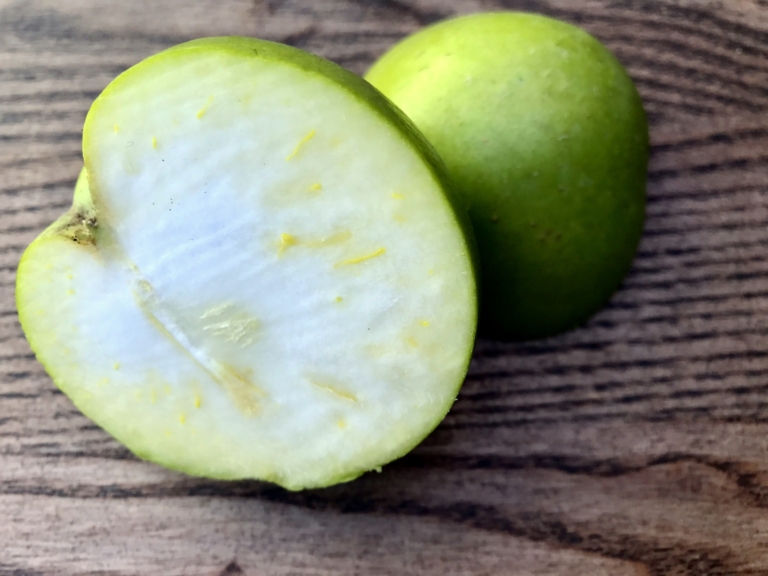
White Sapote: Native to Mexico and Central America. Also known as “the Mexican apple.” Yellow or green when ripe with a thin edible skin. The center has a creamy texture with flavors of banana, and peach with a vanilla undertone–that is, when perfectly ripe. In cooking, it is typically used in desserts and smoothies. High in potassium and calcium.
My husband is a big pie fan. Huge actually. His theory is: eat it in the morning for breakfast so you have the whole day to burn off the calorie bomb. I find this particularly funny as my husband is 6”1 and on the slim side—weight, you could say, has never been his concern. Lucky him. My kids support his theory wholeheartedly. Waffles with ice cream often appear on the breakfast menu when I’m away. All three will push aside my protein-packed breakfasts to indulge in a slightly warmed piece of homemade apple pie with a generous dollop of whipped cream on the side. This “sugar-bomb theory” can be applied to all sweets, but pie, including this Dutch apple pie, seems to be my husband’s kryptonite.
Apple Pie In History
You’ve probably heard the saying “American as apple pie.” Despite the saying, apple pie isn’t all that American. Apples are not even native to the United States; the English brought them to the American colonies. At first, apple trees struggled to survive in the U.S. and did not begin to bear fruit properly until the introduction of the European honeybee around 1622.
Some say the first recorded recipe for apple pie was written in England around 1381, but it looked very different, containing apples along with other fruits such as pears, raisins, figs, and saffron seasoning. Sugar was too expensive and thus not used in older recipes. Dutch apple pie recipes, however, have been around for centuries and can be traced back to 1514. French, Italian, and German recipes can also be found well before the American colonies were established. The first “American” apple pie recipe did not appear till the late 1700s.
Like most Americans, I have tried hundreds of apple pies over the years. I felt compelled to try to like them. But they can be too mushy, too sweet, not sweet enough, have a bland crust, flavorless filling, and too much cinnamon. For me, there is always something to keep me from really enjoying a slice of apple pie. After culinary school, I came to like the classic French apple tart. Simple, delicate, not too sweet–this became my pie substitute. It was close enough.
Everything changed for me when I traveled to Amsterdam in June 2016. There I stumbled upon Café Winkle, a well-known cafe tucked away in the Jordaan neighborhood, and their amazing apple pie.
 Dutch Apple Pie
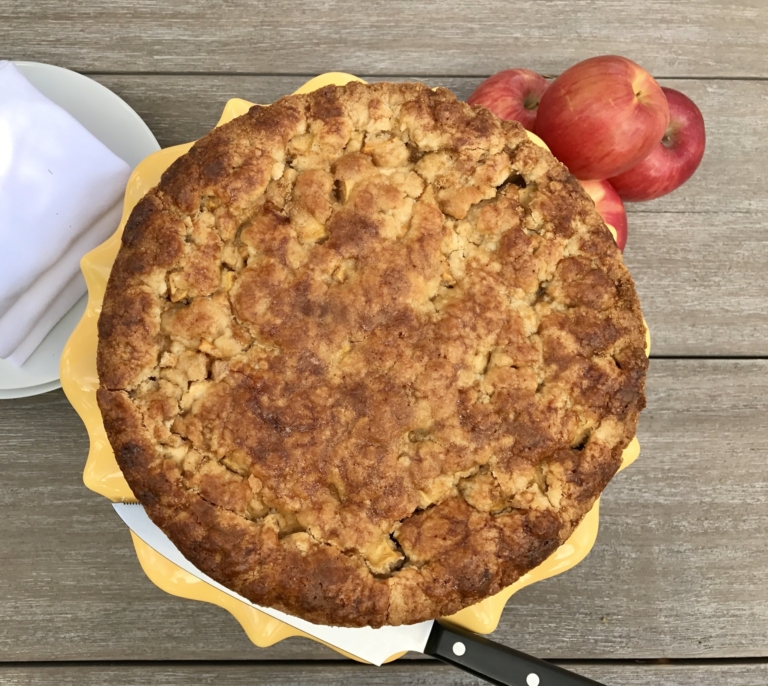
The Dutch call it “appeltaart”, but I refer to it as Dutch apple pie It is Holland’s magnificent national pastry, and it is truly amazing. At first, I thought maybe it tasted so good because it was the first thing I ate after a long, 13-hour flight from San Francisco. Maybe it was so good because it made my kids briefly stop complaining about how exhausted they were, despite sleeping more on the plane than my husband or I. Maybe it was so good simply because we were on vacation. But I was wrong, and I went back several days later before leaving Amsterdam and had it again, for breakfast, to confirm. The deliciousness was confirmed. It was like no other apple pie I had ever had. It is, in fact, the “apple pie” I had been dreaming about my whole life.
In the Netherlands, the apple pie looks (and tastes) almost like a cake. It’s baked in a spring-form pan and the pastry is sweet with a French sablé-like texture. The crust, instead of being rolled, is pressed into the bottom and the sides of the pan. Firm and soft apples are used so that the pie keeps its shape and the apple pieces are still clearly visible when a piece is cut off. The filling is flavored with raisins, spices, lemon juice, and sometimes nuts and liqueur. The top can be a lattice top or a crumble-like. It’s usually eaten cold or at room temperature, and almost always served with fresh whipped cream on top.
Sadly, for me, Winkle does not give out their recipe, but I have come up with something I think is rather close. Nothing can replicate being in Amsterdam, sitting at Winkle on that beautiful corner, near a canal, enjoying their national pastry. Like a true French croissant, they are simply better when in France. But for me, this is better than the normal American alternative.
Dutch Apple Pie (Appeltaart)
Ingredients:
For the dough:
- 3 cups self-rising flour;
- 1/2 cup sugar
- 1/2 cup brown sugar
- 1/4 teaspoon salt
- 2 1/2 sticks unsalted butter, room temperature
- 1 egg, beaten
For the filling:
- 7 firm apples (such as Gala)
- 3 soft apples (such as Golden Delicious)
- 1/2 lemon, juice only
- 1/3 cup brown sugar, plus 1 tablespoon for the topping
- 1 1/2 teaspoon cinnamon (or pumpkin pie spice)
- 2 teaspoon cornstarch
- 1 tablespoon Cognac or Calvados
- 1/2 cup golden raisins
- 1 egg, beaten, for egg wash
Directions:
- Preheat the oven to 375 degrees F.
- For the Dough: Combine the flour, sugars, and salt in the bowl of a mixer, such as a KitchenAid, fitting with a paddle attachment.
- While on low, add the butter and mix to incorporate. Add the egg and mix until a wet dough starts to form. Remove the dough from the mixer and place it on a lightly floured surface, knead the dough together until it forms a ball. Place the dough in a small bowl and refrigerate till needed.
- For the Filling: Peel and core the apples, then cut them into small bite-size pieces. In a large mixing bowl, mix the apples, lemon juice, brown sugar, cinnamon, cornstarch, Cognac, and raisins. Mix well to incorporate. Set aside.
- To Assemble: Grease a large spring-form pan. Remove the dough from the refrigerator. Remove 1/3 of the dough and set aside, this will be used for the top of the tart later. Place the large piece of dough in the prepared pan Using your fingers, firmly press the dough against the bottom and all the way up the sides of the pan. Try to make the dough of even thickness and be sure to completely cover the bottom and the sides, it does not need to look good.
- Next, give the apple mixture a good stir. Pour the apples into the pan and press down to compress the filling, making it flat on top. Using your fingers, take the reserved dough and gently crumble it over the top. (this is a messy process, don't worry about it.) Using your fingers try to mold and flatten some of the dough along the edge of the pan. Pressing lightly, try to connect the top crust pieces with the side crust. Continue to gently flatten the remaining dough over the rest of the tart. You will want some holes in the dough where apples peek through so do not completely cover the top with the dough pieces.
- Sprinkle the additional tablespoon of brown sugar over the top of the tart. Using a pastry brush, lightly brush the top of the tart with the egg wash. Place the tart on a baking sheet and place it on the middle oven rack. Bake for about 1 hour. Check the tart at this point, if it gets too dark, loosely cover it with a piece of aluminum foil. Rotate the art and cook for an additional 30 minutes or till the apples are cooked through.
- Remove the tart from the oven and before removing the sides of the pan, let cool completely (this can take about 2-3 hours so be patient). Do not attempt to remove the tart from the pan too soon, it will break apart. To serve, slice with a serrated knife and serve with whipped cream.
I have never loved yogurt. It was not the texture or tartness; to me, yogurt has always been too sweet. And then I went to Iceland…
Greek yogurt started a whole thick-and-creamy yogurt trend. Fage introduced their yogurt to the market in the late 90’s. By the early 2000s, it was all the rage. Greek yogurt is strained to remove the liquid whey. In doing so, the amount of protein is doubled–making it even more appealing and popular, especially to all the high-protein dieters out there.
Icelandic yogurt, known as skyr (pronounced skeer), once favored by the Vikings, is made the same way as Greek yogurt. But some slight differences make it, in my opinion, substantially better. Icelandic yogurt, sometimes referred to in Iceland as a “traditional dairy provision,” is strained more than Greek yogurt. This results in an even thicker, creamier, decadent, stick-to-your-spoon product with even more protein. All yogurts use cultures; it’s what makes yogurt, yogurt. Icelanders claim that their use of traditional bacterial cultures that date back hundreds of years is what sets this yogurt apart from all the others.
Compared to Greek yogurt, Skyr has a different, slightly sour dairy flavor, with just a hint of sweetness. It takes 4 cups of milk to make a single cup of skyr. Unflavored skyr is roughly 12% protein, 3% carbohydrates, and 0.5% fat. Traditional skyr is naturally low in sugar, though makers now often add fruit for natural sweetness. You typically find 3 to 6 grams of sugar per six-ounce container, substantially lower than typical American yogurt which can range from 12 to 26 grams per container! The result is a richer, healthier yogurt option.
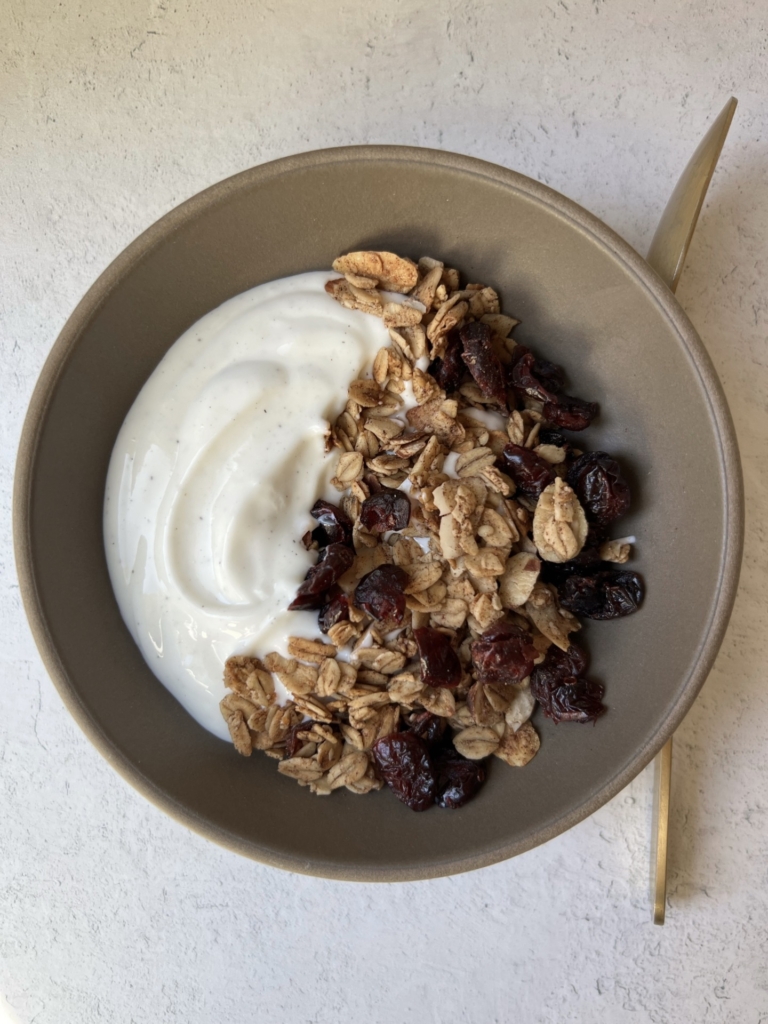
When my family and I traveled to Iceland last summer, we visited Reykjavik Roasters, a well-known coffee house in downtown Reykjavik. My husband ordered the Skyr + Muesli, and my love of yogurt began. Well, love of skyr that is. Topped with homemade jam (or in my case drizzled with local honey), I found the perfect food.
I won’t say I’m obsessed, but it’s a close call. In the States, the skyr is not nearly as good as in Iceland, but it’s not bad. Brands like Skyr and Siggi’s are popular and readily available at places like Whole Foods and Safeway. Siggi’s can even be found in many Starbucks. In Iceland, skyr is typically consumed after lunch as a treat, layered with cream, Nordic fruits such as bilberries and lingonberries, and brown sugar. I add sliced banana or blueberries with a little low-fat granola and some sliced almonds for even more protein. Skyr has now become a staple in my weekly diet.
Homemade Skyr
Ingredients:
- 1/2 gallon milk (skim or 1%)
- 2 tablespoons Icelandic yogurt, (such as Siggi's plain yogurt)
- 1/8 cup warm water
- 2-5 drops of liquid rennet
Directions:
- Slowly heat the milk in a medium stock pot over low heat until it reaches 180 degrees F stirring frequently. Note, this could take up to one hour to heat to the desired temperature.
- Once the milk is heated remove it from the heat and let it cool to room temperature, for about 30 minutes. Remove any skin that has formed on the milk.
- Mix 1 cup cooled milk with the skyr and then pour back into the milk.
- Dissolve the rennet in the warm water and add it to the milk. Cover milk with a towel and let it sit in a warm place for 12 hours.
- When the whey has separated from the curd, place a clean tea towel or cheesecloth in a colander and place that in a bowl. Carefully pour the skyr into the colander. Tie the ends of the tea towel together and place the bowl in the fridge for several hours until the whey has drained off the skyr.
- Spoon the skyr into a bowl and mix vigorously with a spoon until completely smooth. Add any desired sweeteners and toppings for serving.
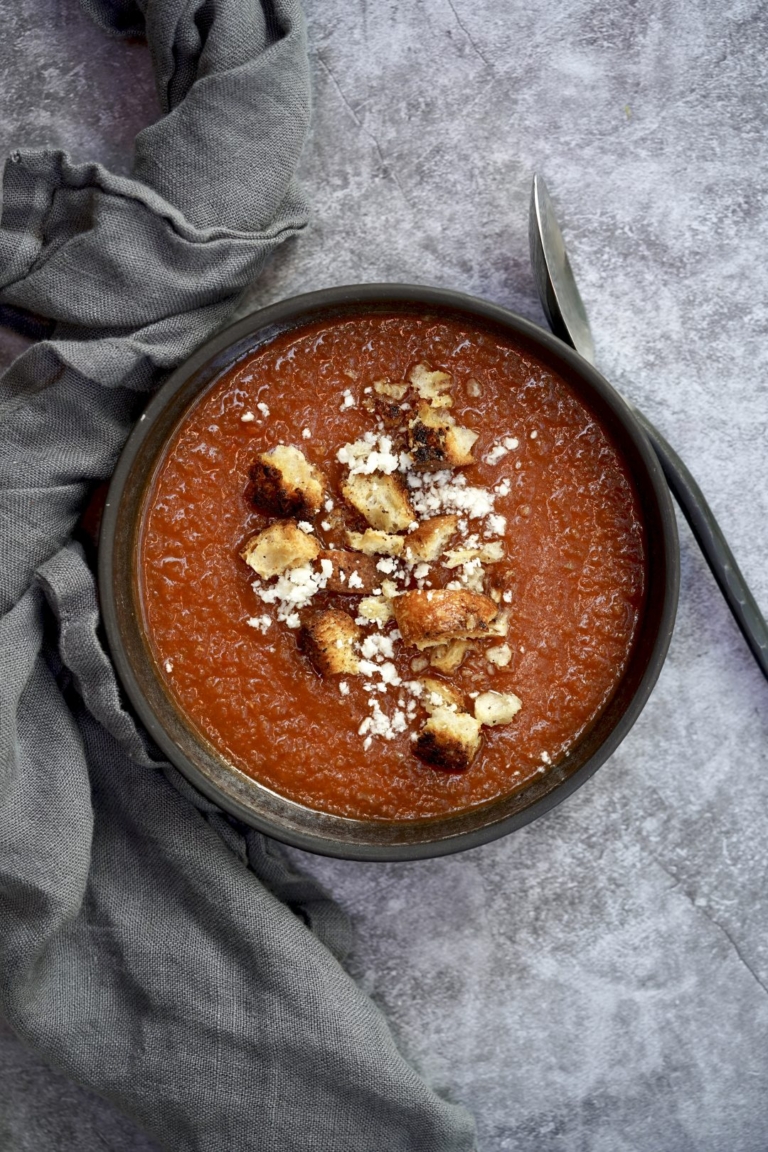
Gazpacho is a raw vegetable soup served chilled. Gazpacho is believed to have originated in the Southern Spanish region Andalusia but is commonly seen all over Spain and Portugal (where it is known as “Gaupacho”). Historically, the most well-known versions of gazpacho (or “soup-salad” as it has been called) come from Seville and Córdoba. Traditional ingredients were simply a mixture of breadcrumbs, olive oil, water, and vinegar–blended in a mortar. Peppers, cucumbers, and tomatoes were added in the 19th century.
Ingredients, texture, and thickness of gazpacho continue to vary regionally. For the most part, gazpachos are classified by color: the most common one being red, which contains tomato; white ones, which contain no tomato, but often include dried fruits; and green ones, which start white but contain some spices that make them green. All of the red gazpachos have core ingredients in common. Gazpacho is a healthy, versatile soup and can be served as a starter or main dish.
My love of gazpacho began in Portugal, but it was confirmed in Spain, somewhere around 2001. The specifics are hazy now, I can’t remember the special places I went to eat. But I remember having gazpacho almost everywhere I went. It was incredibly hot during that trip, and that probably explains why I consumed so much chilled soup. While cold soup does not sound entirely appealing to me in concept, I realized it can be delicious, refreshing, and earthy.
The recipes were different everywhere I went, but they all succeeded in layering flavors and enhancing ingredients. My very favorite version of gazpacho came in Seville, just before I returned home. This recipe made like traditional gazpacho, with old bread puréed into the liquid, was more pink in color and garnished with finely chopped egg. To this day, I can not replicate that version.
Below is a version of gazpacho I came up with about 10 years ago when I first began cooking with my boys. This is a clean, simple, and easy version that is fun to make with children. I began making this to encourage my kids to eat more vegetables and it worked. I don’t believe in hiding vegetables in foods or tricking your kids into thinking they are eating something else. Children need to learn to like vegetables for what they are. I believe if you continually expose children to vegetables, they will learn to like the flavors and textures eventually, even Brussels sprouts. A good presentation won’t hurt either!
My gazpacho is a quick version that does not even require fresh summer tomatoes. You can make it with good quality canned ones, for simplicity, or with fresh tomatoes if available. I added V8 because my older son went through a phase of loving it, and so we experimented one day by adding some. He had a good palate even then, and V-8 has become a permanent ingredient ever since.
Quick Gazpacho
Ingredients:
- Two (28-ounce) cans of diced tomatoes, including juices)
- One (12-ounce) can low sodium V8
- 1 pound sweet mini multicolored peppers
- 1/2 small red onion
- 2 large cucumbers
- 1/4 cup extra virgin olive oil
- 2 tablespoons balsamic vinegar
- 2 teaspoons sea salt
- croutons, for garnish (optional)
- cotija cheese, crumbled, for garnish (optional)
Directions:
- Slice the mini peppers in half and discard the stem and seeds. Place the peppers in a medium mixing bowl and set aside.
- Peel the cucumbers and slice them in half lengthwise. Using a teaspoon, deseed each cucumber. Rough chop the cucumbers and place them in a second larger mixing bowl. Roughly chop the red onion and add to the cucumbers.
- Using a Cuisinart, fitted with a blade attachment, add the cucumbers and onion and purée. Place the mixture back in the mixing bowl it was in before and set aside. Add the peppers to the food processor and pulse until finely chopped. Add to the cucumber mixture.
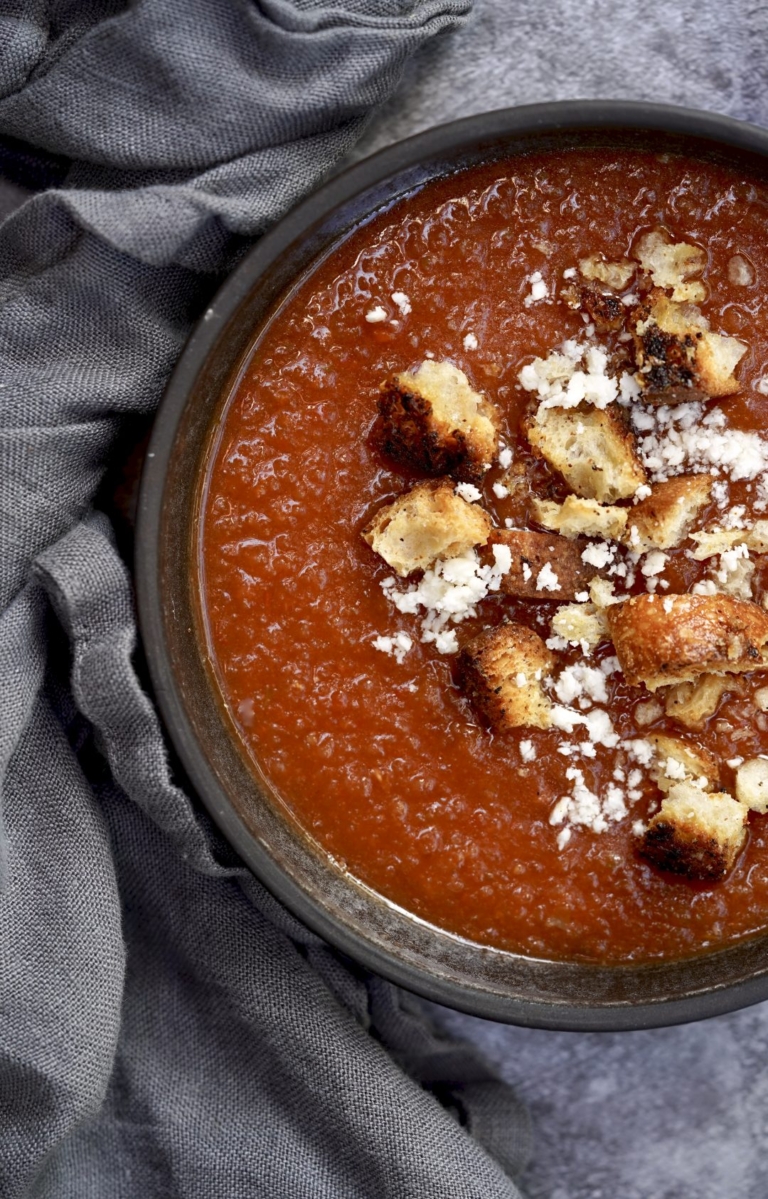
- Place the tomatoes, V8, olive oil, and balsamic vinegar in the food processor and purée well, about 1 minute. Pour the tomato mixture into the large mixing bowl with the other vegetables. Using a large wooden spoon, mix the soup well. Add salt. Adjust seasoning as needed. Add more balsamic vinegar for a sweeter taste, or more salt for a saltier, more tomato-enhanced taste.
- Chill the gazpacho until ready to serve. Garnish with croutons and cheese if desired
I discovered Cotija cheese several years ago when I hosted my husband’s 40th birthday party, which had a Mexican theme and was catered by Tacolicious, a fantastic California-style taqueria in San Francisco. Cotija has become a staple in my house ever since. Cotija is a cow’s milk cheese named for the small Mexican town in which it is made, Cotija, Michoacan. Cotija comes in two types: “El queso Cotija de Montaña” or “grain cheese” which is dry, firm, and on the salty side. That is the version I tend to use. The other type is “Tajo“, which is moister and fattier, and very similar to Greek feta cheese.
Readily available in most grocery stores, Cotija typically ages for 100-362 days. Unlike most cheeses out there, this one is inexpensive and does not spoil quickly. This delicious cheese is made by milling the curds into small pieces before pressing and aging. When cooked, it softens slightly but does not otherwise change its shape or consistency. In the mouth, the cheese has a slightly grainy consistency, which can add to the texture of dishes.
This cheese can be purchased in small rounds or brick-like blocks. It can add a real burst of flavor to simple roasted vegetables. Its versatility is remarkable and I think it is more interesting and flavorful than feta or goat cheese that are often added to salads.
I am a big vegetable fan and I credit that to my mom. Looking back on what we know now, I ate a lot of bad stuff growing up. But my mom always served fresh vegetables and I quickly learned to appreciate them. It was not until later in life that I discovered my preference for roasted vegetables. Now, I roast absolutely everything. One of the things I love about a roasted vegetable is the striking color variation. You get crispy darker outer portions with beautiful vibrant greens, yellows, and oranges mixed in.
If you don’t make the mistake of overcooking the vegetables, you also get great texture variation. In addition, roasting vegetables is surprisingly easy. Through them on a sheet tray; season lightly; put them in the oven; and they are basically out of mind. This I welcome. I typically roast my vegetables at high heat for a short period of time. Convection ovens work great for this.
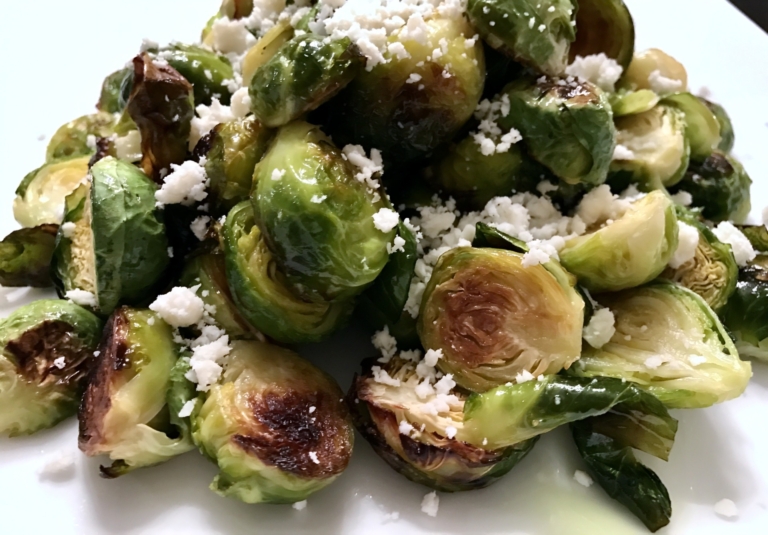
Cotija is my secret weapon. I crumble it up and garnish roasted Brussels sprouts, asparagus, and corn with this wonderful cheese. Yet I don’t stop there, since cheese makes everything better….Cotija is also great on tacos, nachos, baked potatoes, steamed artichokes, salads, shrimp dishes, and almost any soup out there.
Brussels Sprouts And Cotija Cheese
Ingredients:
- 1 1/2 pounds brussels sprouts, trimmed and cleaned
- 4 tablespoons extra virgin olive oil
- 1/2 teaspoon sea salt
- 1/4 teaspoon freshly ground black pepper
- 1/3 cup Cotija cheese, crumbled
Directions:
- Preheat the oven to 400 degrees F.
- Trim the ends of the Brussels sprouts, pull off and discard any yellow outer leaves, and slice in half lengthwise.
- Lay the Brussels sprouts on a sheet tray and toss to coat with olive oil, salt, and pepper.
- Place the baking sheet on the middle rack of the oven and roast for about 25 minutes, or until you start to see coloration. Shake the pan halfway through cooking to help brown the sprouts more evenly.
- Remove the Brussels sprouts from the oven and cool slightly. Place in a serving bowl and top with crumbled Cotija cheese. Serve warm.