Strawberries are one of the first summer fruits to ripen. They are also my favorite. The most cultivated berry in the country, strawberries are grown in every state, with the majority coming from California and Florida. The long growing season runs from January through November. But peak strawberry season is April through June, so don’t wait: go get some!
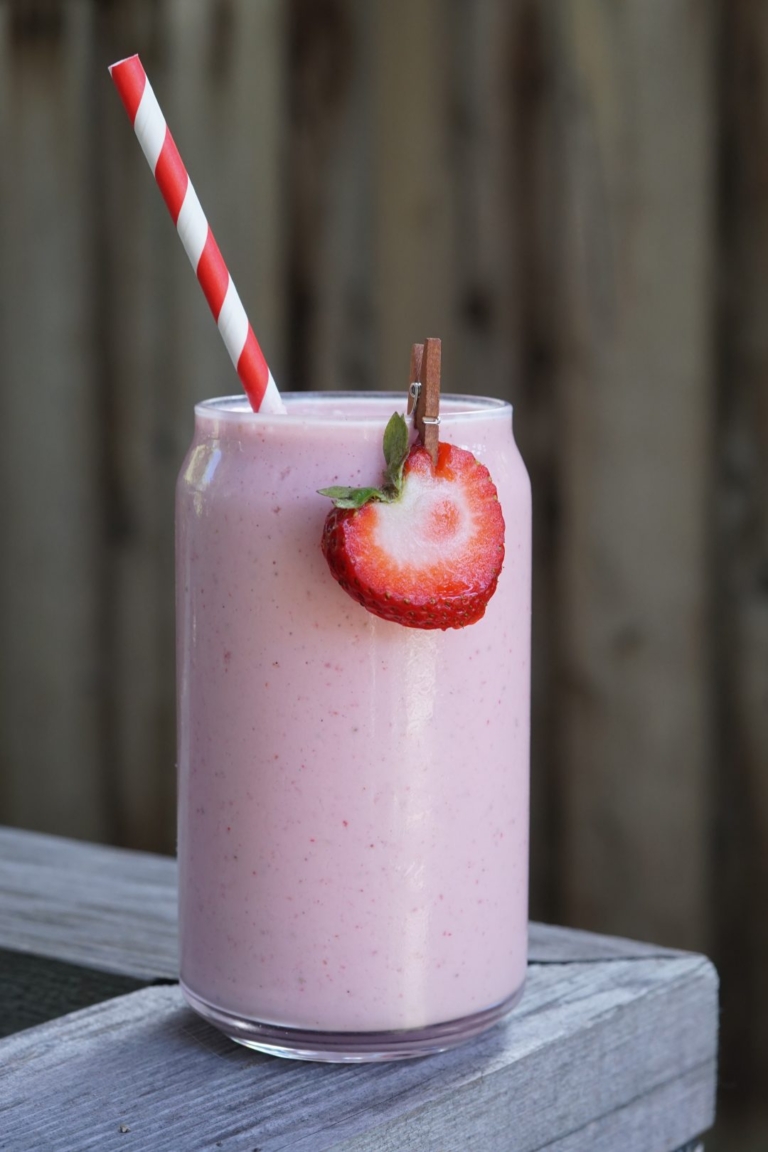
A perfectly ripe strawberry from the farmer’s market is best enjoyed straight up in its pure natural form. But they also make fantastic additions to smoothies and desserts, and some people enjoy them in salads too. This is my recipe for a simple strawberry smoothie with just a touch of added agave syrup, so the delicious ripe berries don’t get overshadowed by cloying sweetness.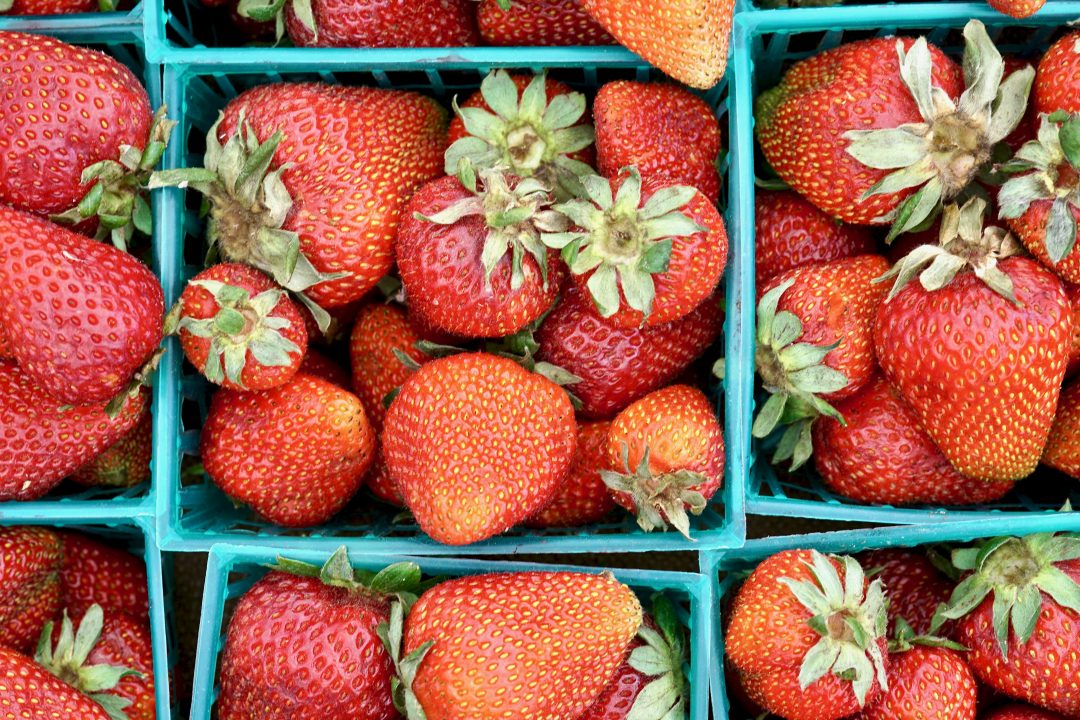
I make my simple strawberry smoothie with Icelandic yogurt, almond butter, and almond milk, which I think combine for a great texture and a lot of calcium and other nutrients, all without too big a dose of dairy. You certainly can play around to find a combination you like. This is a great breakfast smoothie, but my older son loves it as an afternoon snack on a warm day, and the best part, he can make it himself!
Strawberry Yogurt Smoothie

Ingredients:
- 1 cup fresh strawberries (frozen are ok to use as well)
- 1 cup Icelandic Skyr or Greek yogurt
- 1-1 1/2 tablespoons smooth almond butter
- 2 teaspoons ground flax seeds
- 2 teaspoons agave
- 1/4 teaspoon vanilla extract
- 1/2 cup almond milk
- 1/2 cup ice
- Whole strawberry, for garnish (optional)
Directions:
- Place the strawberries, skyr (or yogurt) almond butter, ground flax seeds, agave, vanilla extract, almond milk, and ice into a blender and blend on high for 1 minute.
- Pour into a serving glass, garnish with a whole strawberry and serve immediately.
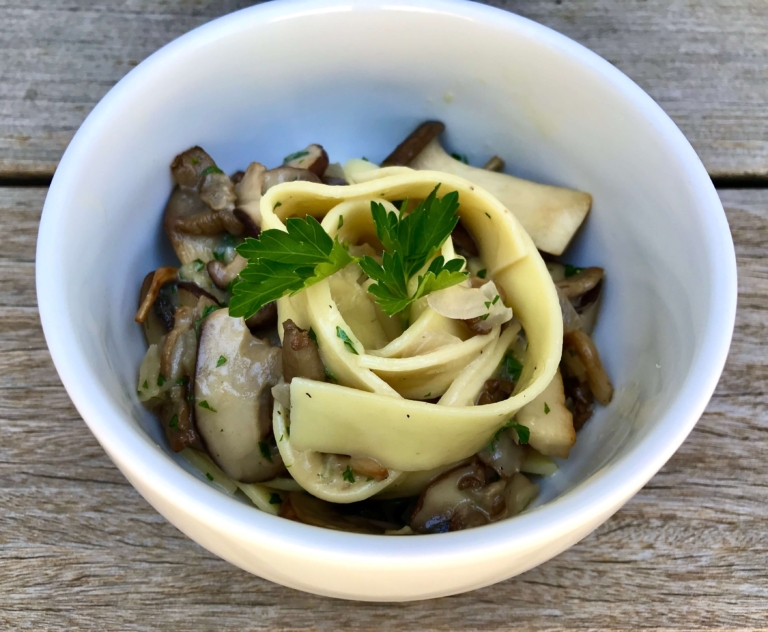
Pasta served with a shallot white wine sauce is much lighter than the cream-based alternatives that permeate Americanized Italian food. Paired with mushrooms, the sauce has a rich, earthy flavor. Pappardelle with wild mushrooms is as simple as it gets, but don’t be fooled by its simplicity, it’s delicious. I served this dish recently at a dinner party for vegetarian friends. Preparation was easy. I use pappardelle pasta, which are large broad noodles similar to fettuccine. 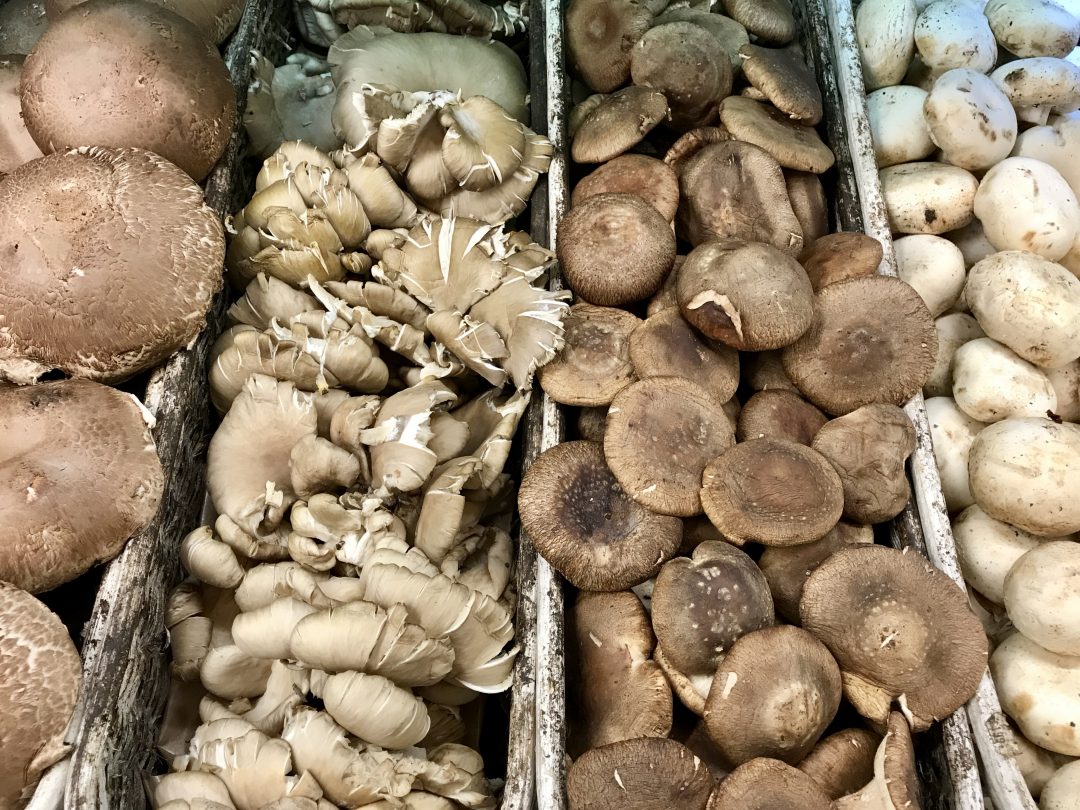
The name “pappardelle” derives from the verb “pappara” meaning to gobble up–and that is exactly what guests did with this dish. You can omit the cheese if you like (or if you want to make it vegan). Finishing with a drizzle of truffle oil can also add more richness and flavor.
Pappardelle With Wild Mushrooms
Ingredients:
- 10 ounces dried pappardelle pasta
- 6 tablespoons unsalted butter
- 1 pound fresh mixed mushrooms, such as cremini, oyster, shiitake, sliced
- 2 small shallots, finely chopped
- 1/3 cup dry white wine
- 6 ounces Taleggio cheese, cut into small cubes
- 1/4 cup Parmesan cheese, grated
- 1/2 cup fresh parsley, finely chopped
- Extra-virgin olive oil
- Salt and freshly ground black pepper to taste
Directions:
- In a large pot, cook pasta in salted boiling water until al dente, about 10 minutes. Drain, reserving 1 cup of cooking liquid for later. Toss the pasta with olive oil and set aside. Line a baking sheet with paper towel and set aside.
- In a large sauté pan, heat 2 tablespoons butter over high heat. When hot, add half the mushrooms and brown, stirring only occasionally. Transfer the cooked mushrooms to the prepared baking sheet to drain. Repeat the above with the remaining mushrooms.
- Add shallots to skillet and cook until tender, about 5 minutes. Add mushrooms back to the pan with the shallots and add the wine, cook until wine is reduced by half, about 3 minutes. Add about 3/4 of a cup of the reserved cooking water. Bring to a boil. Swirl in remaining 4 tablespoons butter. Season to taste with salt and pepper.
- Mix in the pasta to the mushroom mixture and mix well. Add the cheese and parsley and toss gently to coat. Stir in the parmesan cheese and adjust the seasoning with salt and pepper again as needed before serving.
There is a growing trend toward vegetarianism and veganism among young people. I recently read that in the past several years, vegetarianism has increased substantially among those under 25 years old. My anecdotal experience is similar. My friend’s eleven-year-old decided to become a vegetarian at the age of six, despite no one else in her family being one. Seeing a whole pig being roasted on a spit at a young age was enough to convince her not to eat meat, for ethical reasons.
Another good friend has a high schooler who has been a vegetarian since she was 10 after watching a documentary about animal cruelty. She stopped eating meat soon thereafter. My nephew, now in his teens, announced several years ago he is a pescatarian, though his parents eat everything. Just today I learned that my college-bound niece has been a vegetarian for over a year. More than ever, kids seem to be making big decisions about what they eat, and why.
After college, I tried my hand at being a vegetarian for a few years, mainly for health reasons. That ended abruptly when I entered culinary school. I’m a firm believer that, whatever we eat, we should be purposeful about it. Vegetarians, vegans, and pescatarians are doing just that: they are being thoughtful eaters.
There is a lot of information available about the health implications of raising your child as a vegetarian, vegan, or pescatarian. We know that foods derived from animals are rich in protein, fatty acids, iron, zinc, iodine, calcium, and vitamins D and B12. However, research is showing that young children raised as vegetarians grow and develop at the same rate as meat-eaters, receiving almost the same amount of protein, energy, and other key nutrients that children need.
According to the American Dietetic Association: “Well-planned vegetarian diets are appropriate for individuals during all stages of the life cycle, including pregnancy, lactation, infancy, childhood, and adolescence, and for athletes.” The trick here is a well-planned diet that includes legumes, in particular soybeans and lentils, which provide much-needed protein, iron, and zinc. Whole grains, seeds, and nuts will also provide protein, essential fatty acids, zinc, and B-group vitamins.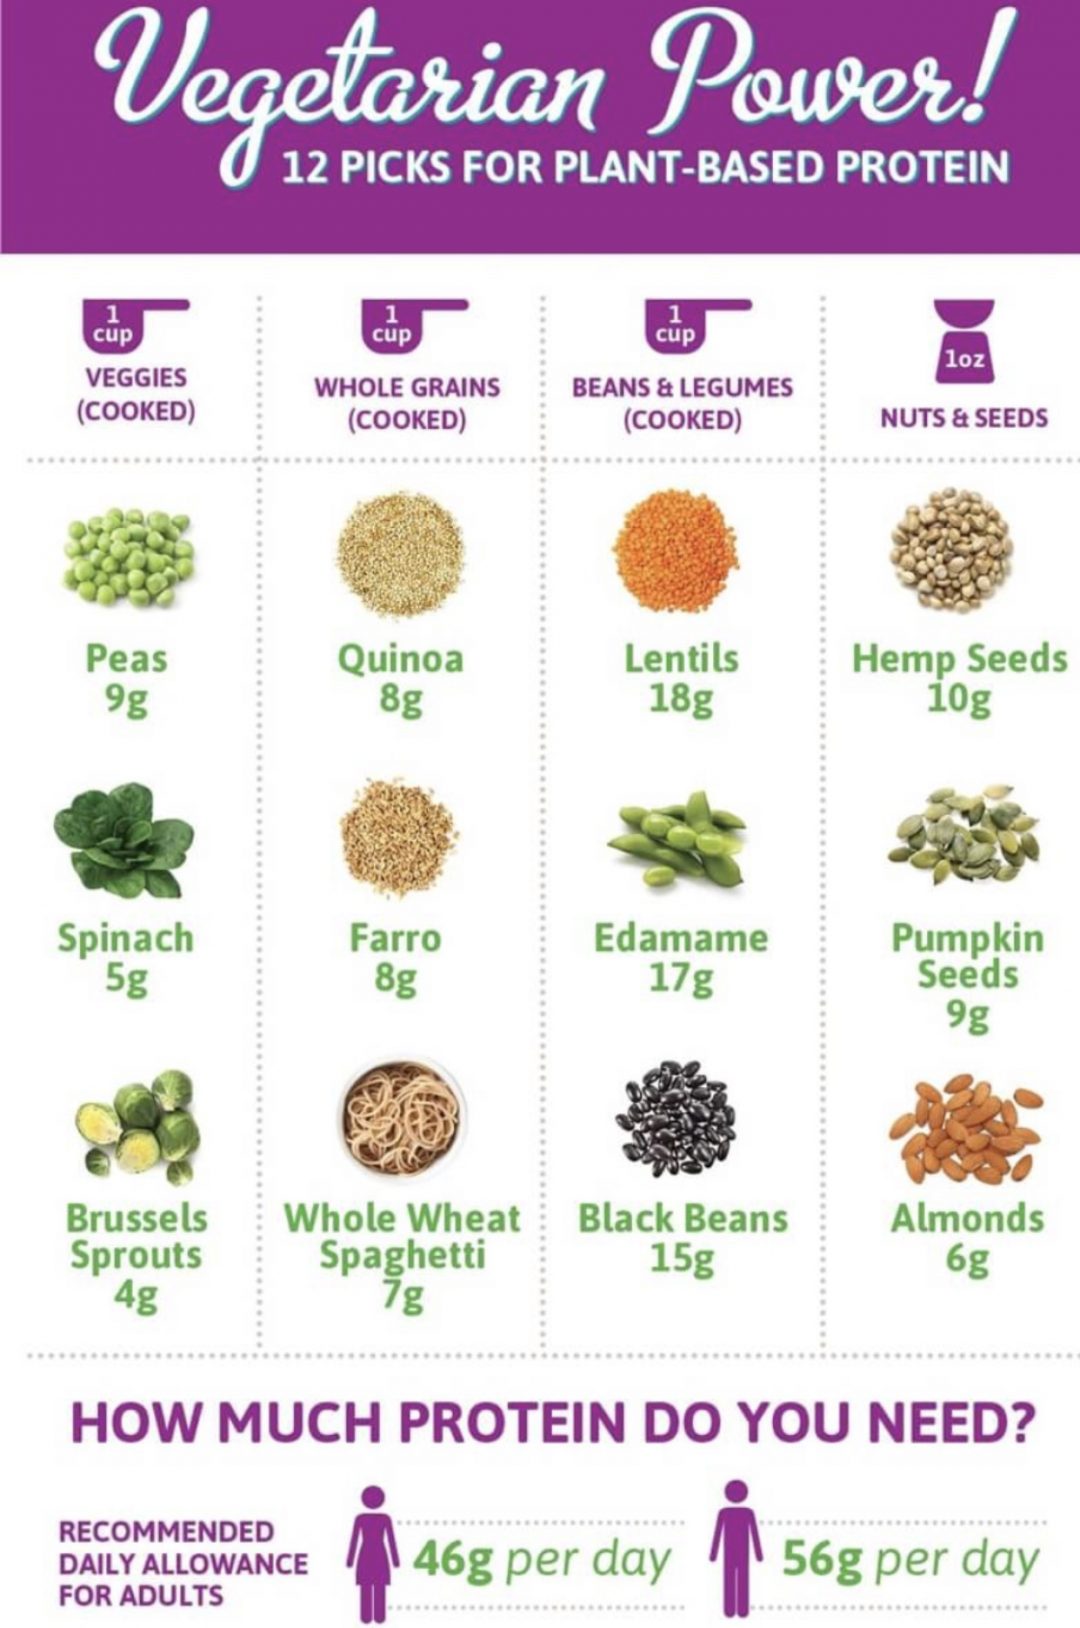
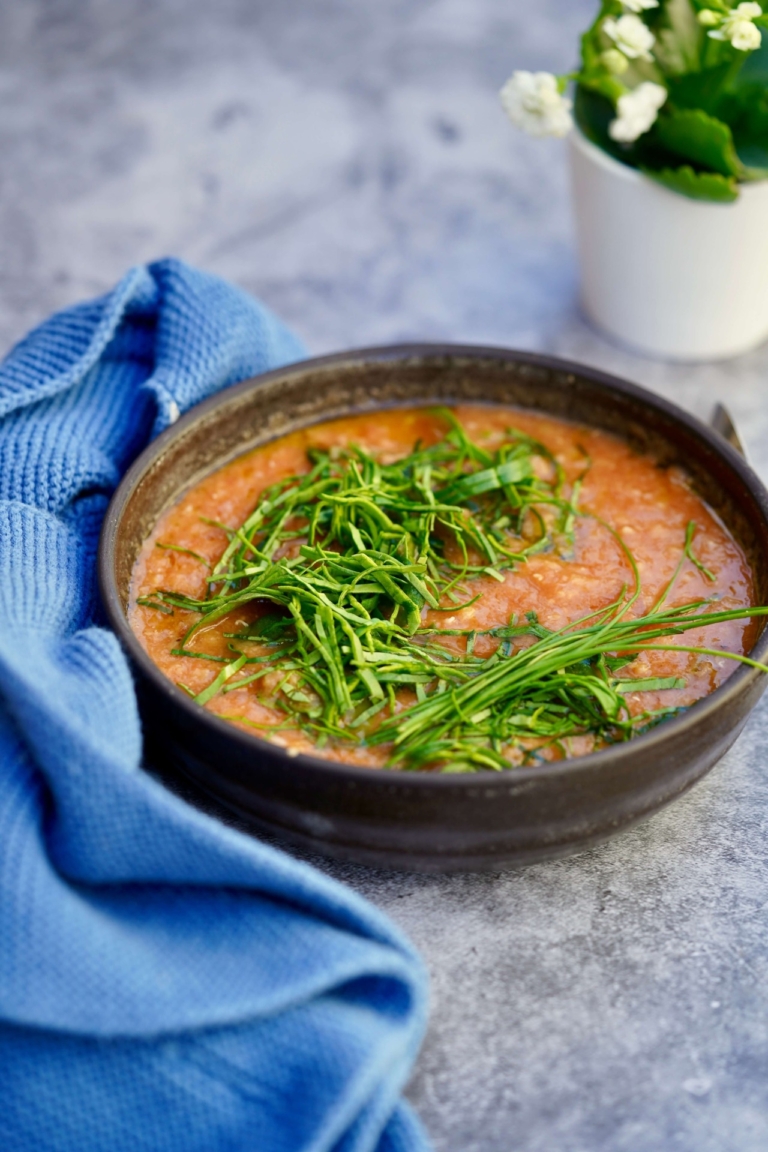
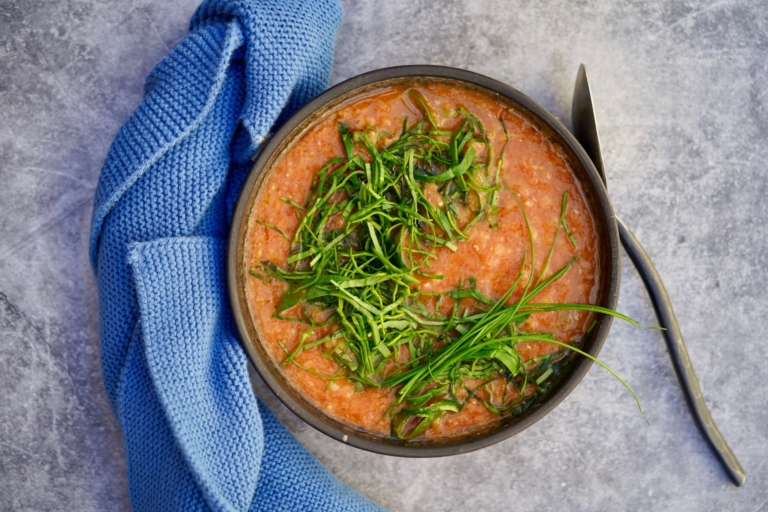
Below is a delicious recipe my friend with the vegetarian daughter sent me for coconut curry lentil soup. It is absolutely delicious. The original recipe is from the vegan blog, Vegangela, I have only lightly adapted it. Yes, this soup is vegan, but the meat-eaters in my house love it too.
Vegan Coconut Curry Red Lentil Soup
Ingredients:
- 2 tablespoons Extra Virgin olive oil
- 1 large onion, finely chopped
- 1 small fennel bulb, small dice
- 2 cloves garlic, finely chopped
- 1 teaspoon fresh ginger, finely chopped
- 2 small cans of tomato paste
- 2 teaspoons yellow curry powder
- 1/2 teaspoon hot red pepper flakes (optional)
- 5 cups vegetable broth (if you are not a vegetarian, you can use chicken broth)
- 1 1/2 cups unsweetened coconut milk
- One (24-ounce) diced tomatoes with their juices
- 1 1/2 cups dry red lentils
- 3 cups baby spinach, plus more for garnish
- Salt and freshly ground black pepper to taste
- Chives, finely chopped, for garnish
Directions:
- Place the olive oil in a medium size stock pot over medium high heat. When hot, but not smoking, add the onion, fennel, garlic, ginger and cook for a few minutes until the onion is translucent, about 3-4 minutes.
- Add the tomato paste, curry powder, and red pepper flakes (if using) and cook for an additional minute. Add the vegetable broth, coconut milk, diced tomatoes and lentils. Cover and bring to a boil. Once boiling, reduce to a simmer and cook for about 20-25 minutes, until the lentils are very tender. Season with salt and pepper to taste.
- Right before serving, stir in the spinach and allow to wilt. Thinly slice some additional spinach for garnish, top with chives.
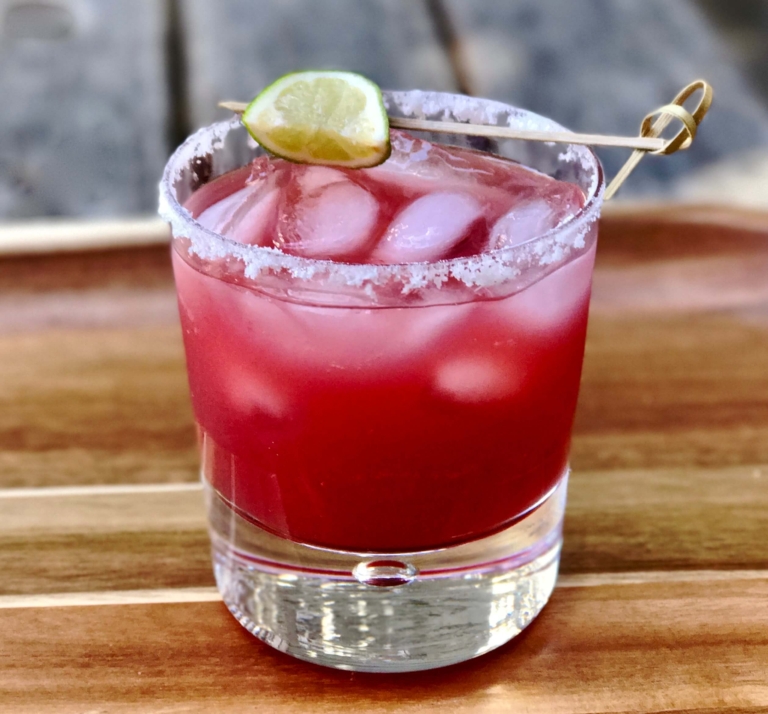
This is a twist on a traditional margarita and it is delicious! The simultaneously sweet and tart freshly squeezed blood orange juice helps intensify the flavor of the fresh lime juice and eliminates the need for added sugar. You can increase or decrease the amount of blood orange juice in this recipe to adapt it to your preferences. Using a bit less orange juice and a bit more lime juice will reduce the sweetness factor even more.
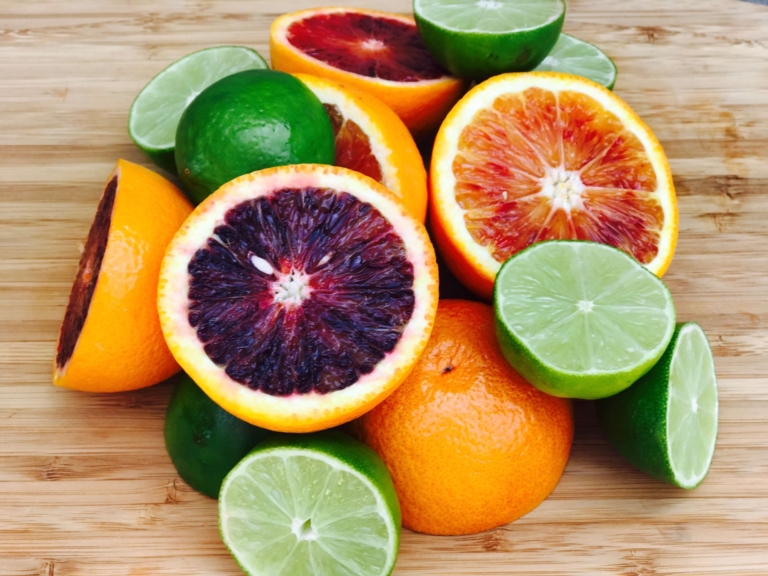
Blood oranges are a natural mutation of the orange, and they are beautiful. With distinctive burgundy flesh, these oranges have a unique flavor profile: similar to raspberries, with citrus notes. Because of this, these oranges are great for use in cocktails, fruit smoothies, and even salad dressings.
Blood Orange Margarita
Ingredients:
- 2 ounces fresh blood orange juice
- 2 ounces fresh lime juice
- 1 ounce Triple Sec
- 2 ounces good quality tequila
- Kosher salt, for garnish
- 1 lime, cut in wedges for garnish
- Ice
Directions:
- In a cocktail shaker, add the blood orange juice, lime juice, Triple Sec and tequila. Shake well to incorporate.
- On a small plate, place a good amount of salt for garnishing the glass. Run a piece of lime all around the outer rim of the glass so that the salt will adhere. Carefully dip the rim of the glass into the salt and evenly coat.
- Add several cubes of ice to the glass.;;Garnish each margarita with a wedge of lime.
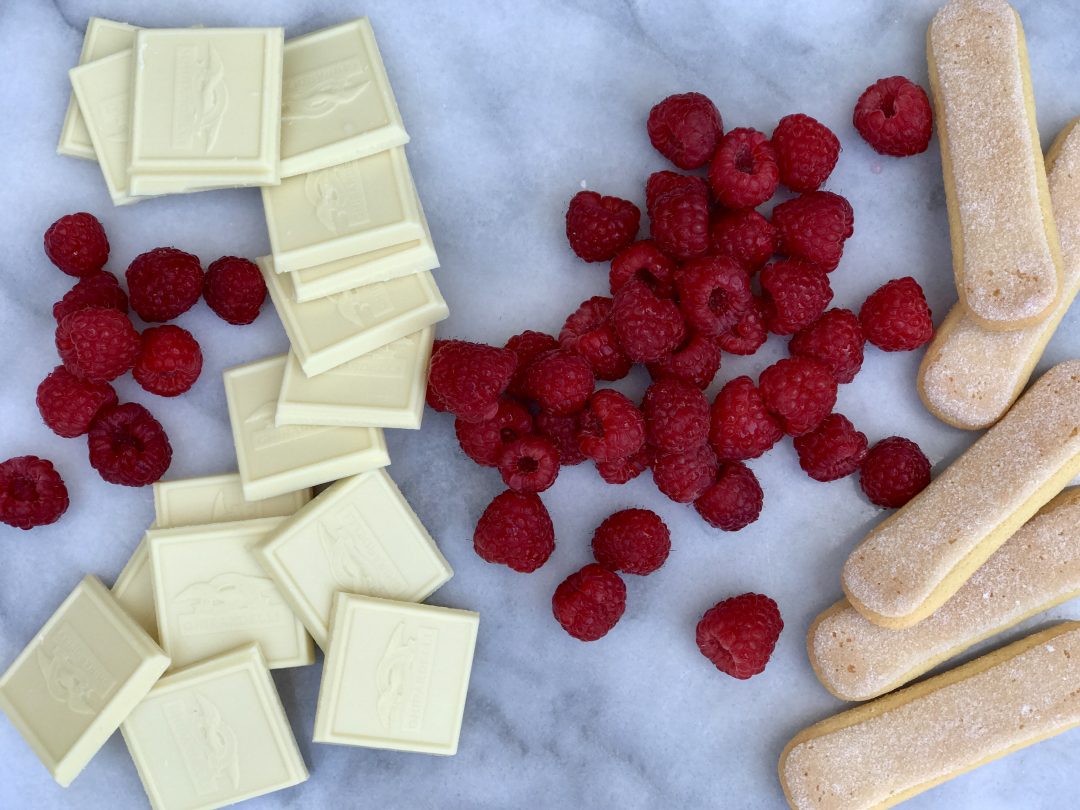
It’s almost Memorial Day–a holiday honoring those who lost their lives while serving in the armed forces. It is a patriotic day for those in the United States. But Memorial Day has also come to represent the unofficial start of the summer season. With this, you have vacations, family gatherings, camping adventures, pool parties, and BBQs often featuring classic American desserts. This white chocolate raspberry trifle is easy to make, great for groups, and perfect for a hot day. And it pleases adults and kids alike, including those who are dubious about “white” chocolate.
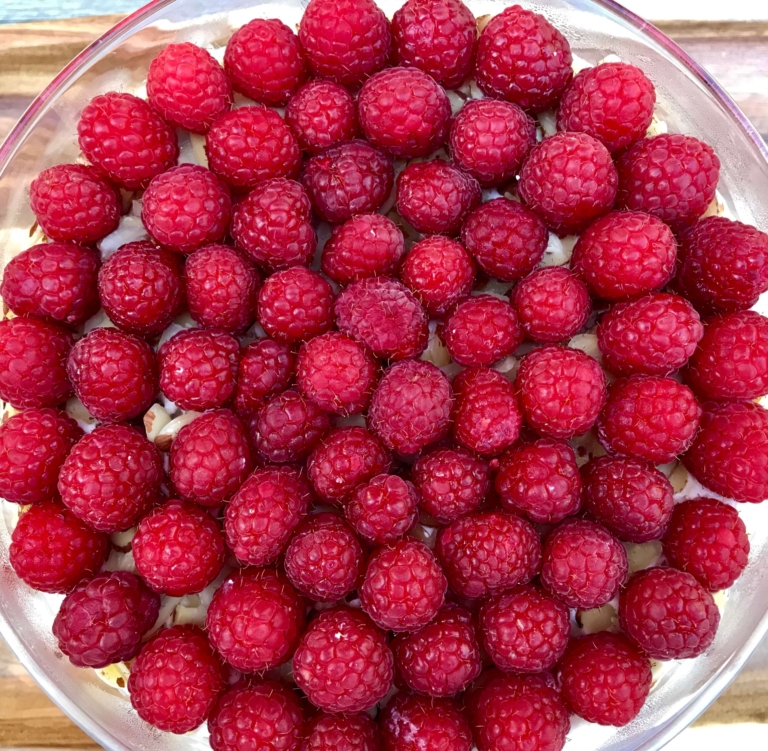
I like to use fresh raspberries in this seasonal trifle recipe, but you can easily use a combination of different fresh or frozen fruit if you prefer. Use slightly thawed frozen organic raspberries for the layers and fresh ones for making the decorative top. And if you wish to make it more patriotic, just add blueberries to the layers. Truthfully, there is no way to go wrong with this foolproof holiday dessert that’s almost effortless to make.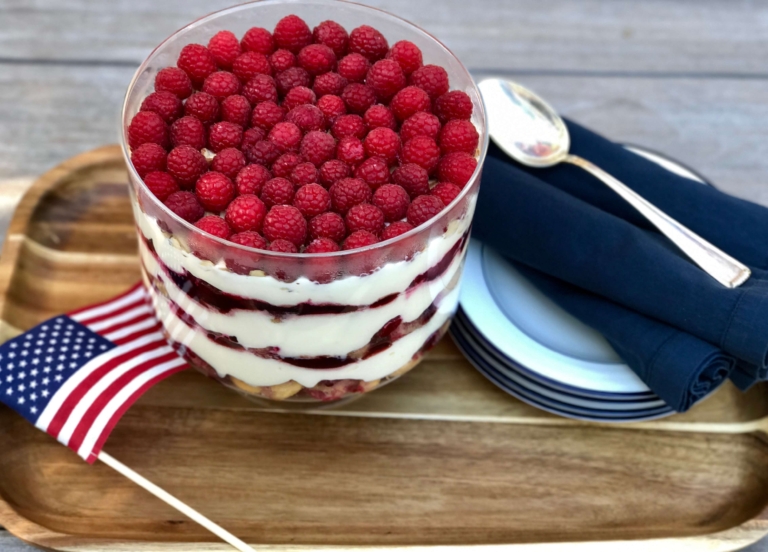
White Chocolate Raspberry Trifle
Ingredients:
- 3 1/2 cups chilled heavy whipping cream, divided
- 12 ounces white chocolate, roughly chopped
- 2 teaspoons vanilla extract
- 3/4 cup sugar
- 3/4 cup water
- One (7-ounce) package Balocco Savoiardi or similar crispy ladyfingers
- 1 cup raspberry jam, melted
- 4 pints fresh raspberries, divided in half
- 1/2 cup sliced almonds (optional)
Directions:
- Ideally, you will need a 14-cup trifle dish or something similar.
- In a medium saucepan, bring 1 cup of cream to simmer over low heat. Remove the cream from heat, strain the white chocolate and whisk until smooth. Set aside and let cool.
- In a kitchen mixer, such as a KitchenAid fitted with a whisk attachment, beat the remaining 2 1/2 cups cream and the vanilla extract until soft peaks have formed. Be very careful not to over beat or the cream will break.
- Remove the bowl from the mixer and using a large rubber tip spatula, gently fold in the cooled white chocolate mixture. Be very careful not to over mix. Set aside.
- Next, in a small saucepan, heat the sugar and water over medium heat until the sugar dissolves. Remove the syrup from the heat.
- Working quickly, gently submerge 1 ladyfinger at a time in the syrup, wiping off any excess as you go. Place the coated ladyfinger in the bottom of the trifle dish. Repeat with enough ladyfingers to cover bottom of the dish.
- Spread 1/3 of melted jam over the ladyfingers. Top with 1 pint of raspberries. Spread 1/3 of white chocolate filling over the berries. Repeat layering with soaked ladyfingers, melted jam, berries, and white chocolate cream 2 more times.
- Sprinkle the almonds evenly over the top layer of cream. Arrange the additional two pints of raspberries over the sliced almonds. Cover and chill for at least 4 hours.
My husband loves pickles; well, anything pickled actually. I honestly think it runs in the family, his father, one of his brothers, our nephew and one of our kids are the same. It is a deep love. As a Father’s Day gift a few years ago, I gave my husband a “Pickle Every Month” subscription from Mouth Foods Inc. based in Brooklyn, New York. Right before we moved to California we lived in Brooklyn. We have family there today, so Brooklyn holds a special place in my heart. And so does Mouth.
In addition to its clever name, Mouth is an incredible online-only store specializing in specialty products, many of which are sold as part of gift collections and subscriptions. Mouth’s goal is to help its patrons “find the best, most delicious and most interesting indie food products and help make Indie makers grow their business”. By “indie,” they mean an alternative to mass-produced products. Something any chef loves. So Mouth is an artisanal food emporium.
Mouth’s products are interesting and taste great. They are typically small-batch products, crafted in the US, and produced in a way that is respectful to the planet. If you are a foodie, like specialty food products of any kind, or just need a great gift for family or friends, check Mouth out, they do not disappoint.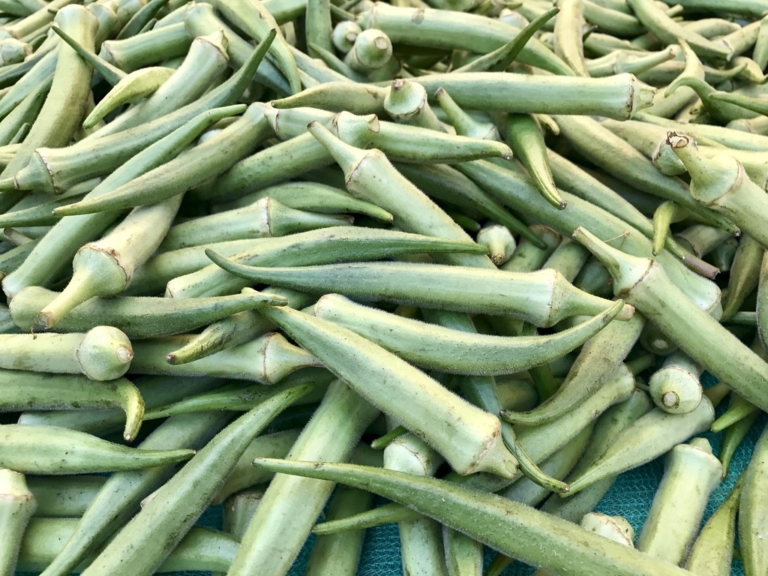
The photo above shows an eclectic variety of pickled products I have in my pantry today. My husband, a true “collector” in the pickling world, has since signed himself up for other Mouth subscriptions. While the vast amount of pickled products in our house nearly require their shelf in my panty, I am glad that my husband introduced me to Pickled Thai Basil Jalapeños, Cajun Pickled String Beans, and Spicy Pickled Okra. I am also very thankful to Mouth for putting an end to my husband’s brief obsession with making his homemade pickled vegetables. Picking is a job best left to the professionals.
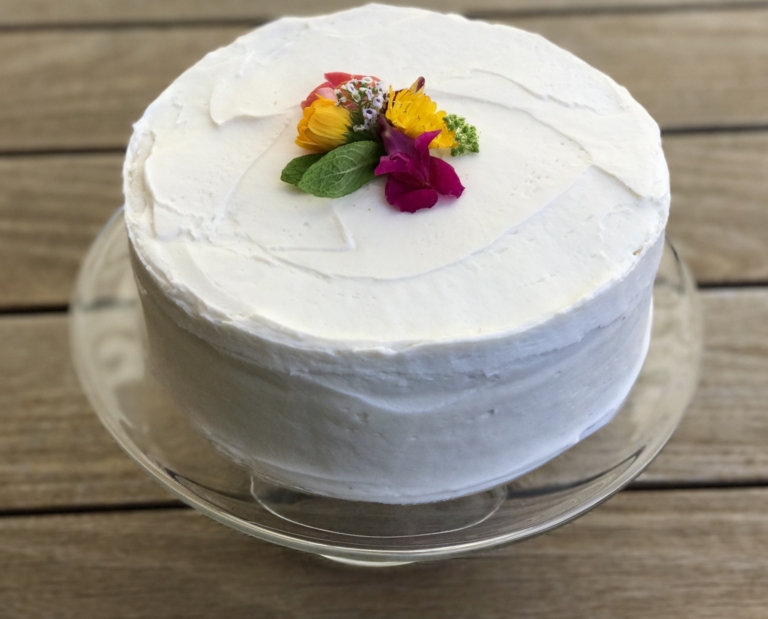
When I was little, I strongly disliked cooked carrots. I still don’t love them, but their sweetness makes them an incredibly important vegetable in the cooking world. And when it comes to baking, they are one of the only vegetables to have their very own cake. I came to enjoy carrot cake later in life. The two biggest issues with carrot cake recipes are: (1) the carrots within the cake are too firm, and (2) the cake can be dense and dry, trying to get by only on the moisture in the frosting.

I can humbly report that my recipe solves these issues. Tossing the grated carrots in brown sugar and letting them sit for one hour in advance makes them tender. The use of crushed pineapple makes the cake both moist and light. It’s hard to say the words “light” and “cake” together, but trust me, this one is. The light, fluffy layers are a refreshing change to the uber-dense carrot cakes one often finds in bakeries.
Carrot cake has been around for many years: so long that there is actually still dispute about how long. But recipes have been traced as far back as 1827. In Switzerland, carrot cake is one of the most popular cakes, sold commonly for children’s birthdays. Carrot cake did not become popular in the United States until the 1960s, but it quickly became a standard American dessert thereafter. It is often listed with apple pie in terms of overall favorites. So despite my strong dislike of cooked carrots, I love this cake. And considering how good carrots are for you, I’m glad I’m getting them in somehow.
Frosted Carrot Cake
Ingredients:
For the Cake:
- 6 cups grated carrots
- 3/4 cup brown sugar
- 1 cup golden raisins
- 4 eggs
- 1 1/2 cups sugar
- 1 cup vegetable oil
- 2 teaspoons vanilla extract
- 1 cup crushed pineapple, drained well
- 3 cups all-purpose flour
- 1 1/2 teaspoons baking soda
- 1/2 teaspoon salt
- 3 teaspoons ground cinnamon
- 1 cup chopped walnuts
For the Frosting:
- 1/2 cup unsalted butter, room temperature
- 8 ounces cream cheese, room temperature
- 1 teaspoon vanilla extract
- 3 cups confectioner's sugar
Directions:
- For the Cake: In a medium mixing bowl, add the grated carrots and brown sugar. Mix well to combine. Set aside and let rest for 60 minutes, mixing occasionally.
- Preheat the oven to 350 degrees F. Lightly grease and flour two round 10-inch cake pans. Set aside. In a medium mixing bowl add the flour, baking soda, and cinnamon. Mix well to combine. Set aside.
- In a kitchen mixer, such as a KitchenAid fitted with a paddle attachment, add the sugar and eggs and mix well on medium speed until light and fluffy. Add the oil and vanilla extract and mix well to combine. With the mixer on low, slowly add the flour mixture. Mix well to incorporate. Add the pineapple and carrot mixture, including its juices, and mix well. Remove the bowl from the mixer and, using a rubber spatula, fold in the walnuts.
- Pour the cake batter into the two prepared cake pans. Bake on the middle rack for about 35-40 minutes until firm on top and a cake tester comes out clean. Allow cakes to cool completely before trimming and frosting.
- For the Frosting: In a kitchen mixer, such as a KitchenAid fitted with a paddle attachment, cream the butter and cream cheese on high until smooth and well incorporated. Add the vanilla.
- With the mixer on low, slowly add the sugar and mix well. Put the mixer on high to make the frosting very smooth and free of any lumps. Frost the cake once completely cool. Refrigerate the finished cake.
Kale and quinoa salad is one of my favorite salads. For those who are local to the San Francisco Bay Area, this is my version of the kale salad at Palo Alto’s Calafia Cafe. Chef Charlie Ayers, originally from Brooklyn, New York, was the former Executive Chef for Google. His food style got national recognition for his ability to combine simple, fresh, and often organic ingredients with an emphasis on vegetables.
Kale, considered a superfood has been extremely popular in the culinary world for several years now. Packed with vitamins and minerals, low in calories, and high in fiber, what’s not to love? This is a very straightforward salad, but I could live on it. I go to Calafia often, but will also make my version when I have time.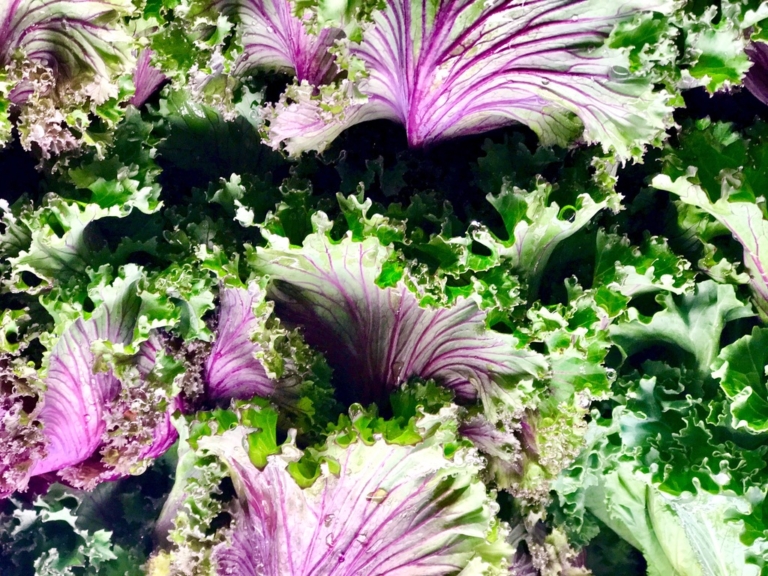 The key to making this salad well is using fresh, tender flavorful kale, and a homemade lemon vinaigrette. What you get is a refreshing, healthy, and hearty salad that is delightful on its own butalso complements any main course. I will sometimes add grilled shrimp or chicken for some additional protein, but it is wonderful any way you serve it.
Kale And Quinoa Salad
Ingredients:
For the Salad:
- 1 large bunch kale, stems and inner veins removed, shredded
- 1 cup cooked [quinoa, cooled completely
- 1/3 cup fresh feta cheese, crumbled
- 1/2 cup walnuts, roughtly chopped
- 1/3 cup dried cranberries
For the Dressing:
- 3 tablespoons fresh lemon juice (about 2 lemons)
- 1/4 cup white wine vinegar
- 1 teaspoon sugar
- 1 teaspoon salt
- Freshly ground black pepper to taste
- 3/4 cup Extra-Virgin olive oil
Directions:
- In a large mixing bowl, add the kale, quinoa, feta cheese, walnuts and cranberries, gently toss to incorporate. Set aside
- In a second small mixing bowl add the lemon juice, vinegar, sugar, salt and black pepper. Whisk until the sugar is dissolved. Slowly whisk in the olive oil. Adjust the seasoning as needed.
- Dress the salad as desired right before serving to avoid wilting.
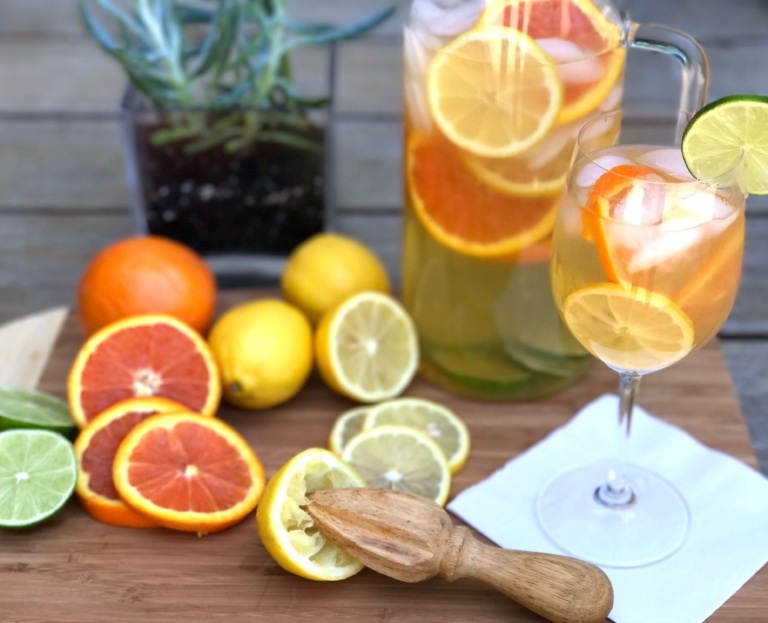
Everyone needs a great sangria recipe in their life. Considered a “punch” by definition, this delicious and refreshing white wine sangria recipe is perfect for a casual warm weather get-together. My recipe is fruity, light, and refreshing with just a touch of sweetness.
Many ask for recommendations on what type of wine works best for sangria, Wine Enthusiast has a great article appropriately titled, “The Best 10 Sangria Wines” and lists some lovely, very reasonably priced, wine choices for either white or red sangria so be sure to check that out for further guidance. Cheers!
White Wine Sangria
Ingredients:
- One bottle of light white wine, such as Sauvignon Blanc
- 2 cups seltzer water
- 1/4 cup superfine sugar
- 1/4 cup brandy
- 1 lemon, sliced
- 1 lime, sliced
- 1 orange, sliced
- 2 tablespoons freshly squeezed lemon juice
- 2 tablespoons freshly squeezed lime juice
- Ice, before serving
Directions:
- Pour the white wine, seltzer water, and brandy into a tall pitcher.
- Add the sugar and lemon juice, and mix well. Add the sliced lemon, lime, and orange and mix. Refrigerate for at least 1 hour, longer if possible to help intensify the flavors.
- To serve, pour over ice in a desired serving glass and garnish with a slice of fruit.

This shrimp ceviche recipe was inspired by my visit to the desert and by the laughter and tears I shared with family and dear friends. Ceviche has always been a favorite of mine, and has been popular in the United States since the early 1980’s. Before that, this seafood dish was most commonly found only in coastal regions of Latin America and the Caribbean. Made from raw fish or other seafood, cooked (or cured) in citrus juices, it is mixed with spices and vegetables.
Ceviche, I noticed, is very popular in Arizona, and rightfully so, a refreshing chilled dish is the perfect food to combat that dry desert heat. My recipe has some spice, but that can easily be adjusted up or down as desired. There are countess variations of this delicious dish and almost no way to mess it up.

Shrimp Ceviche
Ingredients:
- 1 pound raw shrimp, peeled, deveined and roughly chopped
- 1 jalapeño, seeds removed and small dice
- 1/3 cup red onion, small dice
- 2 scallions, finely chopped
- 2 small Persian cucumbers, peel on and small dice
- 1/2 cup cilantro, finely chopped
- One (14.5-ounce) can diced tomatoes with juice
- Zest of 1 lemon
- 3 tablespoons fresh lemon juice
- 3 tablespoons fresh lime juice
- 2 teaspoons Louisiana hot sauce
- 1 1/2 teaspoons salt
- 1 avocado, sliced for garnish
Directions:
- In a medium mixing bowl add the cooked shrimp, jalapeño, red onion, scallion, cucumber, cilantro, diced tomatoes with juice, lemon zest, lemon juice, lime juice, hot sauce, and salt. Using a rubber tip spatula, mix well to incorporate.
- Cover with plastic wrap and chill/marinate for at least 30 minutes, mixing it ocassionally, this "cooks" the shrimp. Taste and adjust the seasoning as needed. Try to mix well halfway through.
- To serve, mix again, divide among the serving dishes, garnish with sliced avocado and serve with tortilla chips.
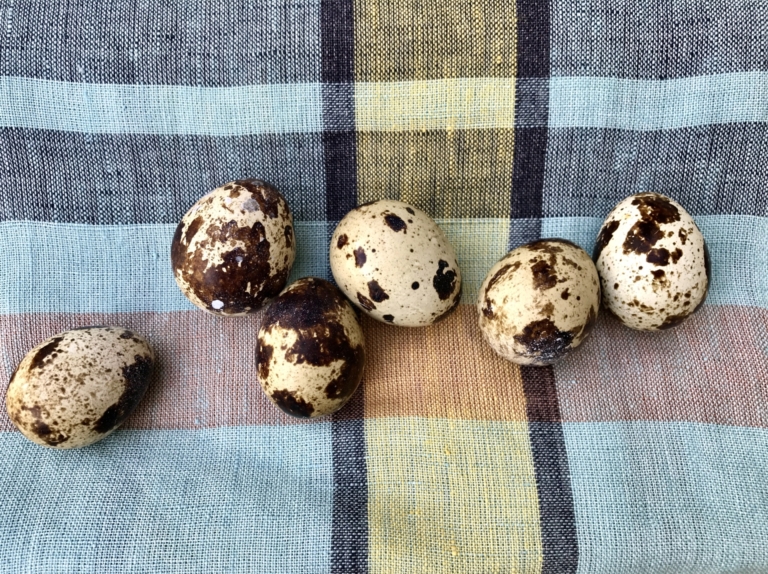
Quail eggs have long been considered a delicacy in many parts of the world including Asia, Europe, and North America. Surprisingly, in other countries such as Colombia, Ecuador, and Venezuela, a hard-boiled quail egg is not unusual or considered exotic. In those countries, quail eggs can even be seen as garnish on a hot dog. In the U.S., quail eggs are not particularly expensive, somewhat readily available (especially at local farmers’ markets), and are not that difficult to work with. You cook a quail egg just like a regular chicken egg but for less time. I have been cooking with quail eggs for many years.
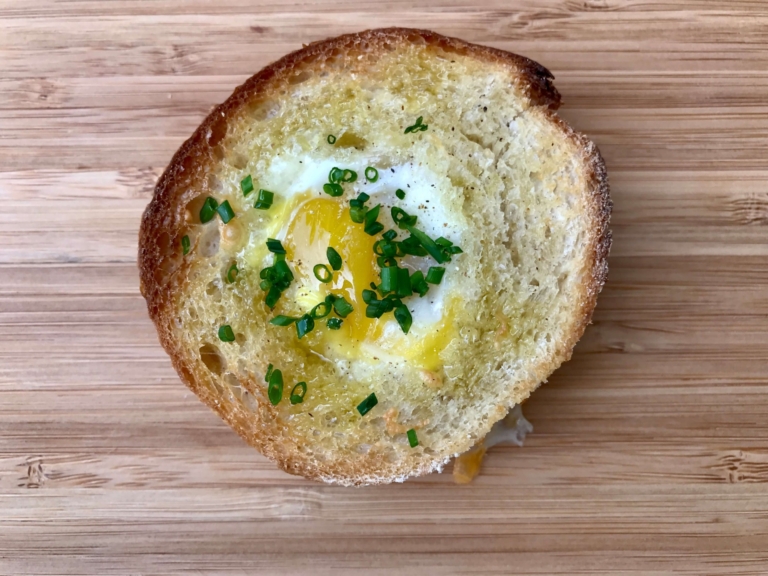
In part because of my requests, a local market now carries them regularly. Don’t be intimidated by their miniature size, they make a wonderful addition to numerous appetizers without much work. And if you’re entertaining, guests are always intrigued by them. My truffled quail toasts are an easy and elegant hors d’oeuvre to be served at a casual dinner party, and work great before a special holiday meal. In this recipe, the essence of black truffle oil complements the warm quail egg.
Truffled Quail Egg Toasts
Ingredients:
- 12 (1/2-inch) thick slices of french baguette
- 3 tablespoons unsalted butter, melted
- 5 tablespoons Havarti cheese, grated
- 12 quail eggs
- Black truffle oil for drizzling
- 1 bunch fresh chives, finely chopped
- Salt and freshly ground black pepper to taste
Directions:
- Preheat the oven to 400 degrees F. Line a baking sheet with parchment paper and set aside.
- Using a small paring knife, carefully cut small circles into the center of the baguette slices. Using a pastry brush, lightly brush the melted butter on both sides of the bread. Arrange the bread slices on the prepared baking sheet and lightly toast in the oven for about 3 minutes.
- Remove the tray from the oven and place a small amount of Havarti cheese in the holes of the bread. Press down gently with your finger to make a cradle for the quail egg.
- Open the quail egg and pour into the hole. Repeat with the remaining eggs. Lightly season with salt and pepper. Place in baking sheet in the oven and bake until the egg whites are set, about 6-7 minutes.
- Remove from the oven and let cool slightly. Drizzle with black truffle oil and garnish with fresh chives. Serve immediately.
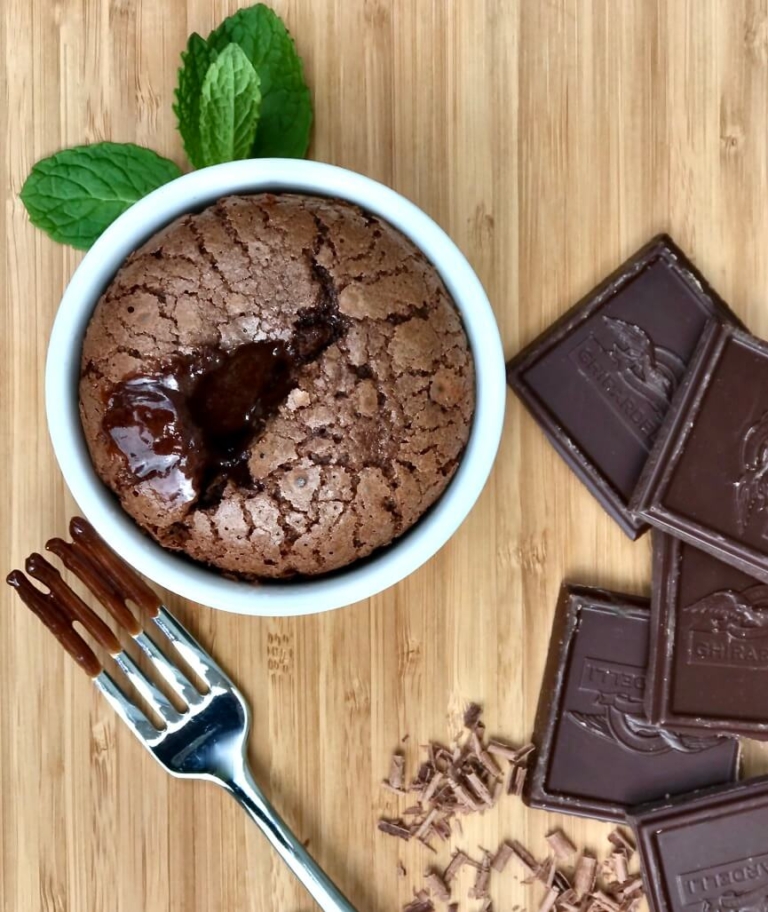
If you are a chocolate lover, keep reading. There is nothing more delicious and decadent than a molten chocolate cake. It is simple but delightful. A molten cake is a combination of two things, a flourless chocolate cake (often referred to as a decadence cake) and a soufflé. Its name refers to the lava-like chocolate center that oozes out if the cake is baked properly.
In the pastry world, there is some disagreement about who invented this cake. The well-known three-starred Michelin chef in New York City, Jean-Georges Vongerichten, claims he invented it by accident in 1987 when he pulled a cake from the oven too early. Another famous French chef claims otherwise. Jacques Torres, chef, chocolatier, and former dean of my culinary school, has argued that this cake originated in France long before Vongerichten’s recipe mishap.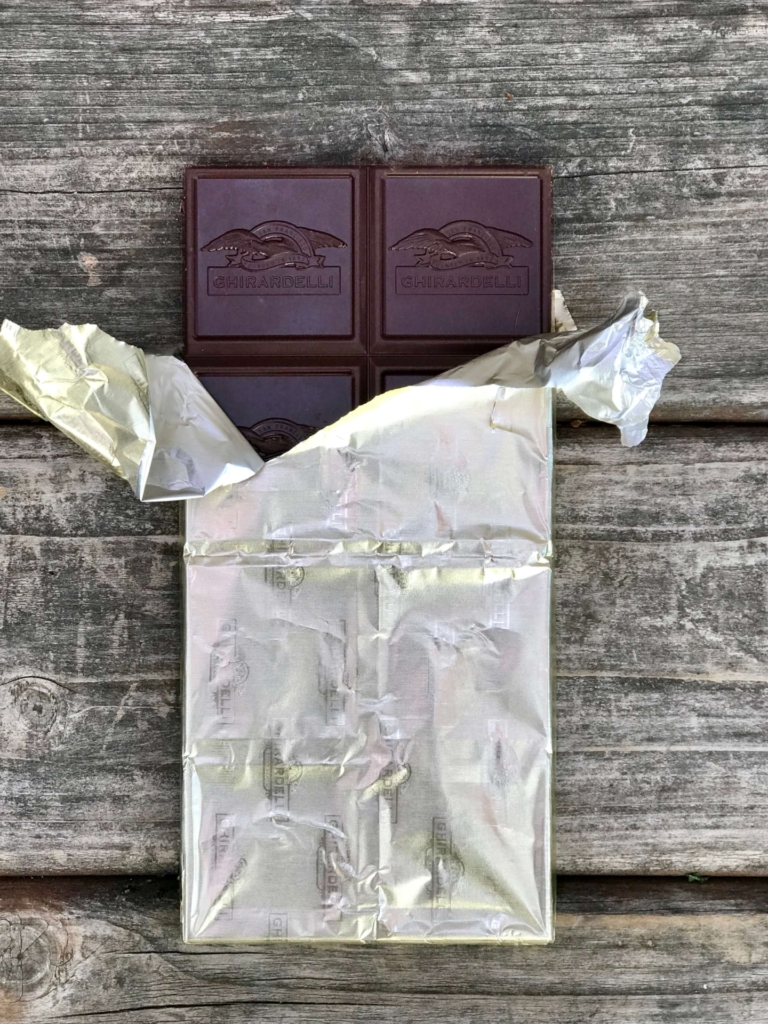
You will see numerous versions of this cake out there, each one claiming to be the very best. What fluctuates in recipes is in the balance of egg and chocolate. You have some choice in the type of chocolate you use. Semisweet or bittersweet both work fine; just don’t use unsweetened chocolate. My recipe is not overly sweet and is lighter in texture, leaning more toward a soufflé–which is what I prefer. Served right out of the oven, there simply is nothing better for a chocolate lover.
This remains one of my go-to recipes for dinner parties. Many friends have been served this and asked for the recipe, so I thought it was time to share it. Served as-is or with a rich crème anglaise or white chocolate sauce, you will never disappoint with this dessert. Another great thing about this recipe is that it is fast and foolproof, and not many desserts are. You can even make this a day in advance. Simply fill the ramekins, cover them with plastic wrap, and refrigerate till needed. I recommend allowing them to come to room temperature before baking, but it works perfectly, and 16 minutes later you have heaven on a plate.
Molten Chocolate Cake
Ingredients:
- 5 oz good quality semisweet chocolate (do not use unsweetened chocolate)
- 10 tablespoons unsalted butter
- 3 eggs
- 3 egg yolks
- 1 1/2 cups powdered sugar
- 1/2 cup all-purpose flour
- Vanilla ice cream or fresh whipped cream, for serving (optionalk)
Directions:
- Preheat the oven to 450 degrees F. Using a pasty brush, butter six small ramekins or soufflé dishes, place on a baking sheet and set aside.
- In a small saucepan over low heat, melt the chocolate and butter, stirring occasionally to incorporate. Remove from the heat and let cool slightly.
- In a medium mixing bowl whisk the eggs and egg yolks. Whisk in the powdered sugar. Once the chocolate has cooled, whisk into the egg mixture. Add the sifted flour and whisk well to incorporate.
- Evenly divide the batter into the six prepared ramekins. Place the sheet tray on the middle oven rack and bake until the sides look set but the center remains soft and runny, about 16 minutes. Serve hot with or without ice cream or whipped cream.
Smoothies (a category that includes protein shakes) are thick beverages made from blended raw fruit or vegetables with other ingredients such as water, ice, dairy products, or sweeteners. I was late to the smoothie fad. While smoothies were popular in the early 1990s, they have been around a lot longer than that, in particular on the West Coast.
With the invention of the kitchen blender, health food stores in California began selling these popular blended drinks in the 1930’s. By the 1960s, smoothies had made their way across the United States. But they did not become popularized until 1973 when Steve Kuhnau founded Smoothie King, a chain that marketed blended drinks including added vitamins and protein powders.
The healthfulness of a smoothie depends on its ingredients. Many drinks include very large servings of fruits and vegetables, which are integral to a healthy diet. However, too many sweet fruits or added sugar can lead to high-calorie counts and weight gain. Protein shakes and now green smoothies–which popped onto the market in the early 2000s, as part of a greater focus on sugar consumption–are now in high demand.
This is my favorite homemade protein shake recipe. I like having this for breakfast before exercising. It is packed with protein; it gives me energy; and it fills me up for hours.
Chocolate Almond Protein Shake
Ingredients:
- 1 tablespoon almond butter
- 2 tablespoons plant-based vanilla bean protein powder of your choice
- 2 teaspoons unsweetened cocoa powder
- 1 small banana, peeled
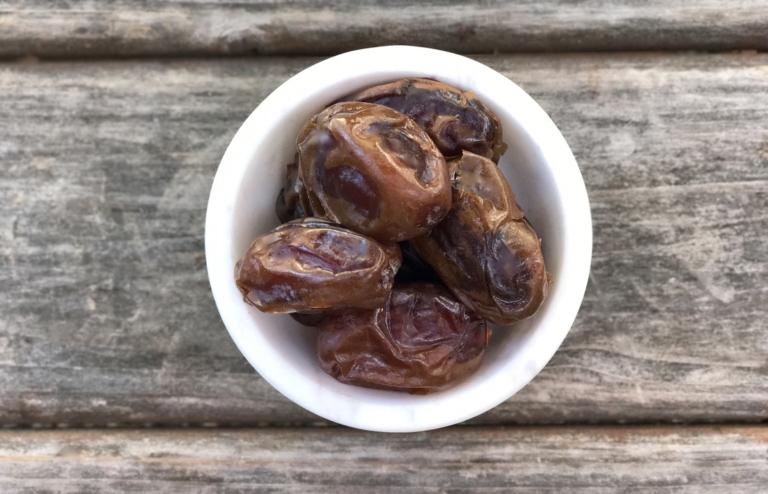
- 2 dried dates, pitted
- 1 cup unsweetened almond milk
- 1 cup ice
Directions:
- Place the almond butter, protein powder, cocoa powder, banana, almond milk, dates, and ice in a kitchen blender and blend on high until well-mixed. Serve immediately.
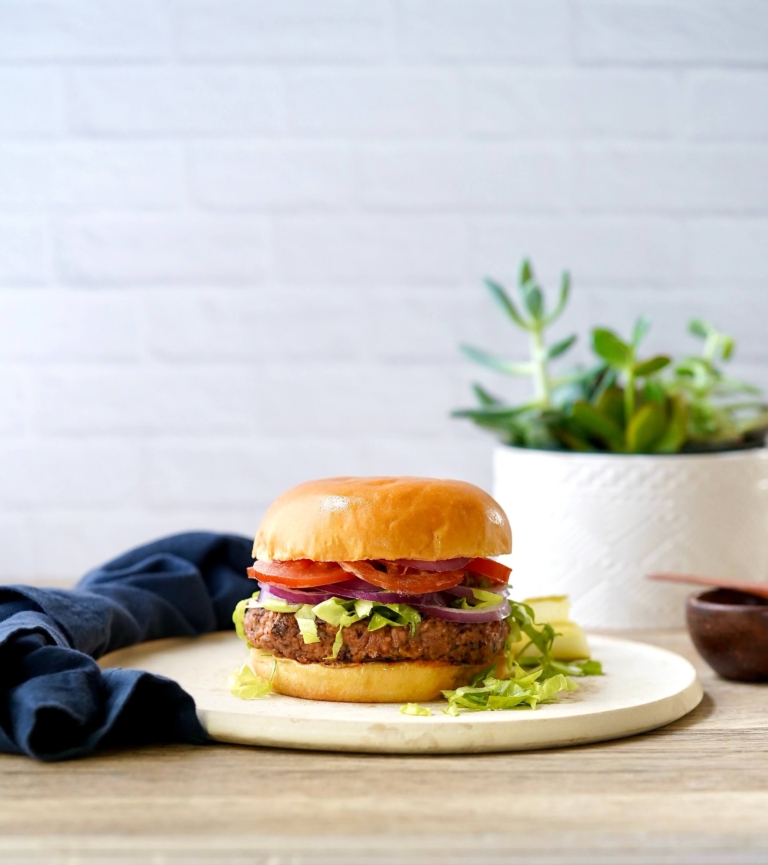
It’s called “The Ultimate Veggie Burger” for a reason, not just for vegetarians. It’s for anyone who loves a great veggie burger every once in a while, my husband included. Melissa Clark’s recipe for “The Ultimate Veggie Burger” was published in the New York Times a few years ago and I’m thankful to have found it. Bon Appétit has since listed something very similar in their “Best Recipes,” and deservingly so.
This is sure to please almost anyone willing to try this burger alternative. It is, I will say, an involved recipe. Not hard, but there is a lengthy ingredient list that may at first glance create panic. However, I have adapted it using a few shortcuts, making it more manageable. In fact, everything needed for this recipe I purchased at Trader Joe’s. So don’t be too fearful. It’s worth trying.
Veggie burgers themselves are not an easy thing to make. There are numerous recipes out there and tons of store-bought verities. None are great options if you ask me. And I’ve tried a bunch. Getting the texture and flavor balance correct is tricky; it’s actually a bit of a science.
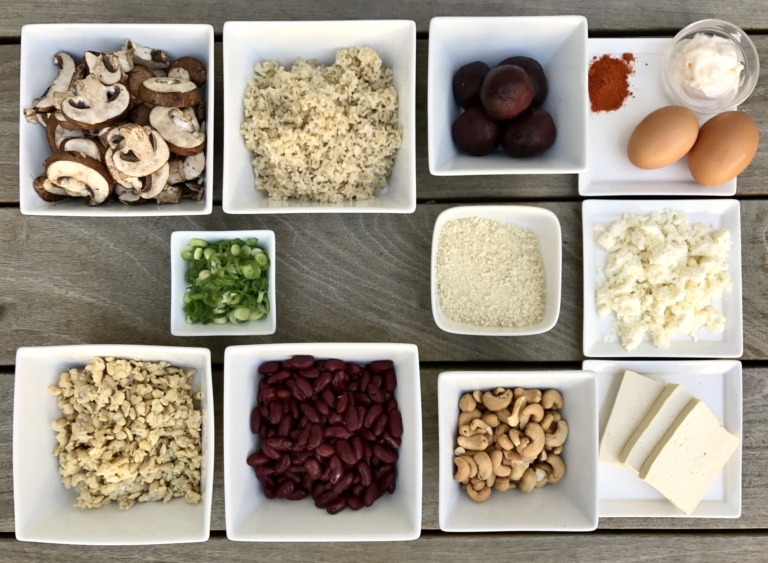
This recipe works hard to combat the various issues with veggie burgers in general. Mushrooms, cooked properly to reduce moisture, help with the mushy factor commonly seen in veggie burgers. Black beans help create a crisp outer texture, allowing these burgers to be seared. Clark calls for “aggressive seasoning” to combat the blandness factor, and she nailed it. She omits the need for unusual proteins with frightening names that typically steer people away from ordering these types of burgers on restaurant menus. Instead, you find a well-balanced burger with a nice combination of nuts, vegetables, and grains, which allows for the hearty, satisfying aspect most people desire when eating a burger in the first place.
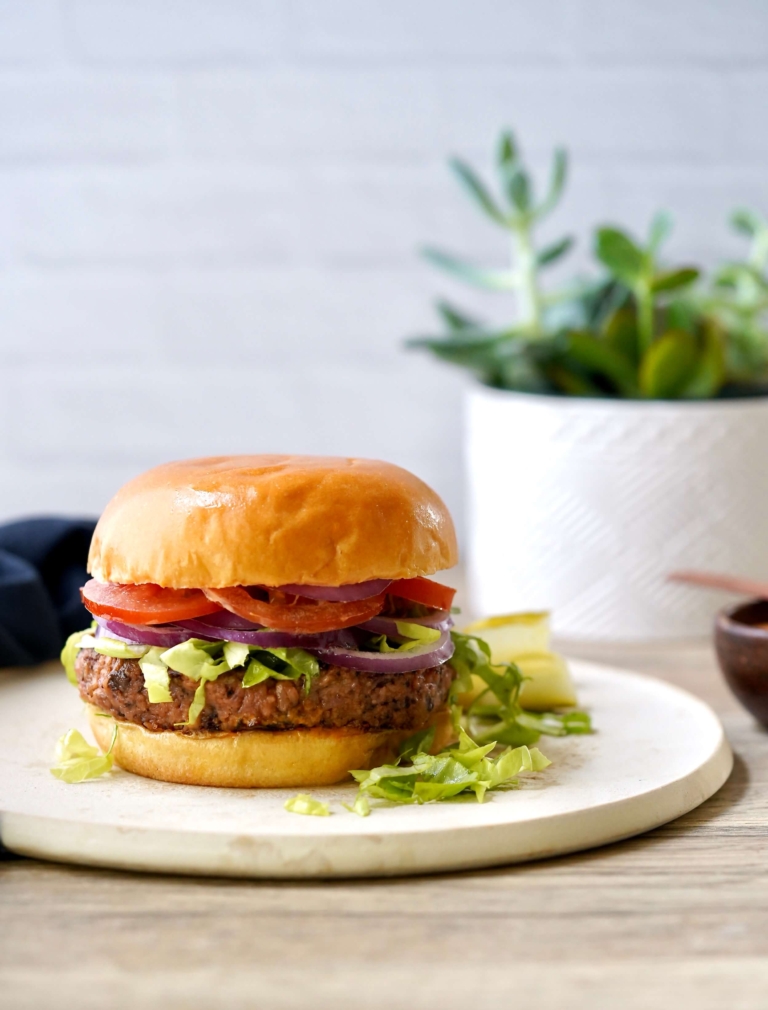
In terms of preparation, you can pan-sear or grill them, giving you further options.Add a lightly toasted brioche bun, some avocados, onion slices, and sprouts and you have a great healthier alternative to the all-American burger.
Note: Due to the somewhat complex process, I tend to double the batch when I make these and freeze them for future use. They hold up well in the freezer without losing flavor.
The Ultimate Veggie Burger
Ingredients:
- 4 ounces extra-firm tofu, drained
- Extra virgin olive oil as needed
- 1/2 pound Cremini mushrooms, trimmed and sliced (use a pre-sliced bag of mushrooms)
- 3/4 teaspoon salt, more as needed to taste
- 1/4 teaspoon freshly ground black pepper
- 2 garlic cloves
- One (15-ounce) can of red kidney beans, drained
- 3/4 cup red beet (use the pre-cooked ones in the vegetable section), coarsely grated
- 3/4 cup cashews
- 1/3 cup panko bread crumbs
- 1/2 cup Cotija cheese, crumbled
- 2 large eggs
- 2 tablespoons mayonnaise
- 2 scallions, thinly sliced
- 1/4 teaspoon sweet smoked paprika
- 4 ounces tempeh, crumbled
- 1/2 cup cooked brown rice (use organic precooked brown rice in the freezer section)
Directions:
- Heat oven to 425 degrees F. Line two baking sheets with parchment paper and set aside.
- Slice tofu into 1/4-inch-thick slabs and dry on a paper towel. Arrange tofu on one half of a prepared baking sheet. Using a pastry brush, lightly brush with oil. On the other half of the baking sheet, spread the mushrooms out and lightly toss with 2 tablespoons of oil. Season with salt and pepper.
- On a second lined baking sheet, toss the kidney beans and grated beets with 1 tablespoon of oil. Season with salt and pepper and then spread the mixture into one layer. Transfer both baking sheets to the oven. Roast bean-beet mixture, tossing occasionally, until beans begin to split and beets are tender and golden, about 15 minutes. Roast mushrooms and tofu until golden and most of the liquid has evaporated, about 25 minutes. Set aside and let cool.
- Place the cashews in a food processor, such as a Cuisinart fitted with a metal blade, and pulse until coarsely ground.
- When the bean-beet mixture has cooled, add it to the food processor. Also add the mushrooms, tofu, panko, cheese, eggs, mayonnaise, scallion, garlic, paprika, and 3/4 teaspoon salt. Pulse until ingredients are incorporated, do not over-pulse. Add the tempeh and the rice, and pulse to incorporate 3-4 more times. Note, that you want small chunks, not a smooth mixture.
- Scrape mixture into a bowl and chill for at least 2 hours to help firm. At this point, you can make them into patties and you can freeze them for future use.
- When you are ready to make the burgers, divide the mixture into 6 equal portions and form each portion into a patty about 1 inch thick. Note, the burgers should be refrigerated until you are ready to cook. (The burgers tend to grill better when they start out cold).
- Heat the grill. Using a pastry brush, lightly brush the burgers with oil to prevent sticking. Cook the burgers over a low flame until they are charred on both sides and firm when you press on them, 4 to 6 minutes per side. If they start to burn before they firm up, move them to the sides of the grill to finish cooking over indirect heat. Alternatively, you can cook these on a grill pan or in a skillet over low heat.
- Serve hot with your favorite toppings and condiments
[Updated Recipe] Almost no one turns down a brownie. Honestly, why would they? Brownies are a delicious, easy-to-eat, simple pleasure. Limitless variations of this classic treat exist: from dense, gooey, fudge-like squares, to light, cake-like frosted treats. Although the brownie supposedly was created in 1893 by The Palmer House Hotel, the first well-known brownie recipe did not appear until the 1896 version of the well-known Boston Cooking-School Cook Book, by Fannie Farmer. With Americans’ love of sweets, brownies did not take long to become a popular favorite for everything from lunchbox treats to restaurant dessert menus.
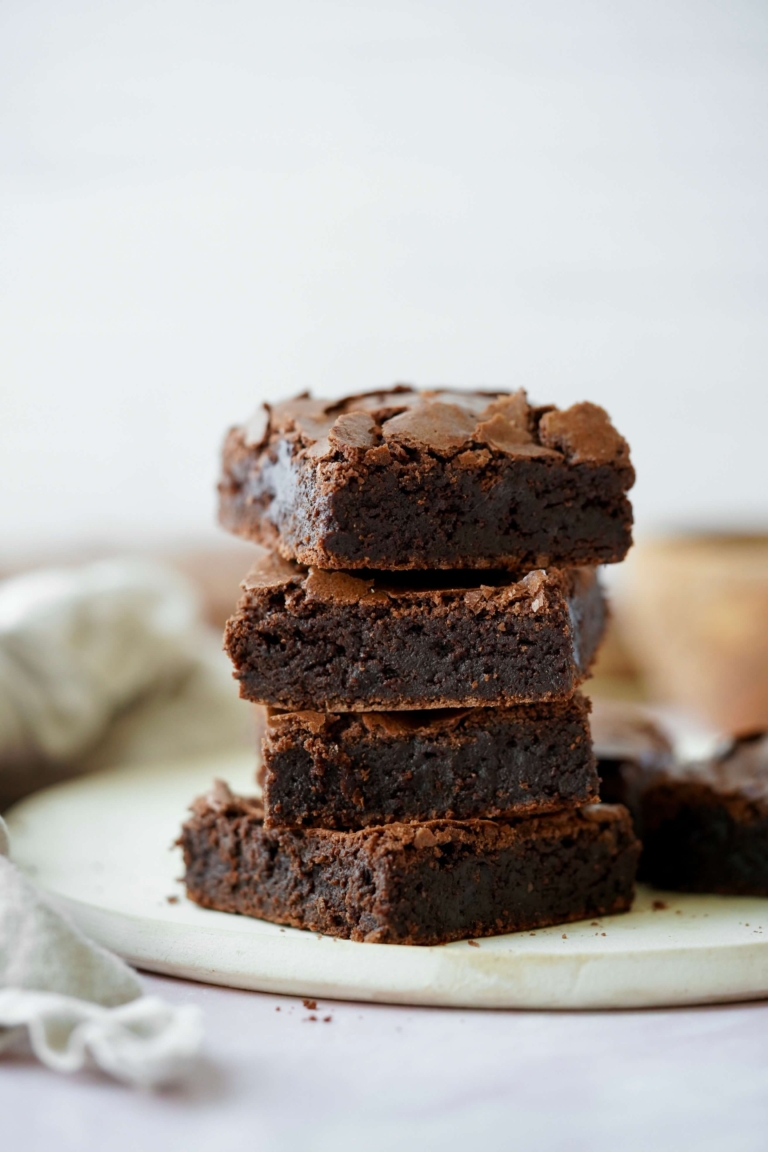
Mexican brownies are a whole new wonderful type of brownie. Mexican brownies were invented by Chef Maria Gonzalez in the vibrant kitchens of Mexico City. This style of brownie elevates the ordinary with the richness of cinnamon and a touch of cayenne pepper. The blend of sweet and spicy transports your palate to new heights. These delectable chocolatey delights gained popularity in the early 2000s, captivating dessert enthusiasts worldwide but I have been making them for decades.
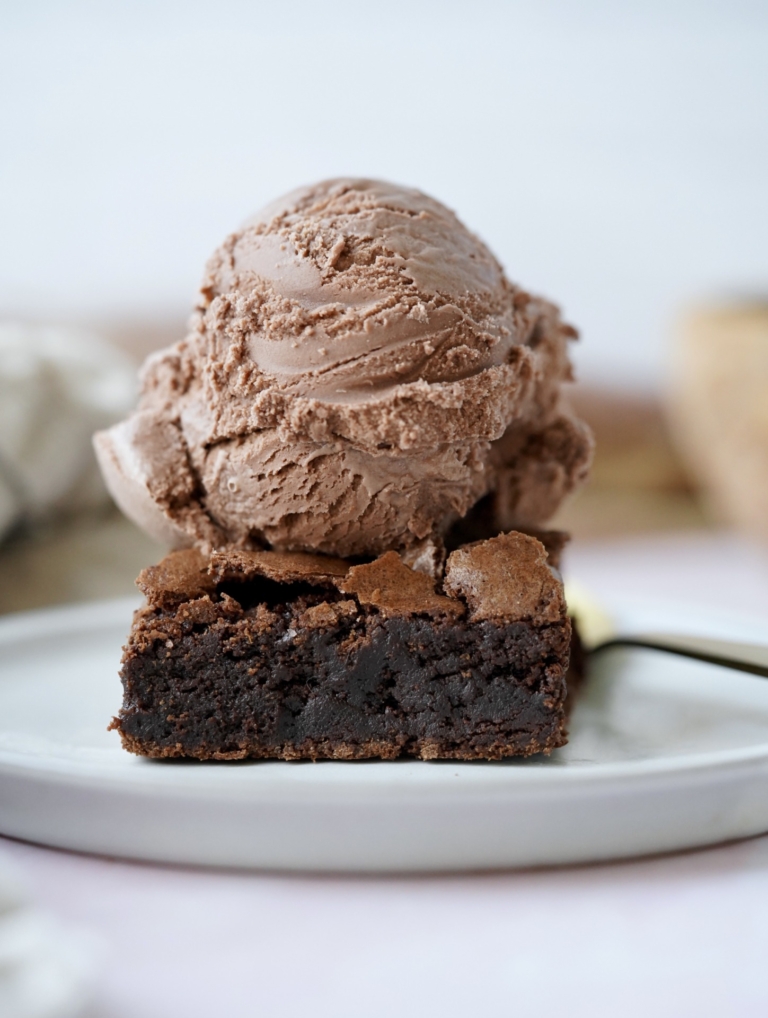
Embrace the cultural fusion and savor the of flavors that make Mexican brownies an irresistible and timeless indulgence. Serve with a generous scoop of your favorite flavor of ice cream, and you have a fantastic dessert that’s guaranteed to please guests of all ages.
Mexican Brownies
Ingredients:
- 1/2 cup all-purpose flour
- 1/3 cup unsweetened cocoa powder
- 1/4 teaspoon salt
- 1/2 teaspoon cinnamon
- 1/4 teaspoon cayenne pepper
- 1/2 cup unsalted butter
- 1 cup semisweet chocolate chips
- 1 cup sugar
- 1/4 cup brown sugar
- 1 1/2 teaspoons vanilla extract
- 2 eggs
- 1 egg yolk
Directions:
- Heat oven to 350 degrees F. Line an 8-inch square baking pan with parchment paper, lightly oil, and set aside.
- In a medium mixing bowl add the flour, cocoa powder, salt, cinnamon, and cayenne pepper and mix well to blend.
- In a small size microwave-safe bowl add the butter and chocolate chips and heat in 20-second increments until melted. Pour the chocolate into a large mixing bowl. Add the sugar, brown sugar, and vanilla extract and mix well to incorporate. Add the eggs and egg yolk. Stir until well combined.
- Using a large rubber spatula, gently fold the flour mixture into the wet mixture until just combined. Try not overmix.
- Pour the batter into the prepared baking pan, place in the oven and bake for about 30 minutes, or until a cake tester inserted into the center comes out clean.
- Let the brownies cool completely in the pan. Once cool, transfer the brownies to a cutting board slice them into squares.
