Everyone needs easy side dish recipes. Well, here you go, it does not get much simpler, or more reliable, than this. Crispy oven-roasted carrots and potatoes, aka, sheet pan veggies, that cook up perfectly every time. And the best part is they can be served with anything you can think up, from a quick weekday dinner to a Thanksgiving feast. Save, make, and repeat this lovely roasted root vegetable dish all winter long.
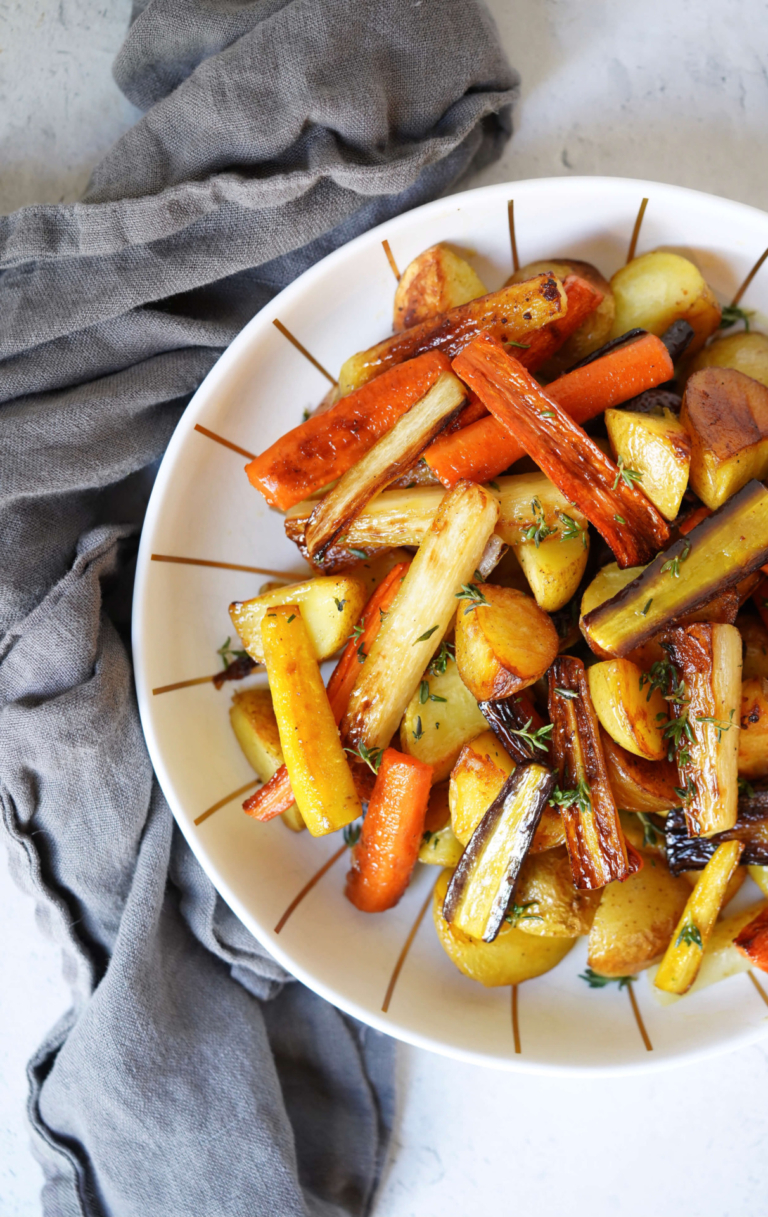
To clarify, by “easy“, I’m talking, drizzling with olive oil and stirring once or twice while the vegetables are roasting in the oven and doing their thing–that is it. This is an extremely popular vegetable dish in my house, satisfying my potato-loving older son and my carrot-obsessed younger one, all at once. Root vegetables are a natural seasonal go-to this time of year, but I love serving this dish at elaborate holiday meals like Thanksgiving, Hanukkah, or Christmas when I don’t want the sides to steal the show too much.
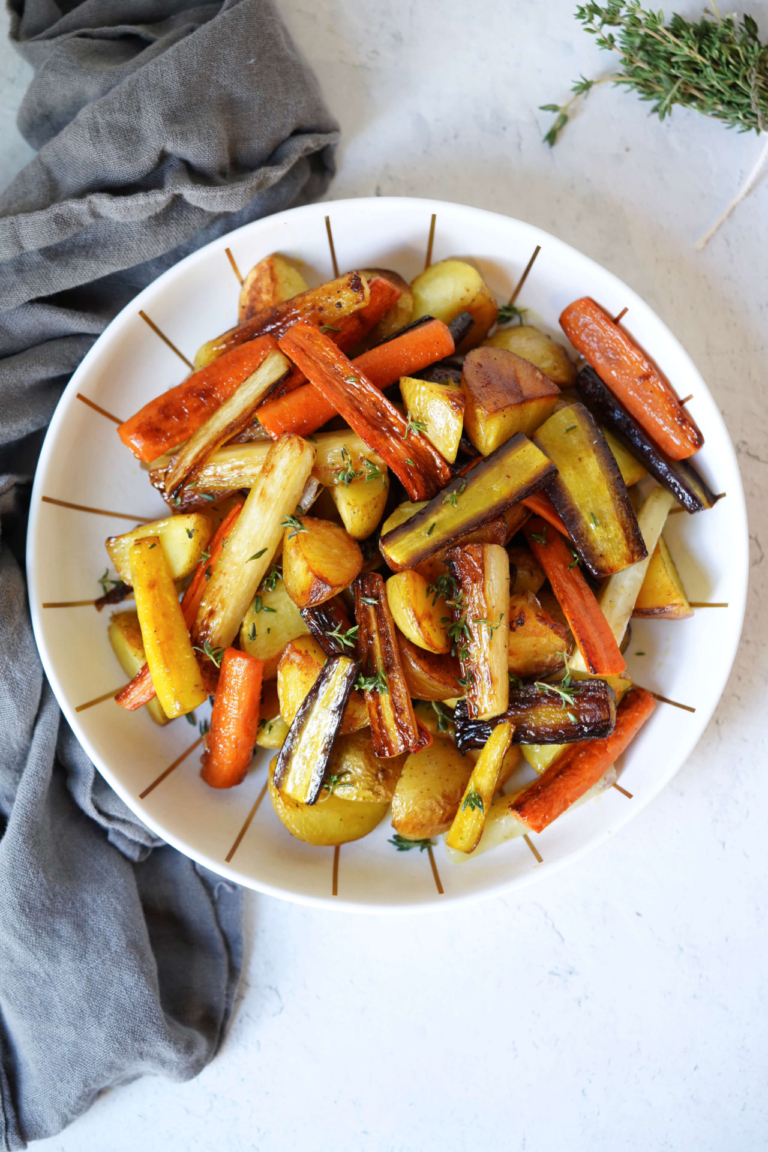
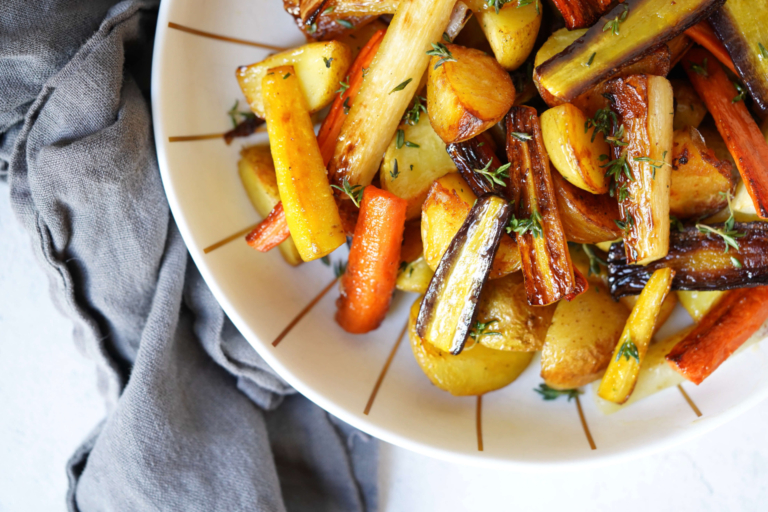
My go-to is local, tricolored carrots, these beautiful yellow, white, orange, and purple/yellow carrots bring great color and flavor to an otherwise simple dish. Creamy, baby Yukon Gold is my potato of choice, but, truthfully, any carrot or potato combination will work just as well. Good, flavorful Extra Virgin olive oil and fresh thyme are a must–do not use dried thyme, you want to get that great earthy flavor that compliments the root vegetables so well.
These roasted carrots and potatoes are not only easy, but they are also a great prep-ahead dish which is why they are a worthy holiday favorite. Two little things you want to remember when making this recipe; (1) cut the carrots and potatoes into similar sizes. The carrots and potatoes should be roughly equal-sized pieces, or they won’t be done at the same time. And (2) to get them crispy, you should not stir them too often. Especially the firing the first twenty minutes. The high heat and the sheet pan work together to make the vegetables crispy, if you interrupt the process too much, the magic can’t happen.
Oven Roasted Carrots And Potatoes

Ingredients:
- 1 1/2 pounds tricolored carrots, trimmed, peeled, and cut into 3-inch pieces
- 1 1/2 pounds small Yukon gold potatoes, quartered
- 1/4 cup Extra Virgin olive oil
- Kosher salt and freshly ground black pepper, to taste
- 2 tablespoons fresh thyme, leaves only
Directions:
- Heat oven to 425 degrees F.
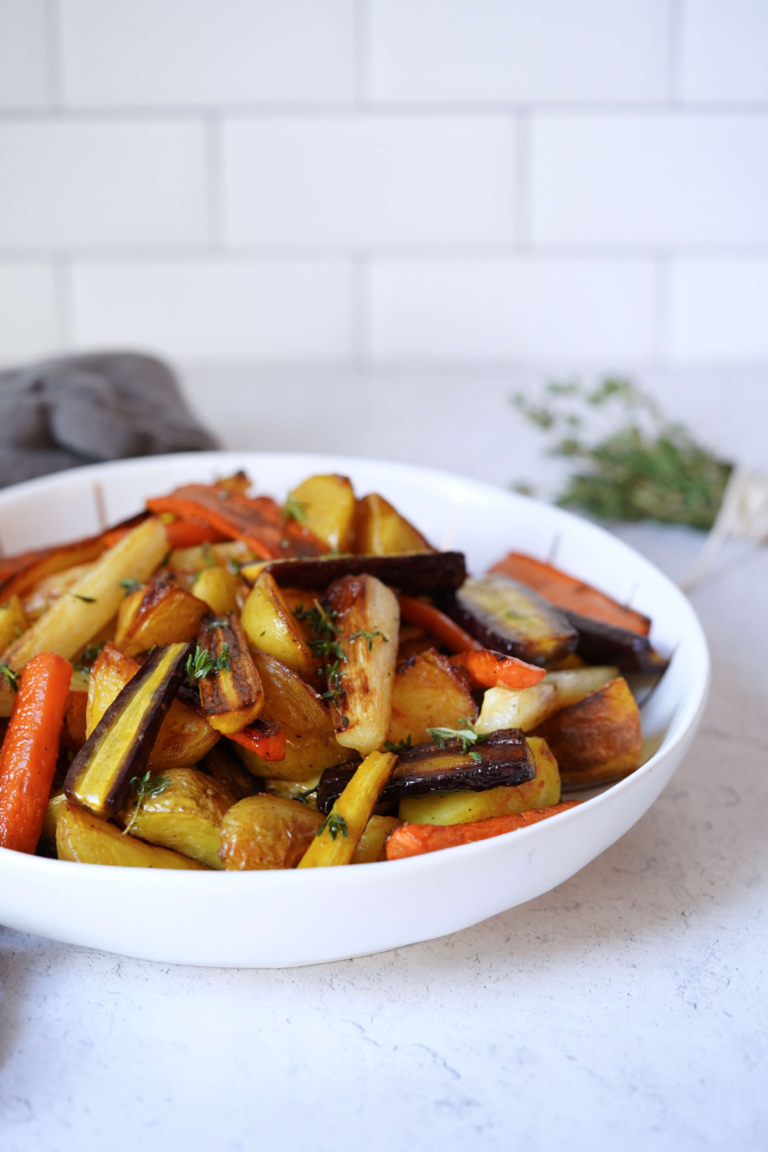
- Pat the potatoes and carrots dry and place them on a baking sheet. Drizzle with the oil and a sprinkling of salt and pepper and toss well to coat.
- Place on the oven and roast without stirring for about 20 minutes. Check on the vegetables, stir, and if sticking drizzle with more oil. Continue to roast, stirring the vegetables once, for another 20-25 minutes until cooked through and showing some coloration. Once the vegetables are done roasting transfer them to a serving platter and garnish with thyme
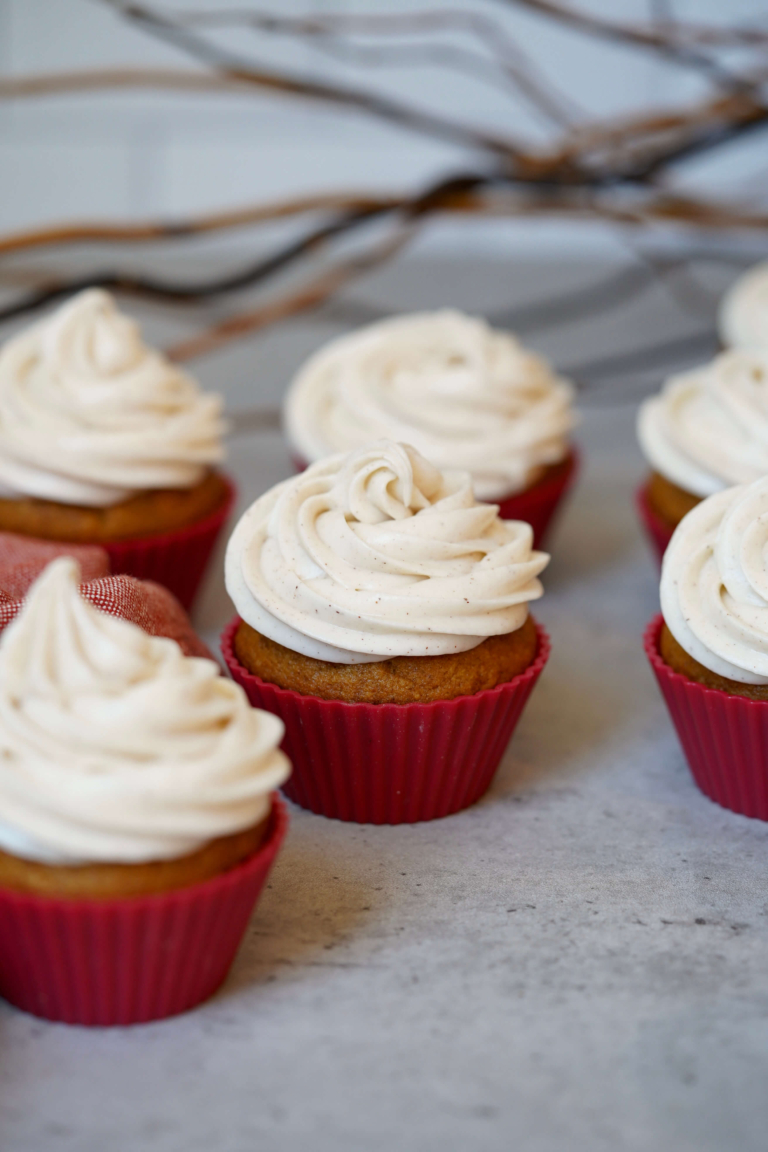
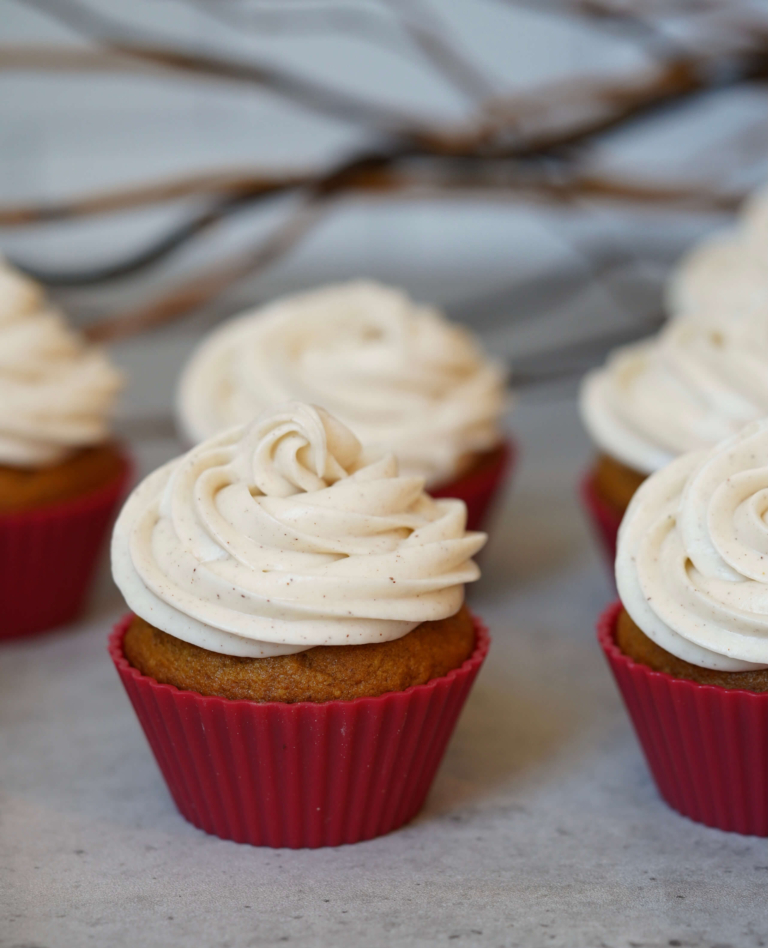
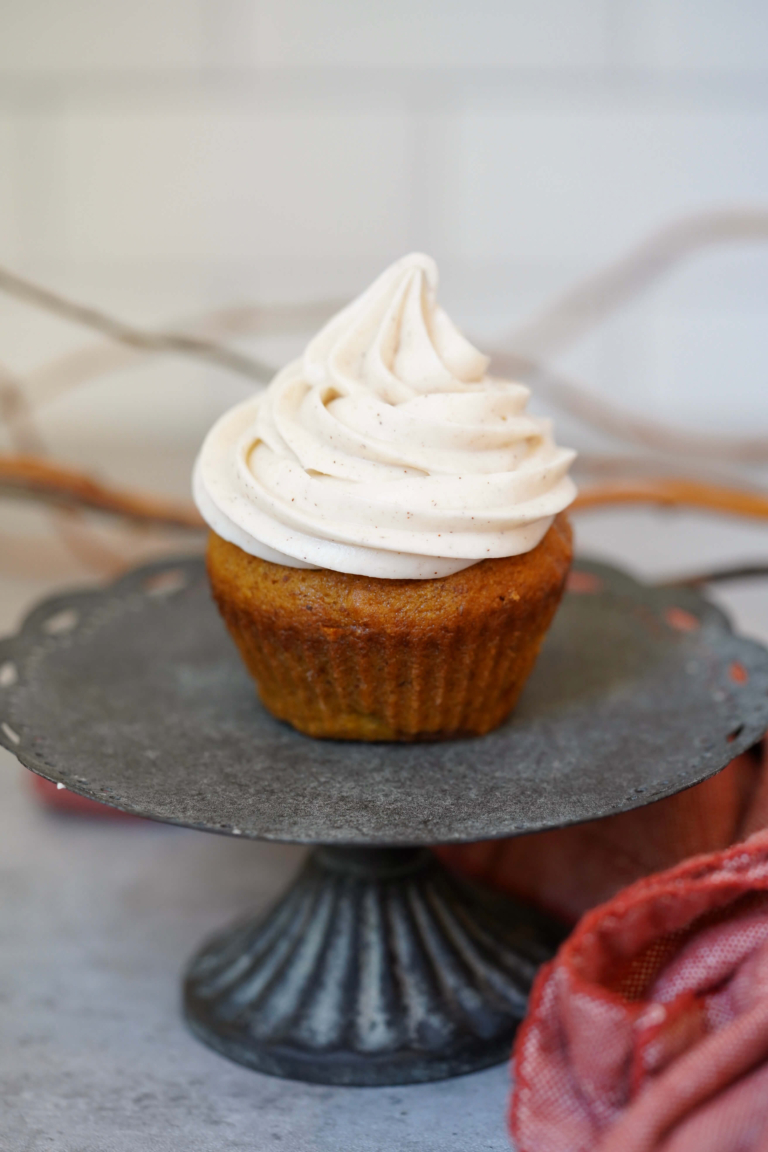
Fluffy, moist pumpkin cupcakes with creamy cinnamon cream cheese frosting that are dreamy. This is the ultimate seasonal dessert, and one you should baking all season long. If you’re a pumpkin spice lover like I am, you truly can’t go wrong with these incredibly simple, yet flavorful pumpkin cakes.
Cupcakes in History
Technically speaking, Amelia Simmons invented the cupcake. Simmons also cemented herself as the author of the first American cookbook, American Cookery, published in 1796. In her cookbook, Simmons refers to “a light cake to bake in small cups”. Even if her “cakes” were slightly different from the modern-day version we know and love, Simmons is deserving of credit. The first actual reference to a “cupcake” dates back to a 19th-century American author named Eliza Leslie in her cookbook titled “Receipts“.
Cupcake Fun Facts
- The term “cupcake” was first coined in the late 19th century.
- The first cupcake recipes had ingredients measured only by the cupful.
- Cupcakes were originally baked in teacups, ramekins, and small clay pots.
- Roughly 13% of modern-day brides prefer to serve wedding cupcakes over wedding cake.
- Cupcakes in Britain are “fairy cakes“. These cakes consist of a lighter sponge cake with less heavy glacé icing.
- Australian cupcakes are called “patty cakes“, a term made famous by the “Pat-A-Cake” poem.
- Hostess Cupcakes began making cupcakes in the 1950s. Smaller cakes meant a faster baking time. The Hostess conveyor oven can make about 11,000 cupcakes an hour.
Cupcakes have long been a favorite of mine and I thoroughly enjoy anything miniature. I have made my share of cupcakes for birthdays, and class parties, and my boys never turn down one when I make them. These pumpkin cupcakes were inspired by the soft frosted pumpkin cookies my older son loves. They have a similar flavor profile and pillowy texture that he (and I) adore. These frosted pumpkin cupcakes are a great go-to during the fall/winter season. They can also make an easy Halloween treat should you choose to decorate them accordingly or not.

Pumpkin Cupcakes with Cinnamon Cream Cheese Frosting
Ingredients:
For the Cupcakes:
- 1 cup light brown sugar, packed
- 1/2 cup vegetable oil
- 1 1/2 teaspoons vanilla extract
- 2 eggs
- 1 cup all-purpose flour
- 1/4 cup almond flour
- 1 teaspoon baking powder
- 1/2 teaspoon baking soda
- 1/2 teaspoon ground cinnamon
- 1/8 teaspoon nutmeg
- 1/8 teaspoon ginger
- 1/8 teaspoon ground cloves
- Dash of salt
- 1 cup canned pumpkin puree
For the Cinnamon Cream Cheese Frosting:
- 8 ounces cream cheese, room temperature
- 1/2 cup unsalted butter, room temperature
- 4 cups Confectioners' sugar
- 1 teaspoon vanilla extract
Directions:
- For the Cupcakes: Preheat the oven to 350 degrees F. Line a cupcake pan with cupcake liners and lightly oil. Set aside.
- To the bowl of a kitchen mixer, such as a KitchenAid, fitted with a paddle attachment, add the brown sugar, oil, vanilla extract, and eggs, and mix until smooth.
- In a medium-sized mixing bowl, add the flour, baking powder, baking soda, cinnamon, nutmeg, ginger, cloves, and salt. Mix to blend.
- With the mixer on low, slowly add the dry ingredients and mix until smooth, scraping down the sides as needed. Add the pumpkin puree and blend until incorporated.
- Divide the batter among the 12 cupcake liners, filling each a little over 3/4 full. Place in the oven and bake, rotating once, until set or a cake tester comes out clean, about 18-20 minutes.
- Remove the cupcakes from the oven and allow to cool while you make the frosting.
- For the Frosting: In the bowl of the kitchen mixer, fitted with a whisk attachment, add the cream cheese and butter and beat until smooth.
- Add half of the Confectioners' sugar and mix on low until smooth. Add the remaining powdered sugar and mix well. Stir in the vanilla extract and blend until incorporated.
- For the Cupcake Assembly: Use a large star piping tip , or other, to pipe the frosting onto the cupcakes. Refrigerate the cupcakes until ready to serve.
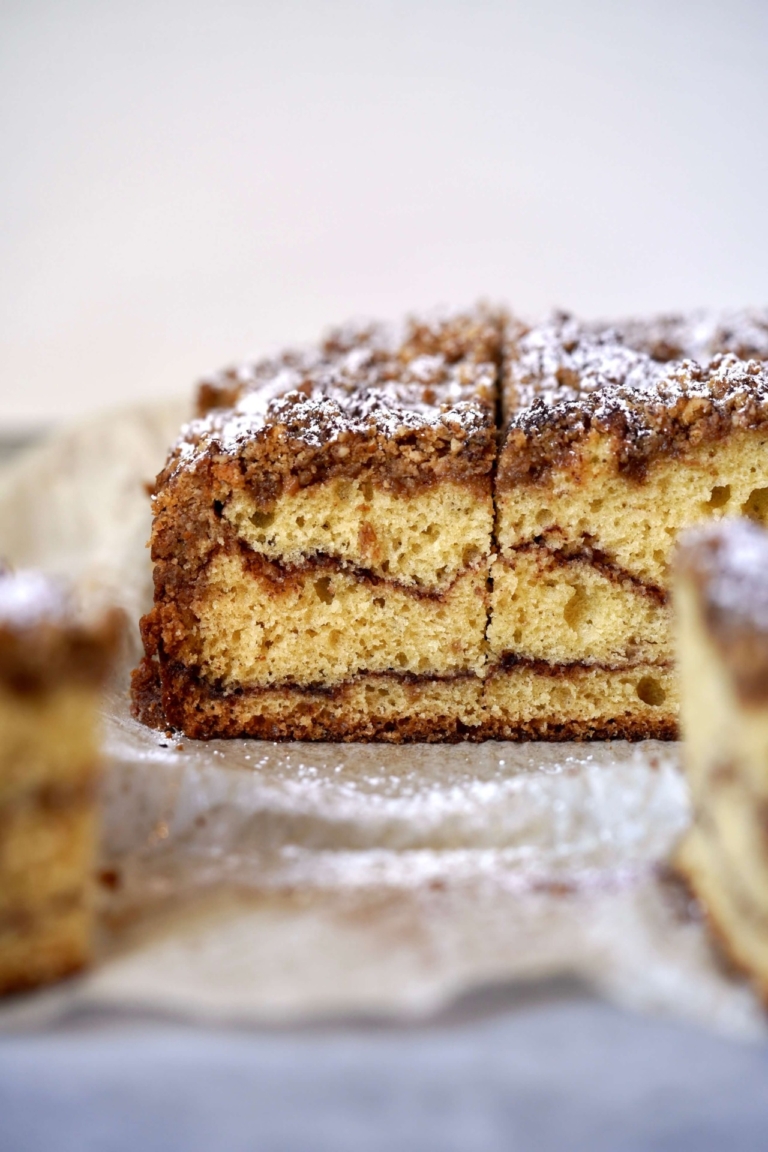
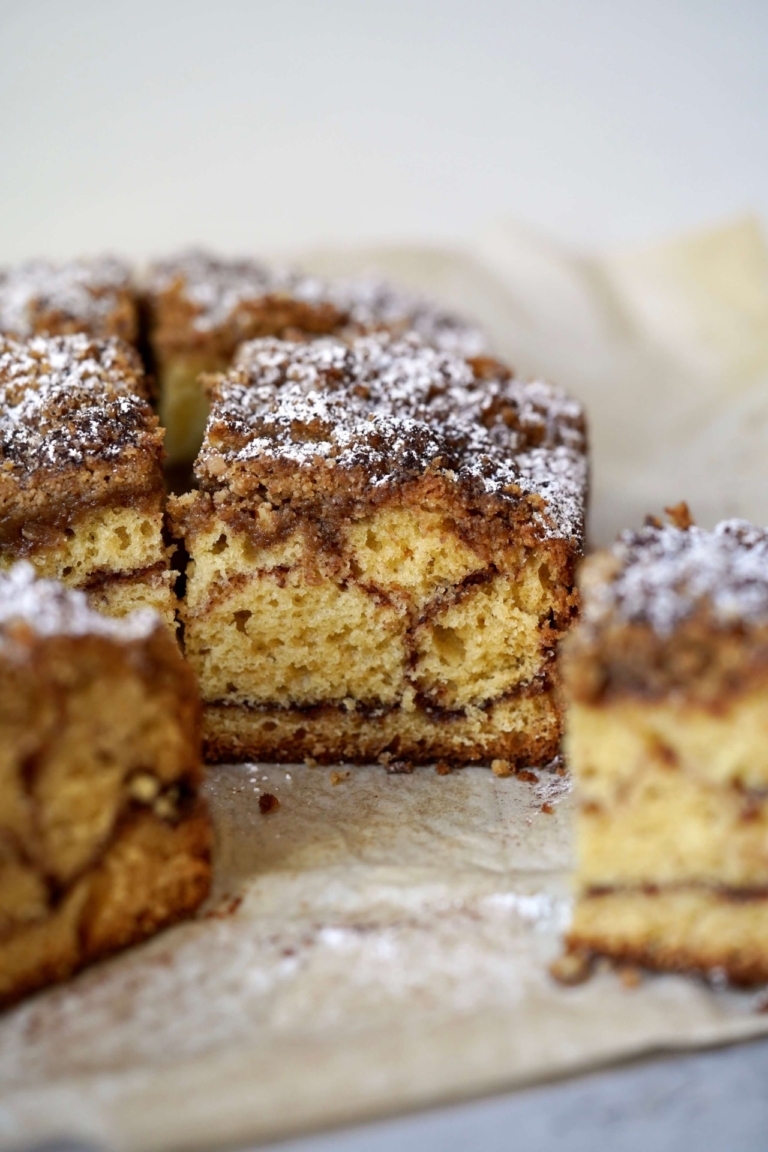
Baked is the name of a bakery in Red Hook, Brooklyn that is worth a visit should you ever find yourself in the area. Baked is also the title of a cookbook which has received lots of attention since its release in 2008, and understandably so, it is a fantastic book. This sour cream coffee cake with cinnamon-chocolate swirl is Baked’s recipe, one I modified only slightly and it is truly exceptional.
I am a self-proclaimed coffee cake snob, I love to bake them and give them and despite the similar ingredients that often make up a coffee cake, there are numerous variations on how to bake one. Case in point, chances are, you’ve made a sour cream coffee cake or perhaps a cinnamon swirl coffee cake before, yet this one likely tastes completely different from to that which you’ve become accustomed. That is baking magic.
Coffee Cake or Crumb Cake
This one always confused me. Coffee or crumb cake? And what’s the actual difference? The truth is coffee and crumb cakes are actually rather similar, especially with the cake layer. The major difference between the two is the actual amount of streusel topping. Coffee cakes tend to have less streusel topping and more cake and crumb cakes have a thicker and chunkier layer of streusel on top.
The Invention of Coffee Cake
Coffee cake, as we know it, was not so much an invention as it was an evolution, with many countries given as the potential origination point. It is widely believed that coffee cake originated from Northern or Central Europe sometime during the 17th century. During that time, coffee was still relatively new to Europe. The countries laying some sort of claim to the coffee cake invention —Germany, Austria, and Denmark particularly—were already well versed in sweet breads and cakes and each was quickly paired incredibly well with this new beverage. And thus the serving of the two became common.
Coffee cake made its way to America via German migrants in the late 19th and early 20th centuries. Here the addition of sour cream was added, both as a means of adding more moisture into the cake as well as activating the baking soda. The most known modification to the coffee cake came with the popularity of the bundt pan in the 1950s. With its ring-shaped design, the bundt pan allowed bakers to increase the moisture content in their cakes without having to worry about the center going uncooked.
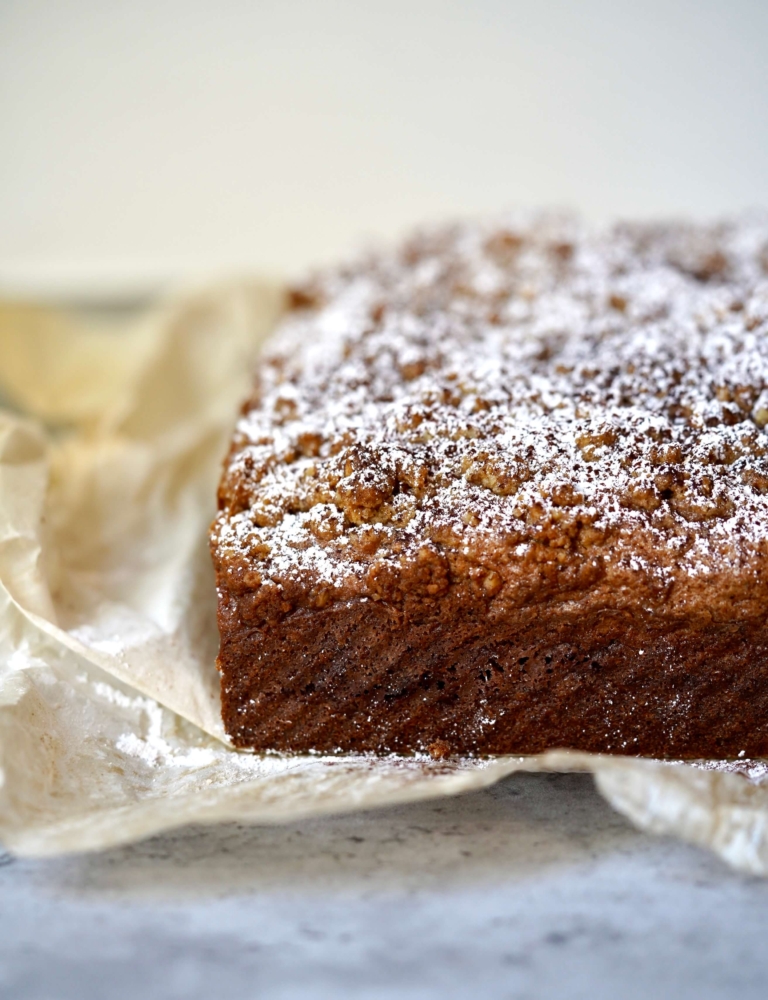
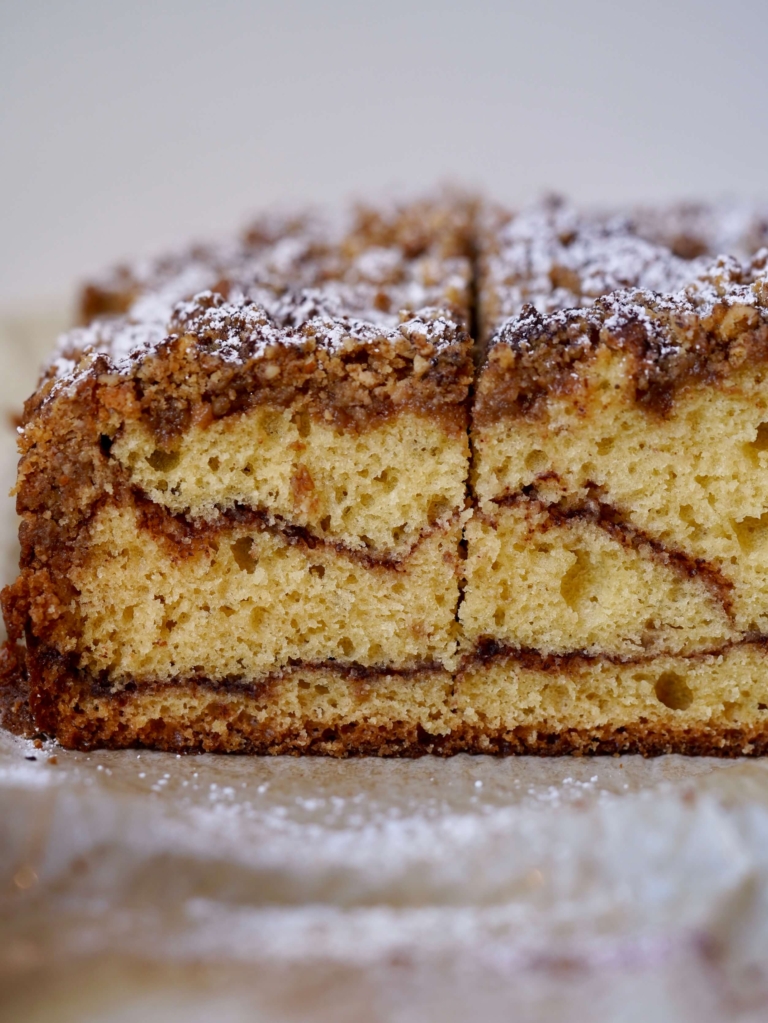
This sour cream coffee cake is tender, studded with a rich cinnamon-chocolate swirl but there’s more to it. The crumble is the usual suspects, flour sugar, and butter, but also has finely chopped pecans folded in adding some texture and a lovely nutty flavor to the cake. This has become a newer favorite but a worthy addition to my top five collections: Bisquick coffee cake, chocolate chip banana coffee cake, Ina’s blueberry coffee cake, and my cranberry coffee cake.
Sour Cream Coffee Cake With Cinnamon-Chocolate Swirl
Ingredients:
For The Crumb Topping:
- 3/4 cup all-purpose flour
- 3/4 cup packed dark brown sugar
- 1/2 teaspoon salt
- 3/4 cup pecans, toasted and chopped
- 6 tablespoons cold unsalted butter, cut into 1 inch pieces
For The Chocolate Cinnamon Swirl:
- 1/2 cup sugar
- 1 teaspoon unsweetened cocoa powder
- 1 1/2 teaspoons cinnamon
For the Cake:
- 3 1/2 cups all-purpose flour
- 1 teaspoon baking powder
- 1 1/2 teaspoons baking soda
- 1/2 teaspoon salt
- 1 cup unsalted butter, softened
- 2 1/4 cups sugar
- 4 large eggs
- 16 ounces sour cream
- 1 1/2 teaspoons pure vanilla extract
Directions:
- For the Crumb Topping: Put the flour, sugar, and salt in bowl of food processor and pulse to combine. Add the pecans and pulse until they are finely chopped and incorporated. Add the butter and pulse until mixture looks like coarse sand. Cover and refrigerate.
- For the Chocolate Cinnamon Swirl: in small bowl mix together the sugar, cocoa and cinnamon. Set aside.
- For the Sour Cream Cake: Preheat the oven to 350° degrees F. Butter a 9×13-inch baking pan and set aside.
- Sift together the flour, baking powder, baking soda, and salt together in a medium bowl.
- In the bowl of a kitchen mixer, such as a KitchenAid fitted with the paddle attachment, cream the butter on medium speed until smooth. Scrape down bowl and add sugar. Beat until the mixture is light and fluffy. Add the eggs, one at a time, beating well after each addition and scraping bowl as needed.Add the sour cream and vanilla and beat just until incorporated. Add the dry ingredients in three additions, scraping down the bowl before each addition and beating only until each addition is just incorporated. Do not over mix.
- Pour one third of the cake batter into the prepared pan. Use an offset spatula to spread batter evenly in pan. Sprinkle half of the chocolate cinnamon swirl mixture over batter, covering the entire surface of the batter. Spoon half of remaining batter over the swirl mixture and spread it as evenly as possible (this is not so easy, but don't worry). Top with remaining swirl mixture, then the remaining batter, and spread the batter evenly.
- Sprinkle the crumb topping evenly over the top of the batter.;;Bake in the center of the oven for one hour, or until a toothpick inserted in the center of the cake comes out clean. ;Let the cake cool for 30 minutes before serving. Optional: Dust with additional cocoa powder and some confectioners' sugar if desired
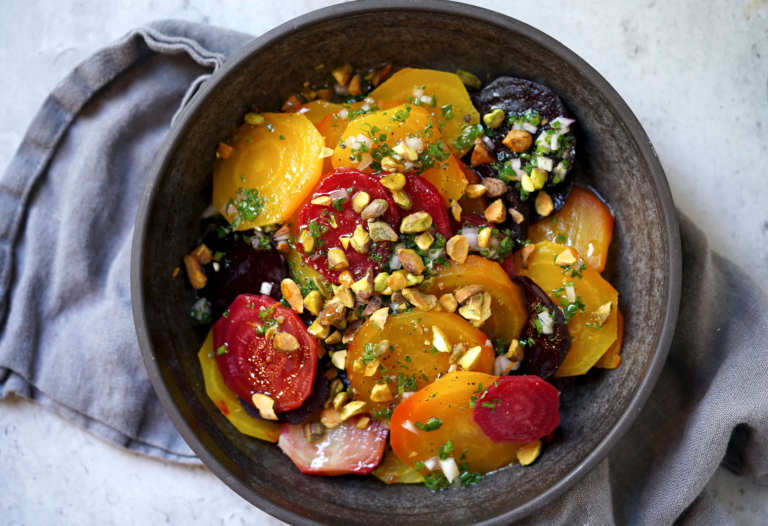
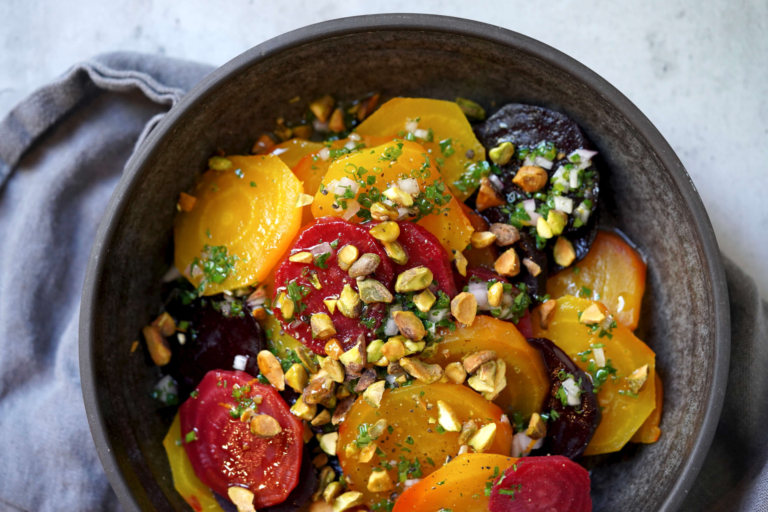
Beets are a winter essential, loaded with nutrition and low in calories as well. Some say this prominent vegetable may just hold the secret for keeping healthy in cooler months. This simple roasted beet salad with pistachios, dressed with a punchy orange vinaigrette is a wonderful way to incorporate beets into your diet going forward.
Beetroot
Beets (also called beetroot, table beet, garden beet, red or golden beet) are the taproot part of the beet plant. Like Brussels sprouts, beets are a complicated vegetable. Classification-wise beets fall into the root vegetable category. Typically deep red or purple, beets are available in various countries, throughout the winter season. Preparation-wise, beets are versatile, and can be roasted, boiled, and even shredded and eaten raw. In terms of taste, beets are mild enough to not overpower other ingredients but also can shine, as is the case with another favorite of mine, beet hummus. Although the green leafy part of beetroot is also edible, (and wonderful in pasta dishes) it’s the tuberous part that is consumed more widely.
Beets in History
Beets have been around for a long time, many believe as early as the Third Dynasty (third millennium BC). But in ancient times, beets were mainly used for medicinal reasons, or offering to the gods in addition to consumption. Apicius, a famous Roman gourmet, wrote a book called “The Art of Cooking” and it gave recipes with beetroots, like broths, and salads with mustard, oil, and vinegar.
All of these uses were for an older variant of beetroot, one that was long and thin, more similar to a carrot. Modern beets, as we know them today, did not appear in Europe till the 16th and 17th centuries. It took a few hundred years more for beets to gain popularity in Central and Eastern Europe where new cuisines with beetroot started appearing (borscht for example).

In Victorian times, beetroot was used to bring color to diets and as a way to sweeten desserts. It was industrialization that allowed for easier preparation and conservation of vegetables, so beetroot eventually became more available. After the Second World War, because of the rations, pickled red beetroot was the norm. Today, the most common variant of beetroot is round and deep red, but beets can also be yellow, white, and even red and white striped.
Beet Nutrition
Beets have an impressive nutritional profile overall, they are low in calories, yet high in valuable vitamins and minerals. They contain a little bit of almost all of the vitamins and minerals your body needs. I think that’s rather impressive. Beets are particularly rich in folate, a vitamin, which helps with heart health. They also contain a good amount of manganese and copper, which helps with energy production. Beets also have a high amount of vitamin C, nature’s immunity booster, making this root vegetable a winter essential.
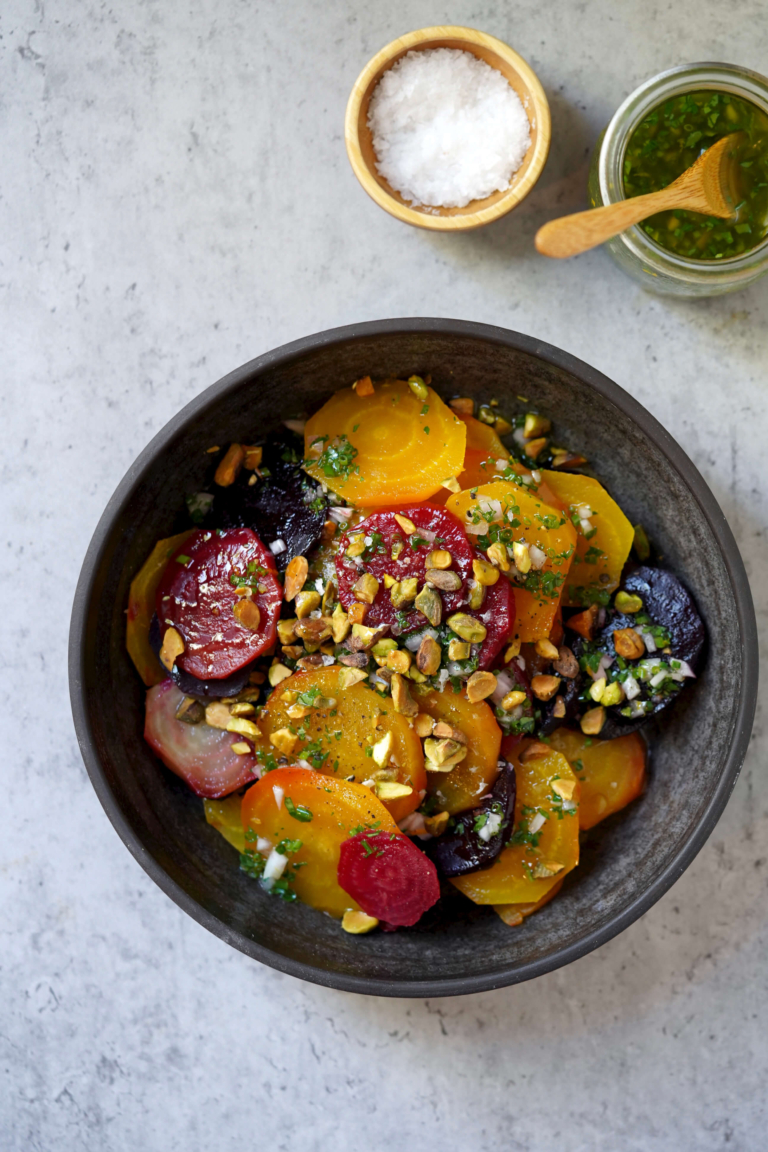
Roasted Beet Salad With Pistachios and Orange Vinaigrette
Ingredients:
- 3 pounds medium beets, a mix of colors, if possible
For the Orange Vinaigrette:
- 1 large shallot, minced
- 1/8 cup white wine vinegar
- Kosher salt, to taste
- 1 teaspoon orange zest
- 1/8 cup chopped flat-leaf parsley
- 1/8 cup chopped chives
- 1/4 cup plus 2 tablespoons Extra-virgin olive oil
- 1/2 cup chopped salted pistachios, lightly toasted
Directions:
- Preheat the oven to 375 degrees F. Wrap the beets in aluminum foil and place them on a baking sheet. Place in the oven and bake for about 1 hour. Or, depending on the beets' size, until the beets are tender. Remove the beets from the oven, open the foil, and cool.
- Once the beets are cooked, reduce the oven to 350 degrees F. Place the pistachios on a baking sheet, place in the oven, and lightly toast until fragrant about 5-7 minutes. Remove from the oven and set aside.
- For the Orange Vinaigrette: In a small bowl add the shallot, vinegar, pinch of salt, orange zest, parsley, chives, and oil. Mix well and season to taste with salt.
- Once the beets are cool enough to handle, peel and trim the beets and slice them into 1/2-inch thick. Arrange the beet slices in overlapping rows on a platter. Drizzle the vinaigrette over the beets. Garnish with the pistachios and serve.
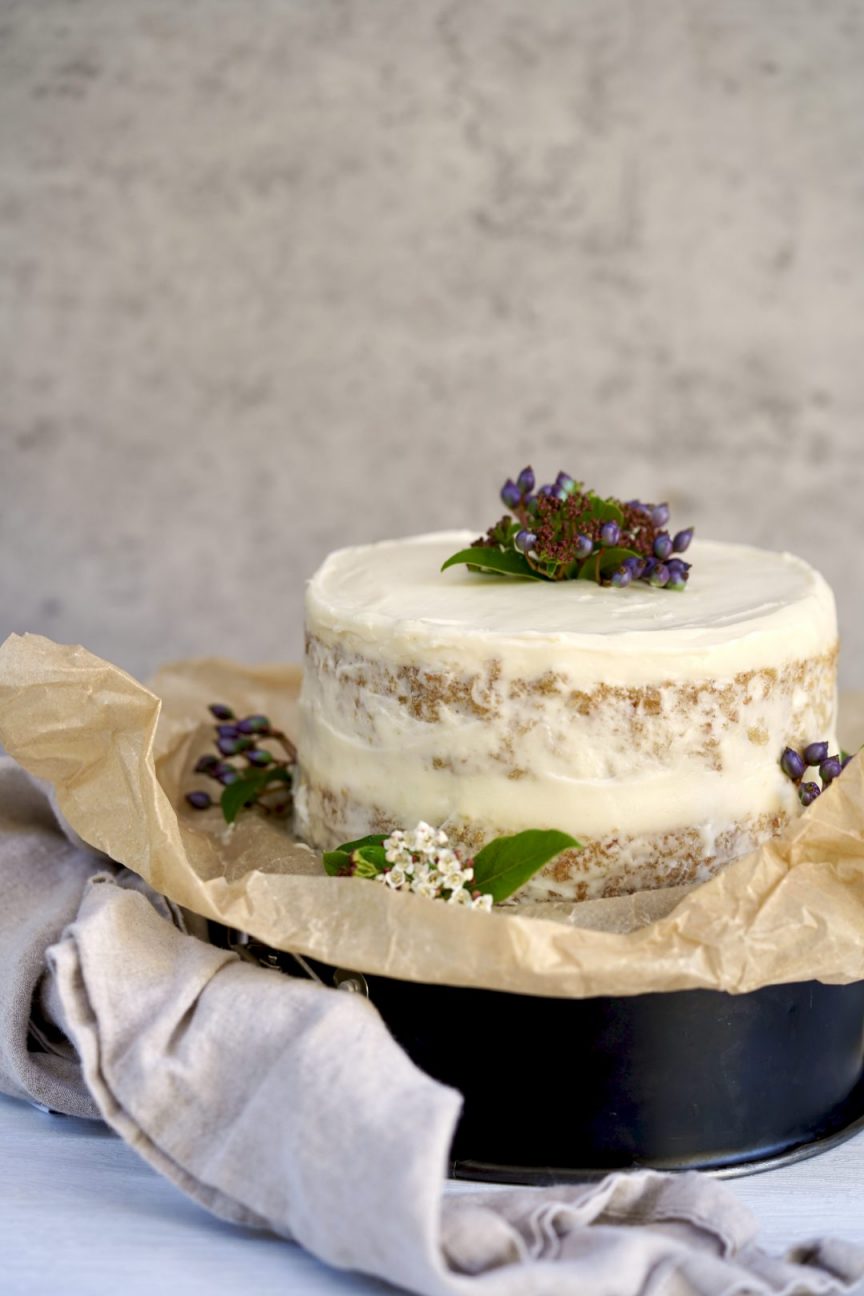
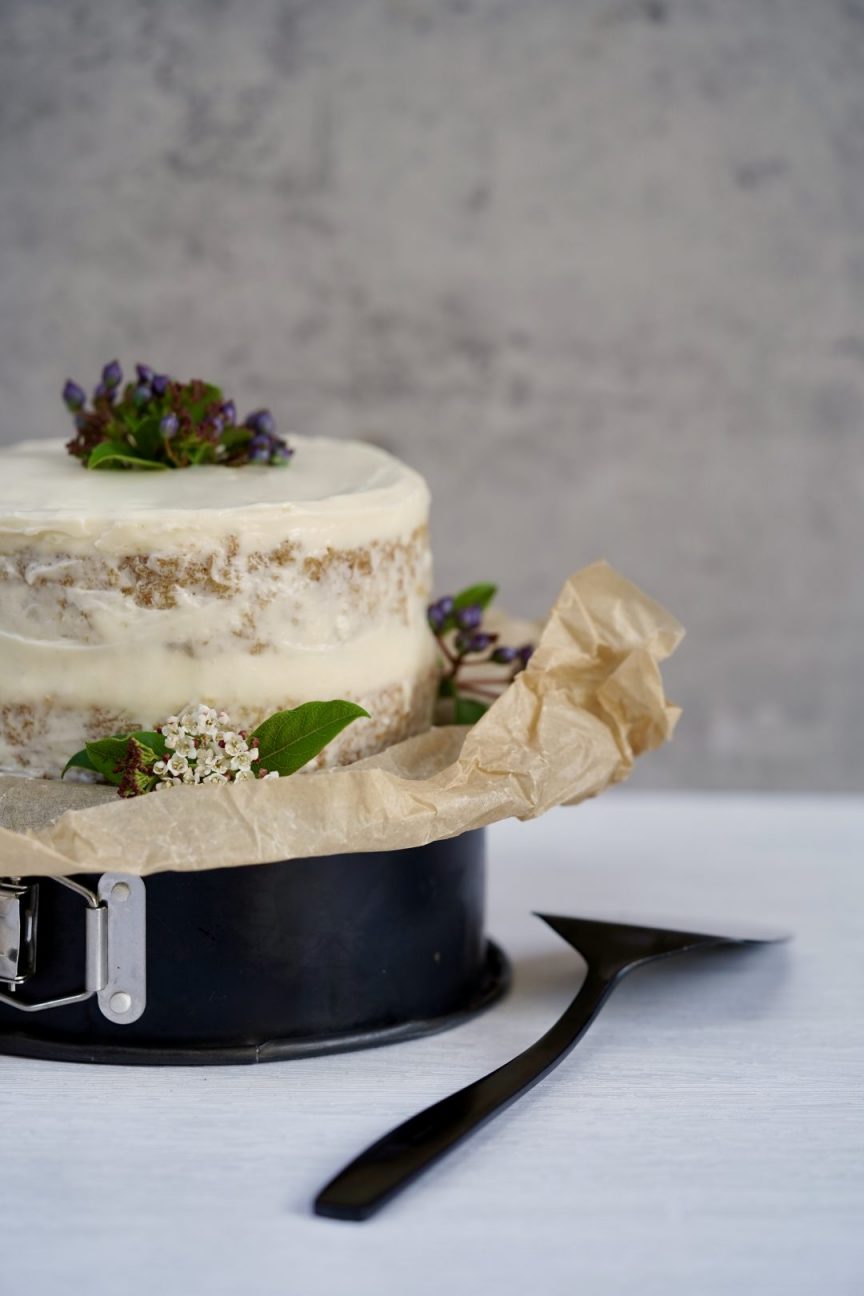
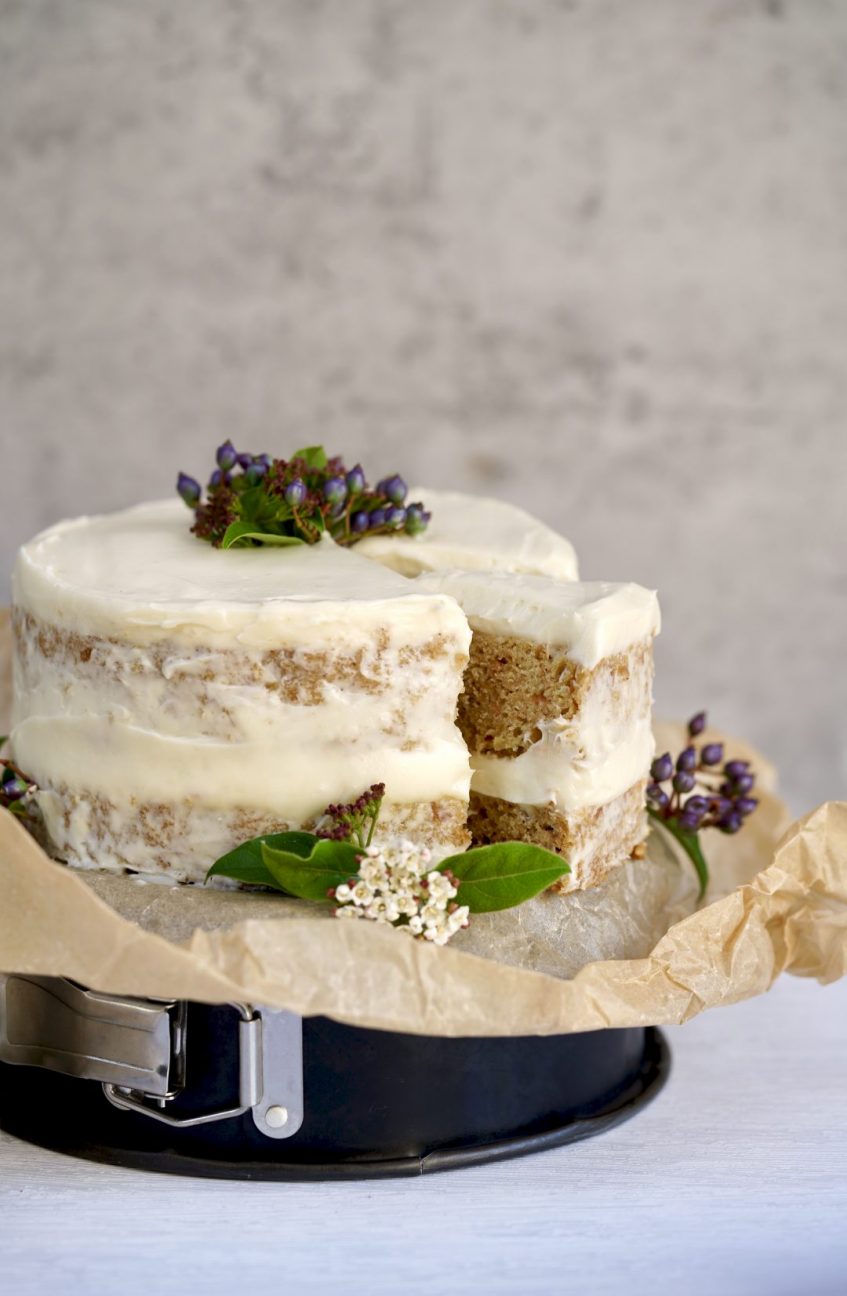
A quintessential autumn dessert; an apple and olive oil semi-naked cake with creamy maple frosting. This is a new fall favorite I recently developed and I’ll be making this throughout the season. This lovely cake highlights seasonal flavors we’ve all come to adore: apples, cinnamon, and maple. The twist is Extra Virgin olive oil, which makes this cake rich in flavor with moist layers. Topped with a simple semi-naked frosting, almost anyone can master, this cake is the cake of the season.
What Are Naked Cakes
There are two types of naked cakes. This apple and olive oil cake is cake is a “semi-naked“, cake, also known as a “nearly-nude“, or “half-dressed” cake. A semi-naked cake has a minimal amount of frosting around the sides. In culinary terms, this means a semi-naked cake is a crumb-coated cake. A “crumb coat” is a thin layer of frosting that bakers apply to a layer of cake before the final frosting. The crumb coat keeps stray crumbs from coming loose during the decorating process. In contrast, a “naked cake” is a cake where the sides of the cake are completely bare of any frosting. And that’s why it’s “naked” because the crumbs are exposed.
The History of Naked Cakes
Naked cakes are everywhere after exploding onto the culinary scene in 2014. Christina Tosi, the chef, founder, and owner of Milk Bar, began selling naked cakes for $400 apiece. Tosi believed that the most exciting, texturally, interesting parts of the cake were the layers-and she didn’t understand why bakers chose to hide them.
The biggest complaint about naked cakes is dryness. Without frosting to seal in the moisture, cake layers can often dry out too quickly. But this apple cake is different, the addition of olive oil in this cake makes the frosting, less essential. A semi-naked style cake is also less likely to dry out, compared to a fully naked cake, since there is a little bit of frosting holding in the moisture. Some critics say this style of cake appears “unfinished“, but I disagree and welcome their simplicity.
Baking With Olive Oil
Olive oil is the secret ingredient in my apple cake and what creates moist, tender, flavorful layers. What many home bakers don’t know, is that olive oil can be used in place of many traditional cooking oils. You can easily swap out the same amount of vegetable or canola oil for Extra Virgin olive oil without issue. In terms of the best Extra Virgin olive oil to use, you want a mild, buttery olive oil with low bitterness and fruity notes.
You can also use mild olive oil instead of butter in most baking recipes. Typically this works best if the recipe calls for melted butter. For baked goods, one should just use slightly less olive oil than better. Meaning, that three parts olive oil to four parts butter is the general rule of thumb. In cake baking, butter can be aerated with sugar to create air bubbles which gives the cake lift. Olive oil does not do that. Instead, the lift comes from leavening agents (baking powder and baking soda) and whipped egg whites, as is the case in this recipe. Another olive oil-based cake I adore is one I make in cupcake and cake form often.

If you’re not yet a naked cake fan, I urge you to reconsider. There are several advantages to it. For starters, this playful style has a rustic vibe that works well with casual gatherings. And, perhaps the best part, a naked cake prevents you from having a frosting disaster which, let’s be honest, we have all had at one point or another.
The truth is, sometimes simplicity is the easiest. And I know it may be a bit of a stretch to say it, but perhaps a naked cake is even a little healthier. I made this cake on the less sweet side generally, but less frosting will also lower the overall sweetness of the cake as a whole. So, the takeaway, is if you’re the type who prefers the cake layers a little more than the sugary frosting (such as my husband), you’ve just found your ideal go-to cake.
Apple And Olive Oil Semi-Naked Cake With Maple Frosting
Ingredients:
For the Apple Cake:
- 2 1/4 cups all-purpose flour
- 1/2 teaspoon cinnamon
- Dash of salt
- 1 1/4 teaspoons baking soda
- 1/2 teaspoon baking powder
- 1/2 cup good quality Extra Virgin olive oil
- 3/4 cup sugar
- 1 teaspoon vanilla extract
- 2 eggs
- 2 medium Granny Smith apples, peeled and grated
- 1 medium Honey Crisp apple, peeled and grated
- 2 egg whites
For the Maple Frosting:
- 8 ounces cream cheese, softened
- 7 tablespoons unsalted butter, softened
- 3 tablespoons good quality maple syrup
- 1 cup Confectioners' sugar
Directions:
- Lightly grease an 8-inch springform pan, line with parchment paper, and lightly grease the parchment. Set aside Preheat the oven to 325 degrees F.
- In a small mixing bowl all the flour, cinnamon, salt, baking powder, and baking soda, mix well to blend. Set it near your workstation. ;;In the bowl of a kitchen mixer, such as a KitchenAid, fitted with a paddle attachment, add the olive oil, sugar, and vanilla, and mix to blend. Add the eggs one at a time, and mix, until blended, scraping down the sides as needed with a rubber spatula.
- Use your hands to gently squeeze out any excess liquid from the grated apple. Add to the egg mixture and blend. With the mixer on low, add the flour mixture. Pour the cake batter into a medium mixing bowl and set aside.
- Clean the mixer bowl and attach the whisk attachment. Add the egg whites and beat high till soft peaks form. Use a large rubber tip spatula to gently fold in the whipped egg whites being careful not to over-mix.
- Pour the batter into the prepared baking pan. Flatten the top as best as possible. Place the cake in the oven and bake for about 45-50 minutes or until set and a cake tester inserted into the middle comes out clean. Allow the cake to cool completely. In the meantime, make the frosting.
- For the frosting, clean the mixing bowl again and attach the paddle attachment, Add the cream cheese and butter and beat on high to blend. Scrape down the sides and add the maple syrup, beat on medium-high to incorporate. With the mixer on low, slowly add the confectioners' sugar and whip till smooth and blend. Refrigerate the frosting until the cake has cooled.
- To Frost the Cake: Place the cooled cake on a cutting board. Using a large serrated knife, trim the cake tops, bottom, and sides. Next, slice the cake in half lengthwise into two equal layers. Gently, set one cake layer to the side. Place the bottom layer on a serving platter. Spread a generous amount of frosting on top of the first layer. Using an off-set spatula, smooth out the frosting going slightly over the edge. Top with second cake layer and evenly cover the top with another generous amount of frosting and bread evenly around. Spread the remaining frosting all around the sides using the offset spatula or an icing spatula.
- Refrigerate the cake to set the frosting for at least 30 minutes before serving.
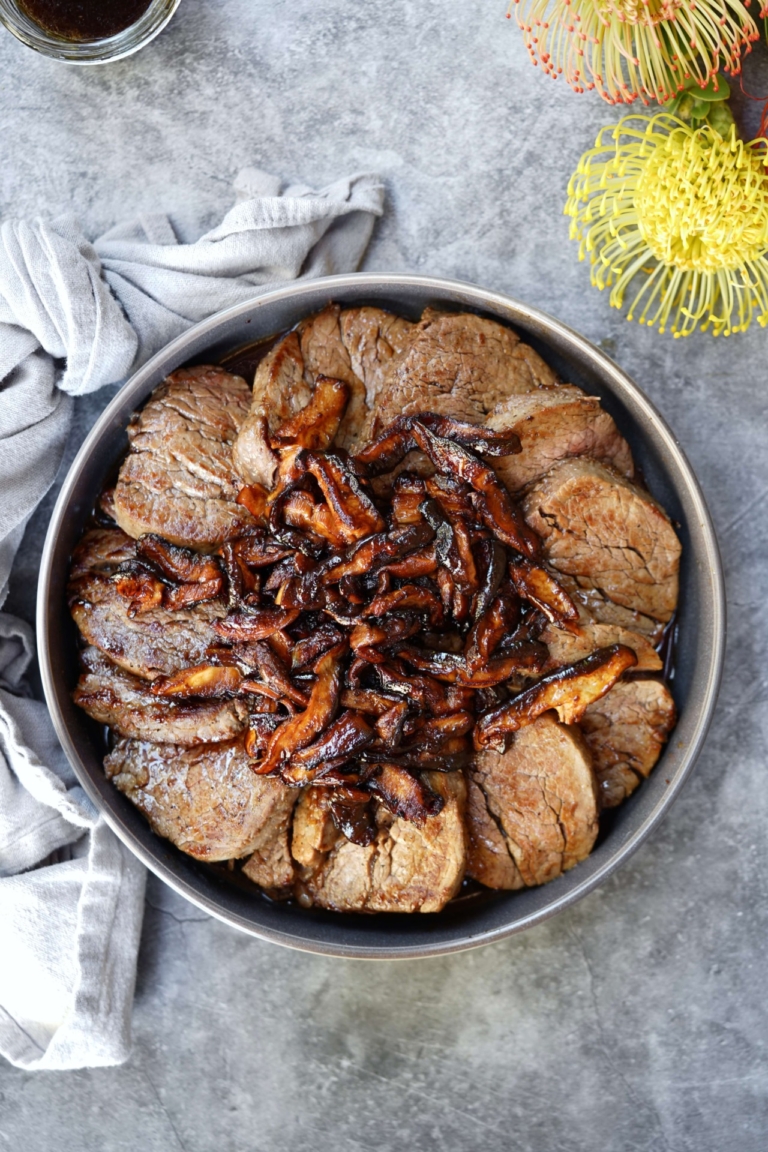
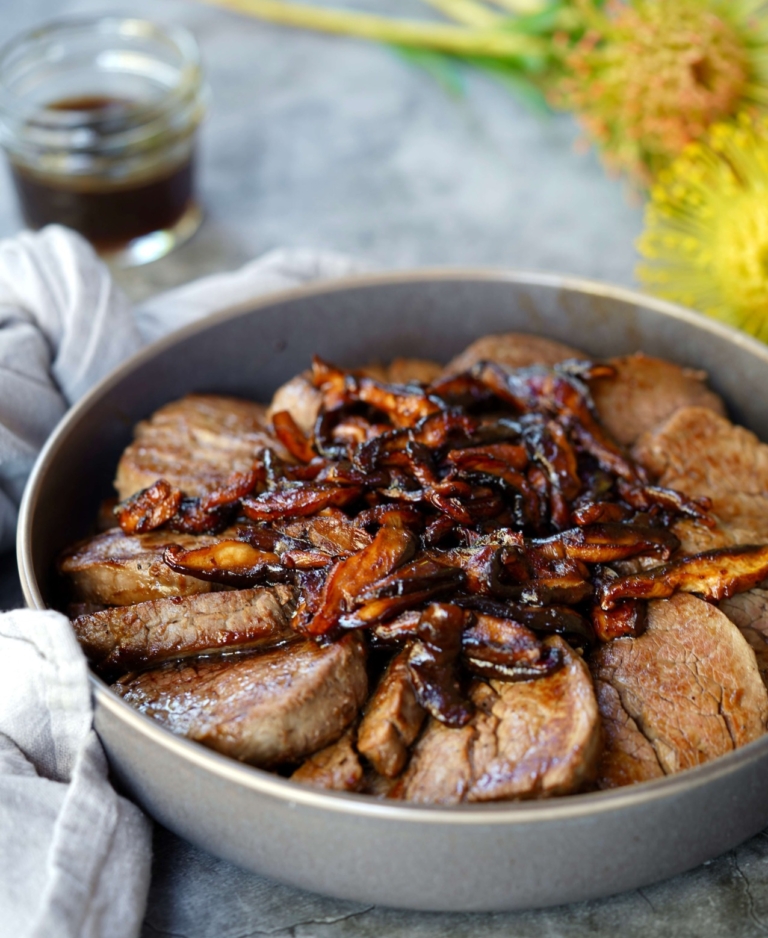
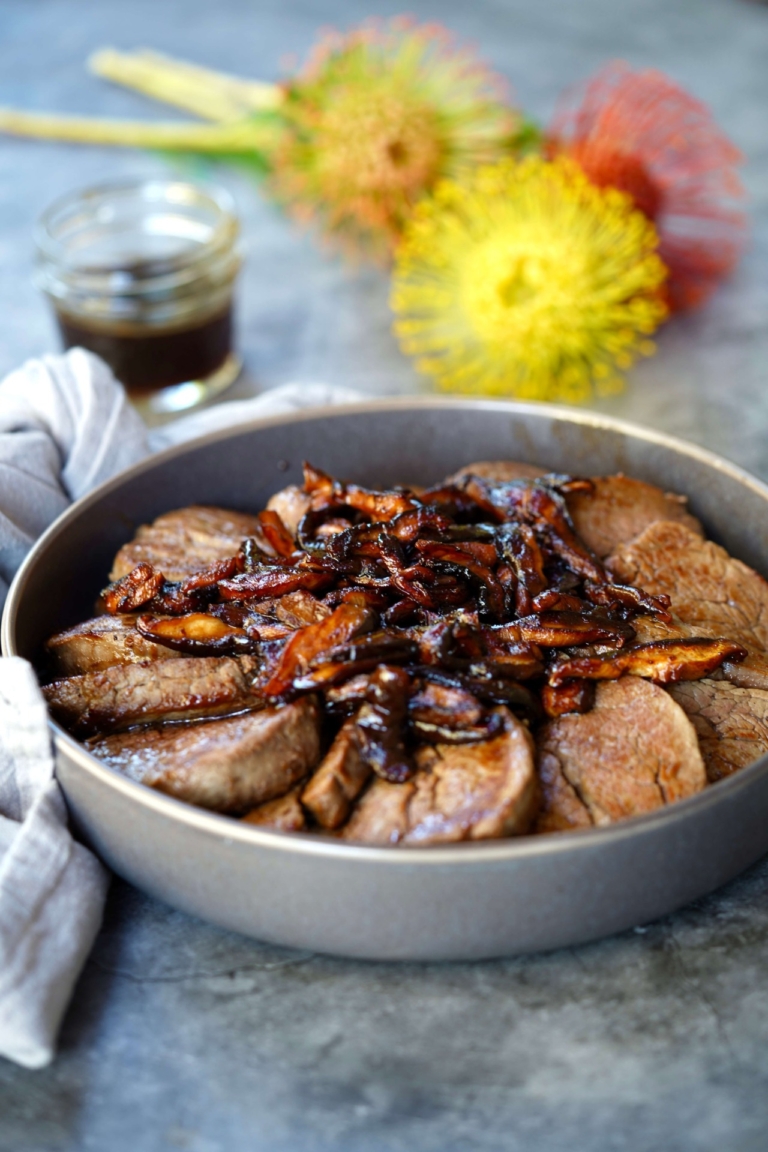
Easy dinner alert. This soy-glazed beef fillet is a lovely, Asian-inspired, dish that should be in your recipe arsenal if you’re a meat eater. A tender fillet of beef and flavorful shiitake mushrooms complement one another perfectly, with a prep-and-forget marinade I adore. A quick sear on high heat makes for a simple finish minutes before serving, making this main dish a star and quick meal for anyone who simply can’t find the time to cook.
Best Cuts of Meat and How to Cook Them
- T-Bone: Ideal for grilling or pan-frying
- Porterhouse: Best cuts to throw on the grill
- Ribeye: A steak you can cook for a little longer with no consequences
- Filet Mignon: Great for marinading
- New York Strip: Best for high-heat cooking; broiling, pan-searing, and grilling
Filet of Beef
Filet mignon, also known as tenderloin, is one of the most expensive cuts of meat available. Once it’s trimmed off its fat, gristle, and silver skin, this lean piece of meat is quite compact. Filet is what people know as the buttery, leaner cut of meat. This cut is low in fat and cooks very fast making it an ideal cut for those in a hurry.
One drawback of filet is because of the lack of fat, it does not offer a ton of flavors resulting in a milder taste. But, for this soy-glazed beef filet recipe, that mildness is exactly what I’m seeking, and allows the marinade to work its’ magic. The result is a very flavorful steak dish that’s memorable. But note, when preparing this kind of lean meat, you have to be especially careful not to overcook it. The low-fat content makes it susceptible to drying out if you cook it too long.
Marinade Elements
A flavor-packed marinade, such as in this soy-based one, is interracial to this recipe’s success. A marinade is a pre-cooking soak of liquid ingredients along with herbs and spices that not only adds flavor and moisture to meats but also acts as a tenderizing agent. Below are the key elements of a successful marinade.
- Oil (or other fat) coats the meat and becomes infused with all of the flavors in your marinade.
- Acid (like vinegar or lemon juice) helps to tenderize the meat.
- Something salty or something sweet adds to the richness.
- Flavoring, herbs, onions, and garlic, enhance taste.
This is a favorite recipe of my younger son, who loves filet about as much as he loves mushrooms. I commonly serve this dish with my cucumber and kohlrabi salad, or Panzanella salad, keeping with the fusion vibe I’m so fond of.
Soy Glazed Beef Fillet With Shiitakes
Ingredients:
- 1 1/2 pounds beef tenderloin, cut into 1-inch thick slices
- 1/3 cup low sodium soy
- 1 cup mirin
- 1/4 cup toasted sesame oil
- 3 tablespoons honey
- 2 teaspoons ginger, grated
- 1 bunch cilantro
- 10 ounces shiitake mushrooms, stems removed and thinly sliced
- 3 tablespoons Extra Virgin olive oil
- Salt and freshly ground black pepper to taste
Directions:
- In a large bowl, add the soy sauce, mirin, sesame oil, honey, ginger and cilantro. Strain 1/3 cup of the marinade and set aside.
- Place the beef slices in a large, shallow baking dish. Add the sliced mushrooms and cover with the marinade. Cover and refrigerate for 1 hour, turning the beef slices over halfway through.
- The ready-to-serve, place a large skillet over medium-high heat. Add 2 tablespoons of the olive oil. Remove the beef from the refrigerator and place the beef on a plate lined with a paper towel to blot dry. Season with black pepper, no additional salt is needed.
- When the oil is hot, but not smoking, add the beef and cook for about 3 minutes per side for medium-rare. Remove the meat from the pan and place on a serving platter. Using a pastry brush, lightly brush the beef with the reserved marinade. Allow the beef to rest while you cook the mushrooms.
- Add the remaining olive oil to the pan and place back over medium-high heat. When hot, add the mushrooms. Season with salt and pepper and cook stirring occasionally until you begin to see some nice coloration, about 5 minutes.
- To serve, fan the seared beef on the serving platter and top with the mushrooms. Serve with the reserved marinade
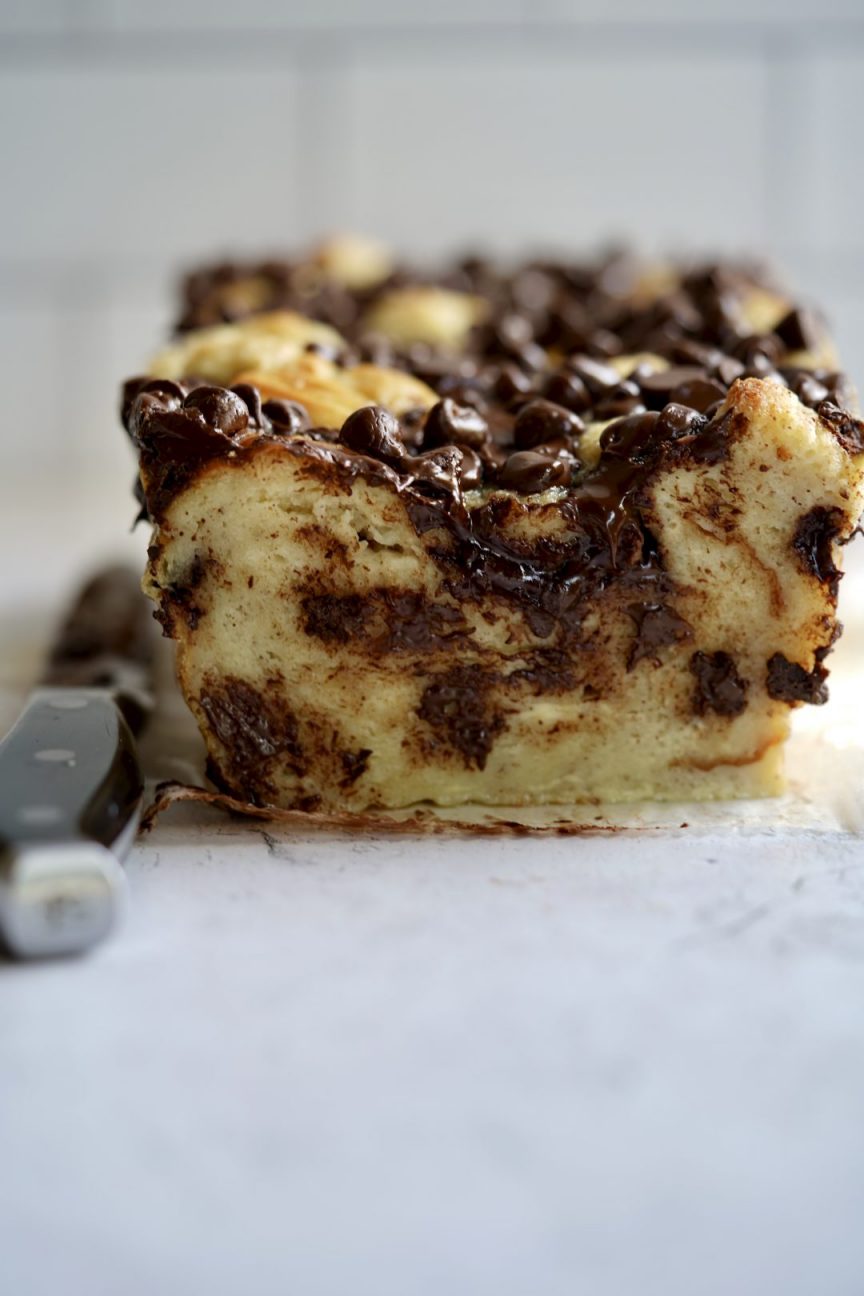
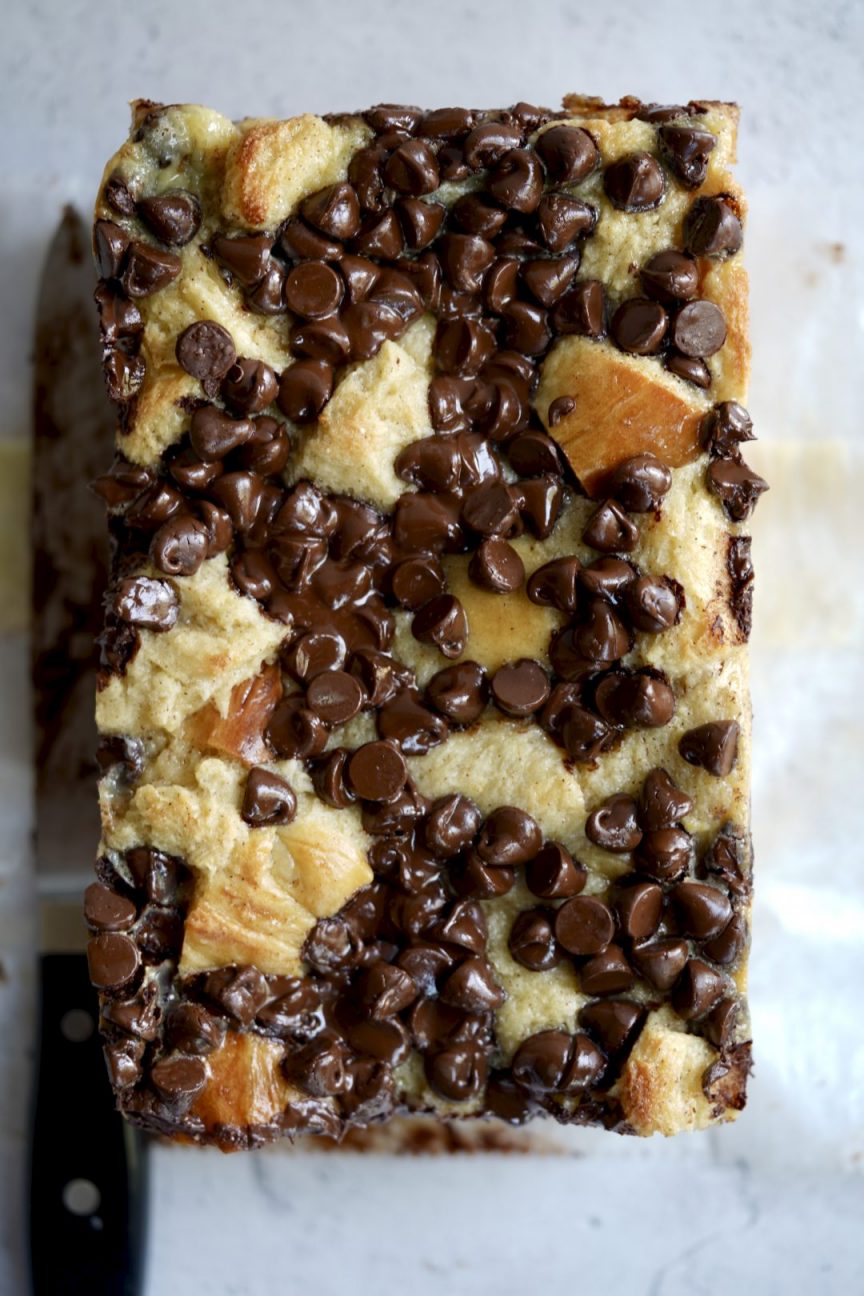
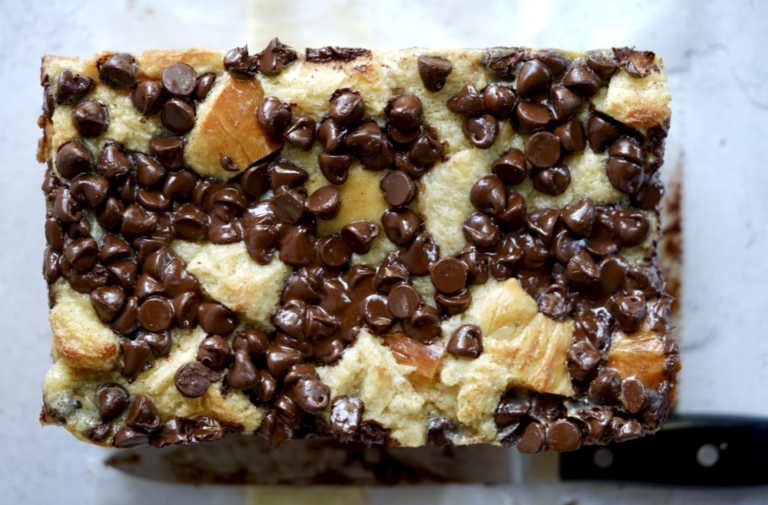
It’s remarkable to think that bread pudding, something that originated in the 11th century, has risen its way up the ranks to become a “trendy dessert” around the world. In the early 11th and 12th centuries frugal cooks began making bread pudding to use leftover bread and eliminate waste. By the 13th century, the English had coined this popular, and now common dish, “poor man’s pudding”.
A Pandemic Obsession
Bread pudding and I have a long history as well. The bread pudding was one of the dishes I became responsible for at my first job as a line cook. As the only woman in the kitchen, desserts became my responsibility, albeit, not part of my actual job. Like rice pudding, I made bread pudding several times a week. But this dish, which I was so familiar with, took on a whole new meaning (and obsession) once the pandemic struck.
During the pandemic, stuck in lockdown, we all had a feeling of fear and hopelessness. With our world upside down, (and no vaccine in sight) the looming sense of doom and uncertainty was overwhelming. Panic was everywhere and things like toilet paper and basic pantry staples were suddenly hard to come by. My chef instincts, (like Spidey’s senses), quickly kicked in, and eliminating waste became a serious focus for me. As did stress-baking, and a tall pour of Sauvignon blanc in the late afternoon.
Don’t Judge a Stress, Baker
Deep within my baking phase were sub-layers of other comfort foods I obsessed over. I can’t recall them all surprisingly, but the most notable were; breads, cocktails, and my chocolate bread pudding phase. The latter began on Fridays when I baked a fresh loaf of challah bread. The challah was essential to Shabbat, but simultaneously served two other equally important purposes: breakfast Saturday morning (cinnamon French toast) and dessert Sunday night. Bread pudding became a welcome ritual for all of us. We had something to look forward to. And whether it was served chilled with homemade whipped cream (how my older son prefers it), or warm with whipped, (like my husband and younger son prefer it), chocolate bread pudding brought the comfort we all craved.
Homemade or Store Bought
In the post-pandemic period, I have made this dish a bit less frequently, but when I do, it’s celebrated. It’s not discussed among us; it’s just understood as something special that bonds us. I still bake fresh challah every Friday so that is what I use to make my chocolate bread pudding. But you don’t have to bake the challah to make this classic dessert, any challah or brioche-type bread will work just as well.
Chocolate Bread Pudding
Ingredients:
- 5 cups challah (or brioche) bread, cut into 1-inch cubes
- 3 cups milk
- 1 cup heavy cream
- 3 large eggs
- 1 cup sugar
- 1 tablespoon vanilla extract
- 1 teaspoon cinnamon
- 1 1/4 cups semi-sweet chocolate chips
Directions:
- Preheat the oven to 350 degrees F. Line a standard loaf pan with parchment paper leaving enough for overhang on the longer sides. Lightly oil and place on a baking sheet.
- In a large mixing bowl add the milk, heavy cream, eggs, sugar, vanilla and cinnamon and whisk well to blend.
- Place the cubed bread in the bowl and using a large rubber tip spatula, gently mix to coat. Allow the bread mixture to sit, undisturbed, for 20 minutes.
- Once the bread has had time to soak, pour half the mixture into the prepared pan. Use a spatula to spread out the mixture evenly. Sprinkle half the chocolate chips over the bread. Pour the remaining bread mixture on top of the chocolate chips and again, even as best as possible. Sprinkle the remaining chocolate chips on top.
- Place the baking sheet and loaf pan into the oven, allow to cook, uncovered, until lightly golden brown, and set about 50 minutes. Remove from the oven and allow to cool slightly before serving.
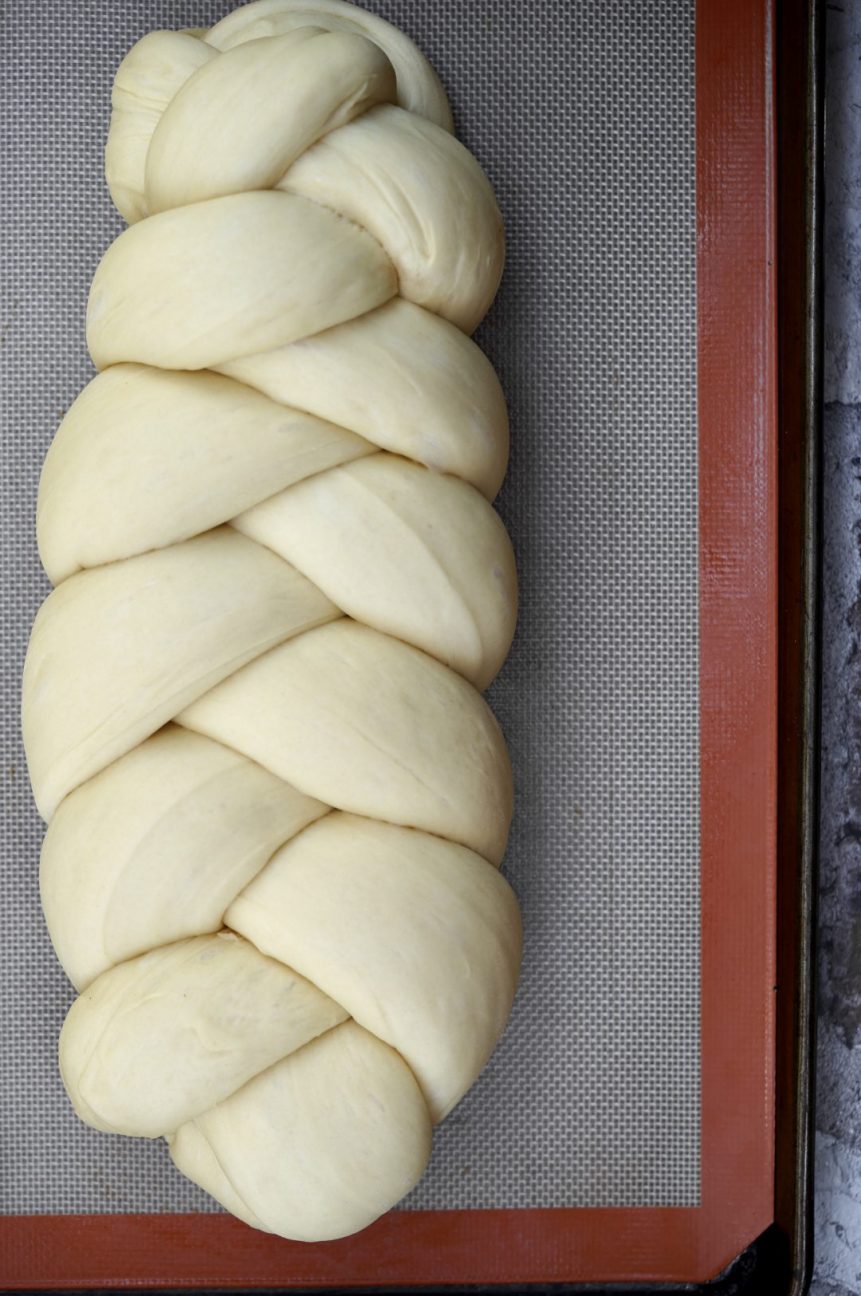
Challah is a bread Jews consume on the Sabbath and holidays and it is surrounded by folklore, tradition, and symbolism. Braided challahs with three, four, or six strands are the most common. And because the braids look like arms intertwined, many people believe that they represent love.
Noah’s Bar Mitzvah
This is Noah’s favorite challah bread and one I now make weekly. This is not my recipe, the original is by Marcy Goldman, and it can be found in her cookbook, Jewish Holiday Baking. I have lightly adapted Goldman’s recipe over the years to fit our families’ tastes. This challah recipe has become especially meaningful for my younger son. I made this challah recipe for Noah’s bar mitzvah which was in December 2020. Like many special life events at the time, the severity of Covid meant we needed a new plan. The inability to gather in groups meant Noah’s bar mitzvah could not be held in person. Instead, we needed to hold it in our backyard, on Zoom, and (for the safety of everyone) without guests. At first, this was heartbreaking to accept. This was not the plan our son had worked so hard for. But Noah pushed ahead with grace and grit, despite the absence of family and friends and the intimidating presence of cameras, screens, mics, lights, and a full tech crew before him.
Something We All Need
In his speech, my son spoke about food and its significance in life, Judaism, and within our own family. He spoke about how food sustains us and connects us because we all need it. My son’s bar mitzvah was actually one of the first zoomitzvahas during pandemic life and something most were still unfamiliar with. To make the service feel a bit more special for those viewing, we sent small care packages to guests ahead of the big day. Inside the packages were some service essentials; a program, yarmulkas, candy to be tossed in the air in celebration when prompted once Noah completed his ceremonial duties, and a recipe for Noah’s favorite challah bread.
Feel the Love
What was so amazing, was on the actual day of Noah’s bar mitzvah, when I welcomed guests online before the service started, I looked up at a giant screen with all our guests, and saw many holding up beautiful, freshly baked challahs, made for the service, using the recipe we sent. I was blown away by this incredibly thoughtful gesture. The challahs, of all shapes and sizes, were incredible and connected all of us, even remotely.
Baking challah, or any bread for that matter, is a labor of love. Baking bread requires patience and flexibility that one obtains through repetition. But bread baking is also cathartic. Baking bread can provide a release of emotions, tensions, and stressors we all have within us, even if we don’t know it.
Noah nailed his zoomitzvaha and this challah bread, both plain or raisin, helped my whole family through the worst of the pandemic. It sounds silly I know, but it’s true. The challah helped calm our frayed nerves at the end of the week, it was truly restorative.
My Challah Tips
This particular recipe makes two very large challahs. Truthfully, when I make it, I typically split the recipe (which is not the easiest thing to do as halving an egg can be tricky), but trust me, it’s doable. I also adjust my flour amounts weekly based on the humidity that day, which one learns how to do with repetition. The main takeaway from this is that challah bread can be forgiving. The most important tip is to always use fresh yeast and activate it properly before you begin.
I hope you give Noah’s favorite challah recipe a try and if you do, please drop me a note and let me know if you enjoyed it. Because this is such a special recipe to me, I’d really love to hear your thoughts.
Noah's Favorite Challah Bread
Ingredients:
For the Sponge:
- 1 1/2 cups warm water
- 2 tablespoons dry active yeast
- pinch of sugar
- 2 cups bread flour
For the Dough:
- 1/2 cup warm water
- 3/4 cup sugar
- 3 teaspoons kosher salt
- 3 eggs, plus 1 egg yolk
- 1/2 cup vegetable oil
- 5-6 cups bread flour (as needed)
For the Egg Wash:
- 1 egg plus 1 egg yolk
Directions:
- For the Sponge: In a very large bowl, add the water, dry yeast, and pinch of sugar, mix well to blend, cover tightly with plastic wrap, and allow to rest for several minutes until the yeast swells and looks puffy. Mix again, add the flour, and stir until combined. Cover the bowl with plastic wrap again, place in a warm spot in the kitchen, and allow to rest for 1 hour.
- For the Dough: Stir down the sponge mixture in the work bowl and pour into a kitchen mixer, such as a kitchen Aid. Add the rest of the water, sugar, salt, eggs, egg yolk, oil, and about 5 1/2 cups of bread flour. Use your hands to mix until the dough is coming together but messy. Attach the bread hook attachment, cover the bowl with a damp kitchen cloth, and allow the dough to rest as is for 15-20 minutes to allow the dough to relax. After the rest period, turn the mixer on low and knead the dough with the dough hook until it's smooth and elastic, about 8-10 minutes adding an additional 1/4-1/2 cup flour as needed, to make the dough that is easy to handle and not too sticky or tacky.
- Shape the dough into a ball and place in a large lightly greased mixing bowl. Place the bowl in a large plastic ziplock or garbage bag and close it loosely. Let the dough rise in a draft-free, warm environment until almost doubled in size, anywhere from 45 minutes to 90 minutes depending on the warmth of your kitchen.
- Line two baking sheets with parchment paper and set near your workstation. Gently deflate the dough. If making two challahs, divide the dough in half for 2 loaves. Working with one at a time, divide into three equal pieces. Roll each of the three pieces into long event strands, about 12 inches in length. Gently pinch the top of the three strands together and braid the strands as you would a child's hair. Pinch the strands at the end. Tuck a small portion of each end slightly under the loaf and place it on the prepared backing sheet. Repeat this process with the remaining dough so you have two braided chilled loaves. Using a pastry brush, brush the loaves with the egg wash. Place both baking sheets in plastic bags. Or tent the challahs with plastic wrap and allow them to rise for 45 minutes to 90 minutes. (I find tenting to be easier than inserting the trays in large bags)
- Preheat the oven to 375 degrees F. Place the challah in the oven and reduce the heat to 350 degrees. Bake the challah, rotating once, until medium brown, about 30-35 minutes for two loaves. Bake for about 40 to 45 minutes for one large challah. Allow the challahs to cool before serving.
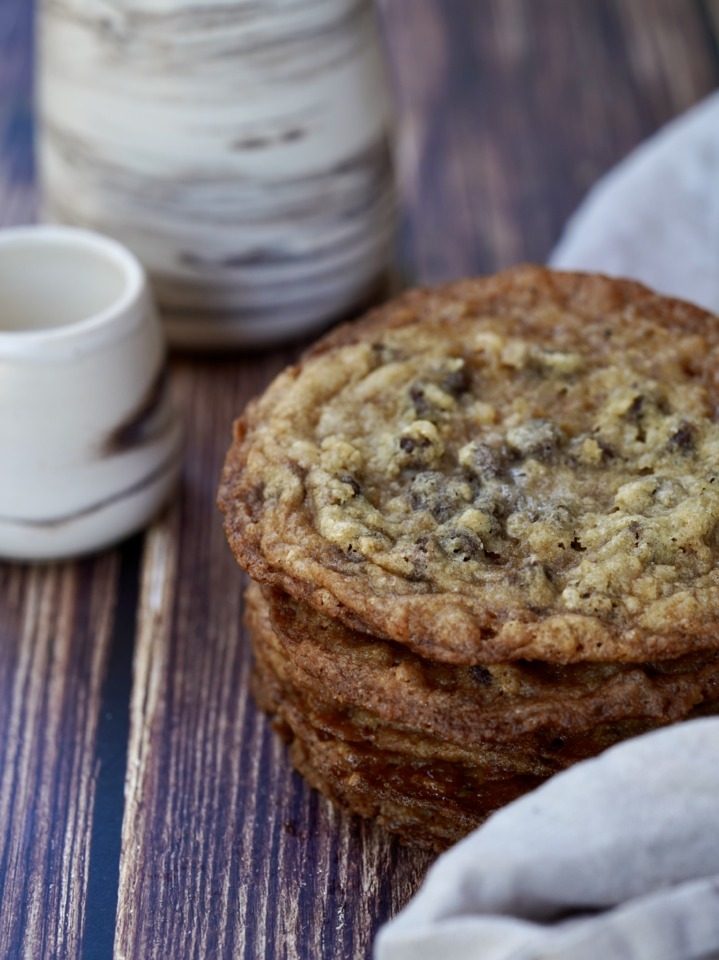
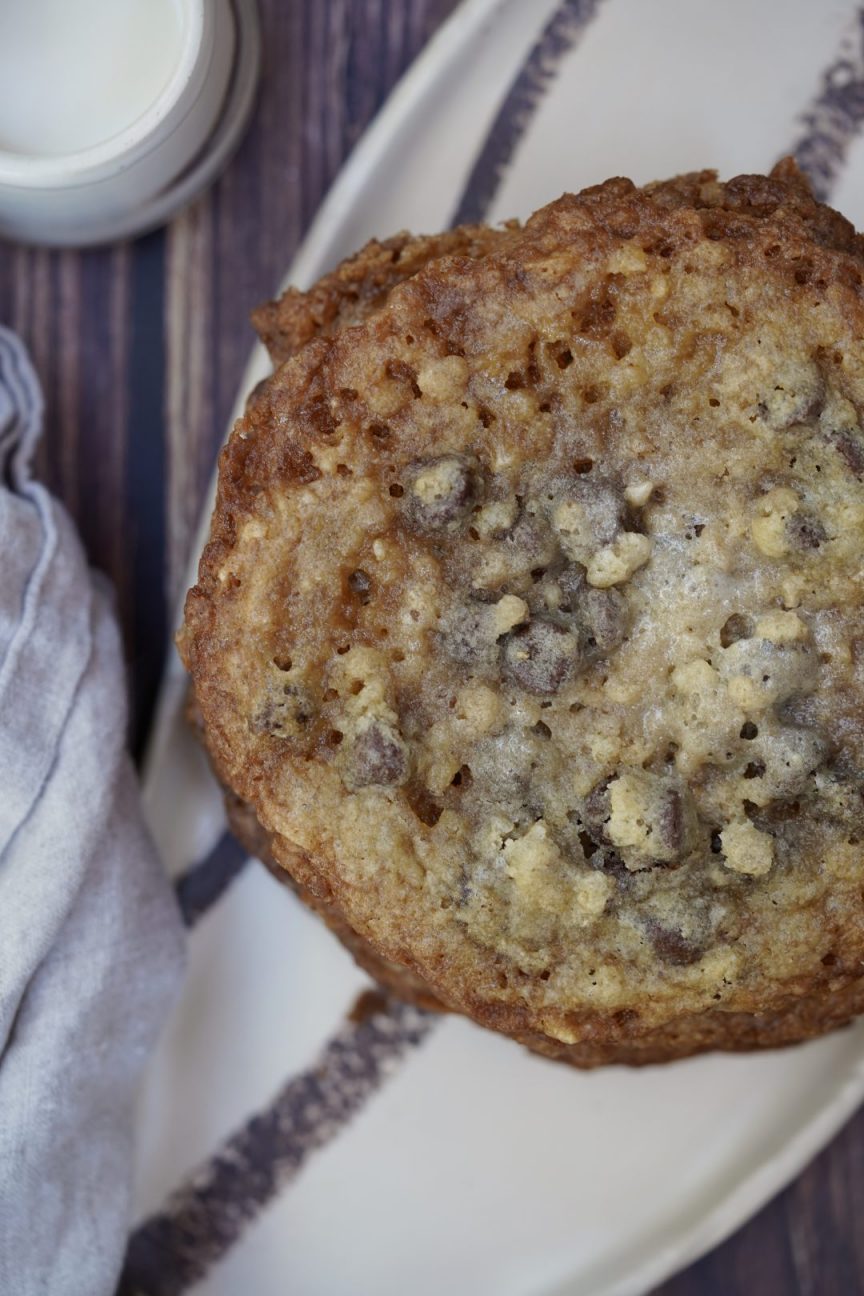
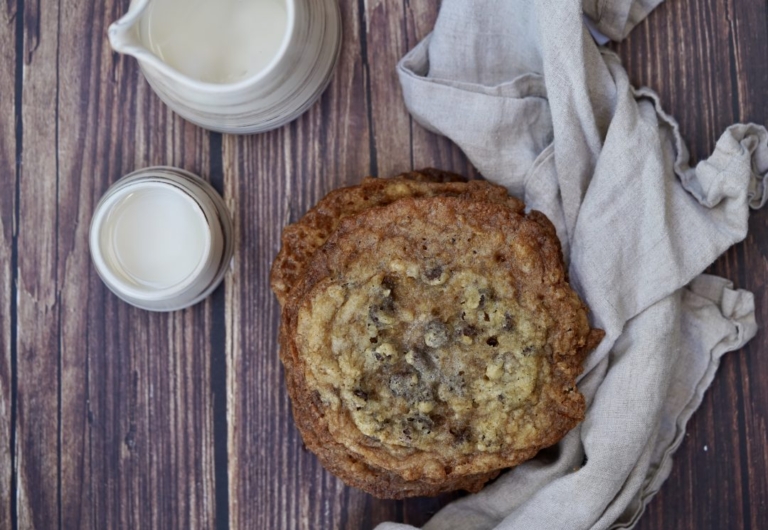
I have never been a big breakfast cereal fan. But, mix some cereal into a cookie, like in these chocolate chip rice krispie cookies or in ice cream and it’s a game changer. Historically, breakfast cereal has become a highly competitive market. And whether for health or convenience reasons, consumers have been hooked on cereal since its invention.
The History of Cereal
In 1863, James Caleb Jackson, who was a vegetarian and ran a medical sanitarium in western New York, created a breakfast cereal using graham flour dough that was dried and broken into shapes that needed to be soaked in milk overnight. He called it “granular“. Soon after, John Harvey Kellogg, a surgeon who ran a health spa in Michigan, made a similar version he called “granola“. But it was a patient of Kellogg’s, named C.W. Post, who created “Grape-Nuts“, which would is what went on to become the first popular cereal product.
Kellogg
John Harvey Kellogg along with his younger brother, Will Keith Kellogg, discovered a way to make a flaked cereal which they called “Corn Flakes“. Will Kellogg had the idea to add sugar and began mass-marketing them, which included putting an in-box prize. Post developed a similar cereal Corn Flakes which he called “Elijah’s Manna“, that later got renamed “Post Toasties” after receiving flack from a religious group.
Quaker
In the early 1900s, the Quaker Oats Company had devised a method of forcing rice grains to explode under pressure, and began marketing “Puffed Rice” and “Puffed Wheat” as a breakthrough in food science, calling them the first “food shot from guns” and a new “wonder of the world.”
1920-1930
In the 20’s-the 30s, a health clinician accidentally spilled a wheat bran mixture onto a hot stove, creating what would come to be called “Wheaties“. The Ralston Purina company introduced “Wheat Chex“, calling it “Shredded Ralston“. It was intended to feed followers of Ralstonism, a strict, racist social movement that included a belief in controlling the minds of others. Cheerios first entered the market as “CheeriOats“, but were quickly renamed.
The Talking Cereal
Around the same time, Kellogg was hard at work on a puffed rice cereal ad that was officially launched to the public in 1928. What made Rice Krispies stand out was the very distinct noise they made when milk was added. Because of this, Rice Krispies were initially marketed as “The Talking Cereal” back in 1928.
According to Mashed.com, the “talking” is apparently due to the physical structure of the cereal. Rice Krispies are made by cooking rice at a high temperature. This makes the rice expand or puff up, creating pockets of air divided by bonded starch molecules. This causes the cereal to behave like a piece of glass. Liquid (milk) puts pressure on the air pockets, pushing the air up against the thin walls of the pocket, and shattering it. And it’s that shattering that makes the distinctive snap, crackle, and pop noises Rice Krispies are known for.

Post-World War II
After World War II, cereal consumption increased with the baby boom, and the addition of sugar became a huge selling point. It was also when Kellogg’s invented its signature cereal, “Frosted Flakes“, launching breakfast cereal into a whole new direction.
The word is still loved cereal today. Revenue in the breakfast cereals market amounts to$72 billion dollars as of 2022. And although I don’t like breakfast cereal for breakfast, I am still a consumer. Case in point, these outrageously delicious, slightly, chewy, slightly crispy chocolate chip cookies with rice krispies. The addition of Krispies takes these buttery chocolate chip cookies to a different playing field. My compost cookies, featuring cornflakes, were the inspiration behind these cereal cookies and got me thinking, perhaps I’m a cereal gal after all.
Chocolate Chip Rice Krispie Cookies
Ingredients:
- 2 sticks, plus 1 tablespoon unsalted butter, softened and divided
- 1 1/4 cups sugar
- 2/3 cups brown sugar
- 1 egg;1 teaspoon vanilla extract
- 1 1/2 cups all-purpose flour
- 1/2 teaspoon baking powder
- 1/4 teaspoon baking soda
- 1 teaspoon kosher salt
- 2 1/2 cups Rice Krispies
- 1 1/4 cup semi-sweet chocolate chips
- 1 cup marshmallows, melted
Directions:
- Preheat the oven to 350 degrees F. Lie two baking sheets with parchment paper and set aside.
- In a small saucepan add 1 tablespoon butter and the marshmallows and place over low heat stirring occasionally. Once melted, remove from the heat and allow to cool slightly.
- In a small bowl add the flour, baking powder, baking soda, and salt. Mix to blend and set aside.
- In the bowl of a kitchen mixer, such as a KitchenAid, fitted with a paddle attachment, add the remaining two sticks of butter and both sugars. With the mixer on medium, beat, scraping down the sides as needed, until fluffy, about 1 minute. Add the egg and vanilla and mix to blend.
- With the mixer on low, add the flour mixture. Once incorporated, add the Rice Krispies followed by the chocolate chips. Remove the bowl from the stand and using a large rubber spatula, gently fold in the melted marshmallow being careful not to over-mix.
- Scoop about 1/3 cup into your hand and gently roll it into a ball. Place 5 cookies per baking sheet giving the cookies plenty of room to expand while baking. Place in the oven and bake, rotating once halfway through, until golden brown around the edges, about 8-10 minutes.
- Remove the cookies from the oven and allow them to cool for a few minutes before carefully transferring them to a wire rack to finish cooling and firm up. Repeat the about with the remaining cookie dough
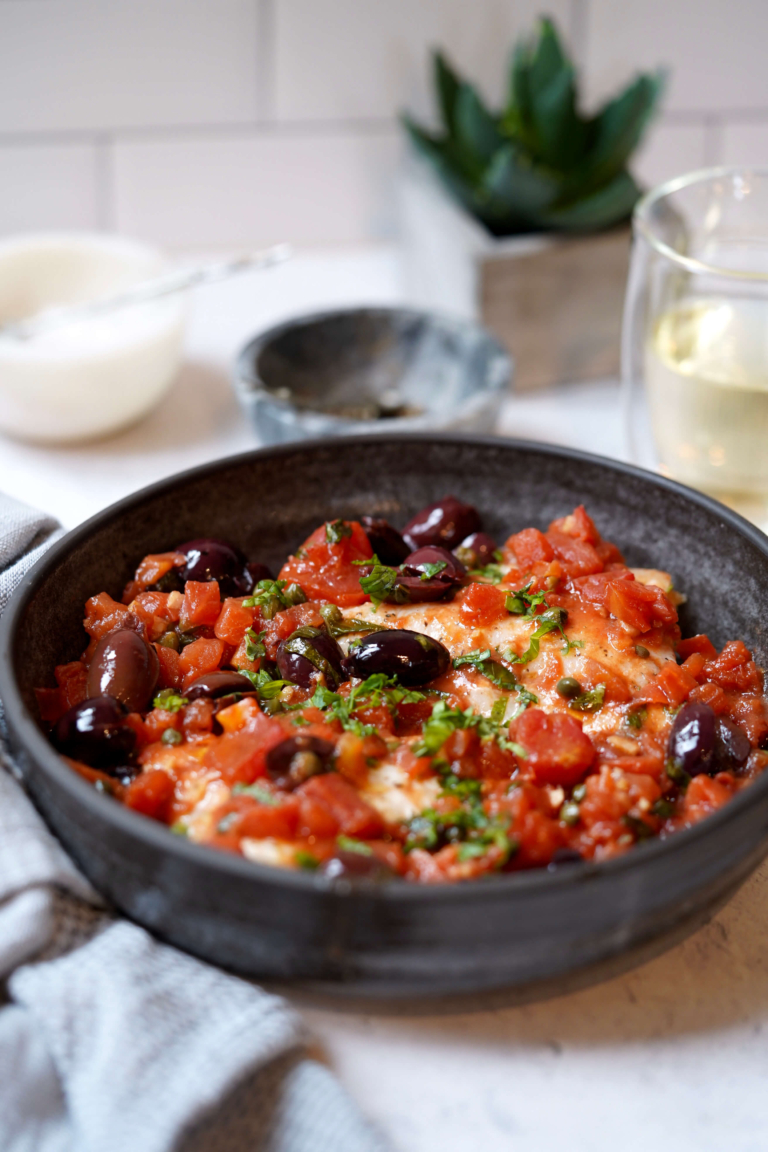
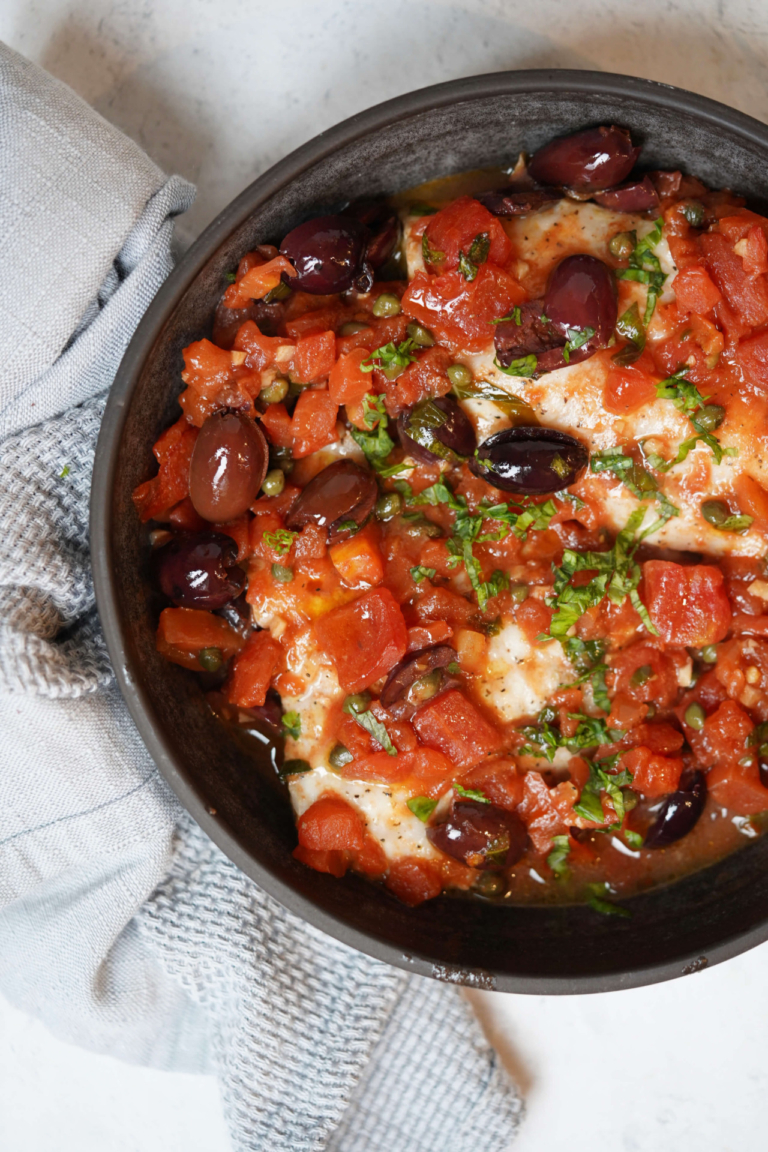
This oven-braised snapper with Puttanesca is a wonderful dish for fish lovers. I have blogged about Puttanesca already, but this version is a little different and not served with pasta. I found this lovely recipe in Fine Cooking and adapted it slightly, but the original one can be seen here. As many know, Spaghetti alla puttanesca is an iconic Italian pasta dish that originated in Naples in the mid-20th century. Puttanesca, a sauce made with tomatoes, olive oil, olives, anchovies, chili peppers, capers, and garlic is traditionally served over vermicelli or spaghetti pasta. But this lovely pasta sauce, with bold flavors, also makes a fantastic accompaniment to fish. So, if you’re a fish fan who is also mindful of the amount of carbs you consume, this simple dish is perfect for you.
Red Snapper
Red snapper is a popular fish often found on restaurant menus. The Red snapper lives in waters all around the world but is commonly found in the Caribbean, the Gulf of Mexico, and along the Atlantic Coast. Taste-wise, snapper is a mild, slightly sweet fish with a subtle nutty taste. Considered a light white fish, its meat is lean and moist with a firm texture, making it a versatile ingredient in recipes. And in case you’re curious, snapper is not a “fishy” fish compared to many other fish varieties, making them ideal for kids and people who prefer mild fish.
Red snapper is one of the most popular white fish in the world. The name “red snapper” is sometimes used to refer to similar, but less desirable fish, like the West Coast rockfish. However according to the FDA, the labeling or sale of any fish other than Lutjanus campechanus (red snapper’s scientific name) as “red snapper” is considered a misbranding and violates the Federal Food, Drug, and Cosmetic Act.
How to Pick the Best Snapper
- Find a trusted fish seller and verify you’re buying Lutjanus campechanus rather and not the cheaper, lookalike West Coast rockfish.
- Buy fish with the skin on to help identify the correct fish – red snapper should always have red skin.
- Clear, bright eyes are a sign of fresh fish. The backbone should also be bright in color.
- Fillets shouldn’t be browning and if you poke the fish it should bounce back.
The simplicity of this oven-braised snapper with Puttanesca is what I love most. A flaky white fish is the perfect complement to the tasty and vibrant sauce with pungent aromas of garlic, anchovies, capers, and olives. This is a great quick meal any time of the year, but I love it in late summer when you are savoring those last few days with extra hours of sunlight.
Oven Braised Snapper with Puttanesca
Ingredients:
- Four (5-ounce) skinless snapper fillets (about 3/4 inch thick)
- Kosher salt and freshly ground black pepper
- 3 tablespoons extra-virgin olive oil, divided
- 3 cloves garlic, minced
- Two (14.5 ounce) cans of petite diced tomatoes
- 1 teaspoon anchovy paste
- 1/2 cup pitted Kalamata olives, halved lengthwise
- 3 tablespoons, fresh basil leaves, thinly sliced, divided
- 1 tablespoon capers
- 1/4 teaspoon crushed red pepper flakes
- 2 teaspoons red wine vinegar
Directions:
- Position a rack in the center of the oven and heat the oven to 325 degrees F. Season the snapper on both sides with salt and pepper and set aside.
- Heat 2 tablespoons of the olive oil in a 12-inch ovenproof skillet over medium-low heat. Add the garlic and cook, stirring, until softened, but not golden, about 1 minute. Add the tomatoes and their juice, anchovy paste, olives, 2 tablespoons of basil, capers, and pepper flakes to the pan. Bring the sauce to a simmer and cook, stirring occasionally, until the tomatoes are tender and the juices have reduced to a saucy consistency, about 8 minutes.
- Nestle the snapper fillets into the sauce, spooning some of the sauce on top to keep the fish moist. Drizzle with the remaining tablespoon of olive oil. Tightly cover the pan with a lid or aluminum foil, place in the oven, and braise until the fish is almost cooked through, about 10 to 15 minutes, depending on thickness.
- Carefully remove the pan from the oven and with a slotted spatula, transfer the snapper to 4 shallow serving bowls. Stir in the remaining tablespoon of basil and vinegar into the sauce and spoon it over the fish
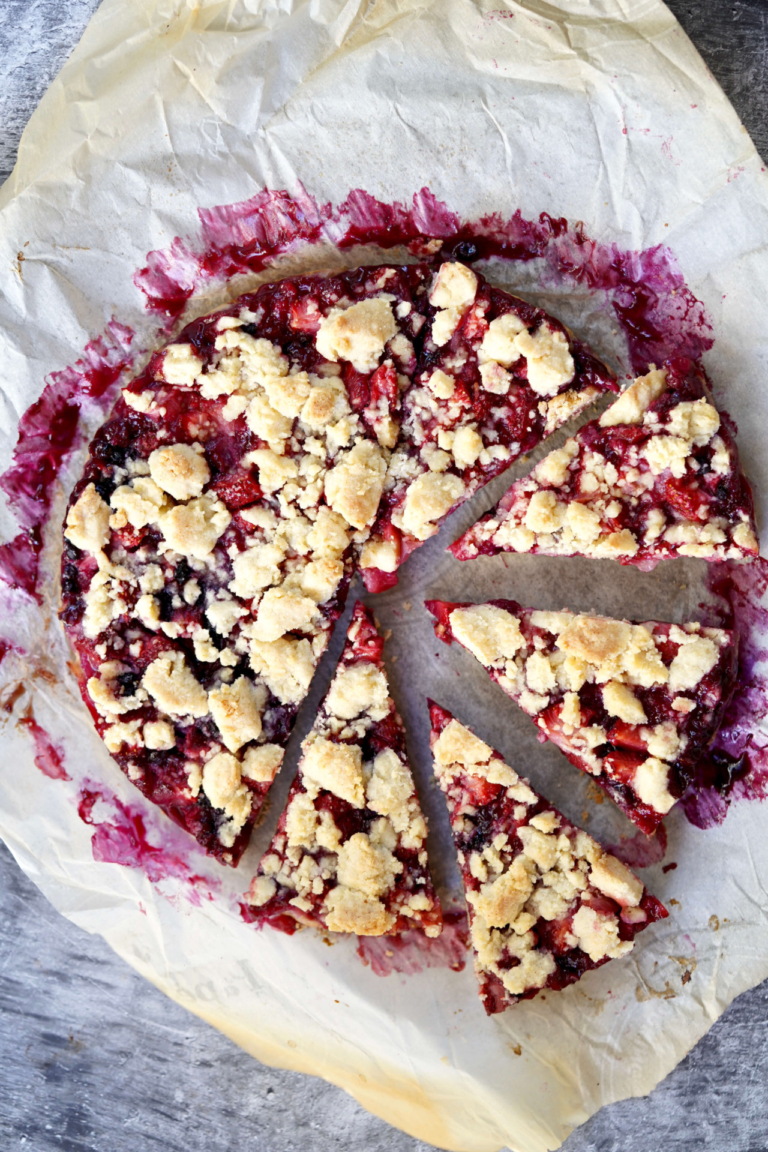
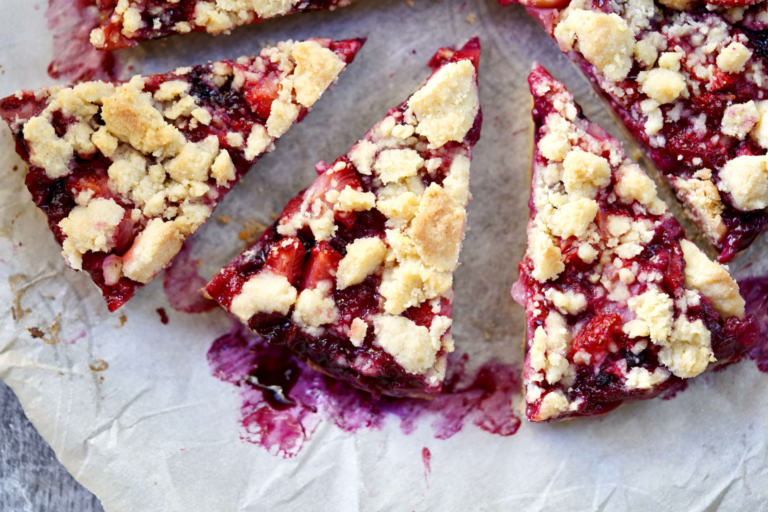
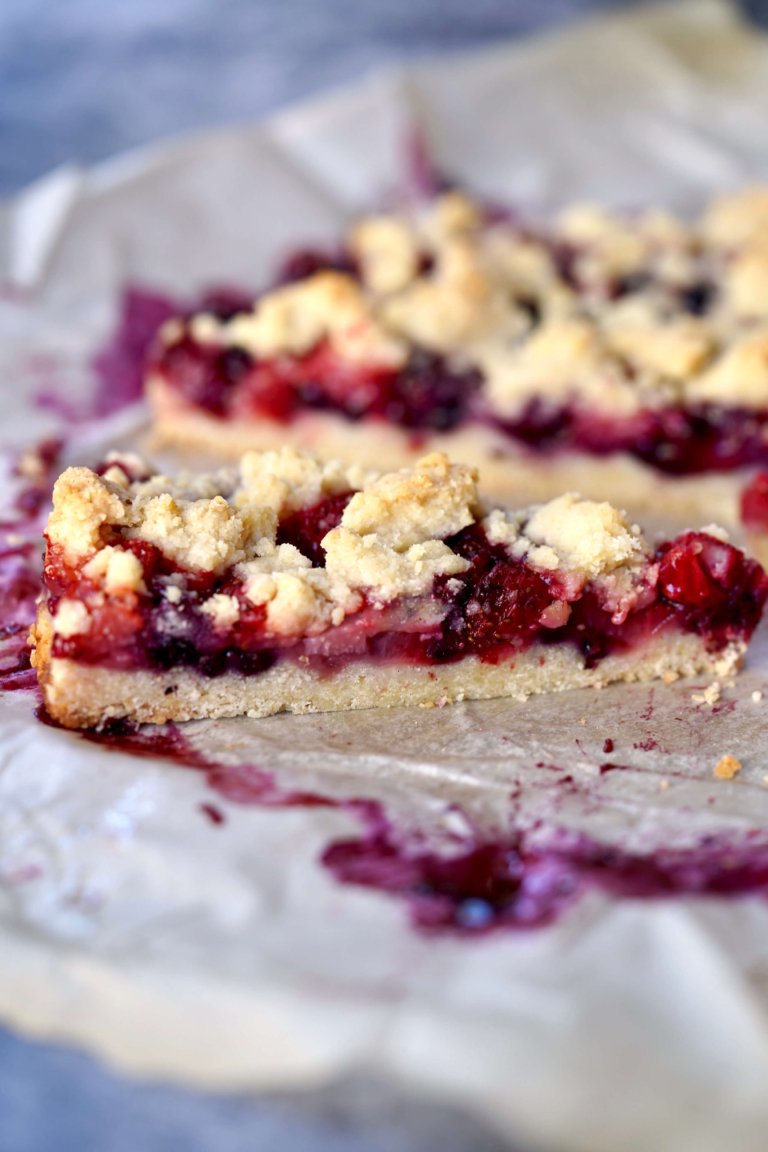
Ripe, juicy berries are synonymous with summer, and although we are slowly closing out that season, there is no need to panic, frozen berries, can make some amazing things as well. These outrageous and incredibly easy, summer berry crumble bars are loaded with fresh and frozen berries and they are exactly what you need in your life right now. Slice-to-size, these fruit-forward bars make a fantastic dessert for big or small gatherings alike and may just elevate your Labor Day celebration to a whole new playing field.
With seasonal produce of all kinds, you get a richer flavor and full nutrient composition because your produce is picked at peak ripeness. Buying produce seasonally allows you to buy locally and support local farmers with a nod to sustainability. That my friends, is a win-win. I also support buying seasonal fruit and freezing it for later, to be used in recipes like this, whenever the craving arises. But truth be told, most shoppers don’t know when produce is in season, so here’s a quick reference guide to help you out.
Summer Produce Calendar
- Apricots (May – July)
- Armenian cucumber (June – Aug.)
- Asian pear (July – Sept.)
- Basil (June – Aug.)
- Beets (All year, June – Oct.)
- Bell peppers (July – Nov.)
- Blackberries (May – Sept.; peak from June – July)
- Blueberries (April – Sept.)
- Butter lettuce (June – Aug.)
- Cherries (May – Aug.)
- Corn (May – Sept.)
- Cucumber (May – Aug.)
- Eggplant (July – Oct.)
- Grape tomatoes (June – Aug.)
- Green beans (May – Oct.)
- Honeydew melons (June – Oct.)
- Limes (May – Oct.)
- Mint (Year-round, in warmer climates)
- Nectarines (May – Aug.)
- Peaches (May – Sept.; peak in July – Aug.)
- Plums (May – Oct.)
- Raspberries (July – Oct.)
- Shallots (June – Sept.)
- Strawberries (April – June)
- Summer squash (June – Aug.)
- Tomatillo (June – Aug.)
- Tomatoes (June – Aug.)
- Watermelon (June – Aug.)
- Zucchini (June – Aug.)
Fresh Strawberries
In case you didn’t already know, strawberries are packed with vitamins, fiber, and particularly high levels of antioxidants known as polyphenols. And strawberries are also a sodium-free, fat-free, cholesterol-free, low-calorie food. They are among the top 20 fruits in antioxidant capacity and are a good source of manganese and potassium.
Frozen Blueberries
Like blackberries, blueberries are also a fantastic source of fiber and packed with loads of antioxidants. Despite their name, blueberries are a purple fruit because they contain the antioxidant anthocyanin, which contributes to their blue-purple pigment. Blueberries are a low-calorie and nutrient-dense source of dietary fiber and I love adding them in just about everything.
In my berry crumble bar recipe, I use fresh strawberries and frozen wild blueberries which may seem odd to some. Here’s my reasoning. Freezing blueberries is believed to make blueberries powerful antioxidants more available to the human body. This is possible because anthocyanins, (the antioxidant compounds that make blueberries blue), are found in the skin of the berry. Freezing blueberries creates tiny ice crystals that disrupt the structure of the cells, which in turn makes it easier for our system to access the anthocyanins contained within the skin. Sounds crazy, but it’s true. Because of this, one cup serving of fresh blueberries contains 3.6 grams of fiber, while the same serving of frozen blueberries has 6.2 grams of fiber.
My crumble bars are not healthful, but we all deserve a treat sometimes. This recipe works just as well with fresh blueberries as well so don’t let that factor stop you, these bars bake up perfectly just the same.

Summer Berry Crumble Bars
Ingredients:
- 1 1/2 cups all-purpose flour
- 3/4 cup sugar, divided
- 1/2 teaspoon baking powder
- Pinch of salt
- 1/2 cup cold unsalted butter, small cubes
- 1 large egg, lightly whisked
- 2 cups fresh strawberries, hulled and diced
- 1 cup frozen wild blueberries
- 1/2 tablespoon cornstarch
- 2 teaspoons vanilla extract
Directions:
- Preheat oven to 375 degrees F. Line a 9-inch round cake pan with parchment, lightly oil, and aside.
- In a medium bowl, add the flour, 1/2 cup of the sugar, baking powder, and salt, and mix to blend. Add the butter and the egg and use your hands to blend the ingredients. Note: the dough will be crumbly. Place half the crumble mixture into the prepared baking pan.
- In another medium-size mixing bowl, add the remaining 1/4 cup sugar, cornstarch, and vanilla extract. Use a large rubber tip spatula to gently fold in the berries.
- Pour the berry mixture over the crust. Take the other half of the crumb mixture and sprinkle on top of the berries.
- Place in the oven and bake for about 40 minutes, or until the crumb topping is slightly brown. Remove from the oven and allow to cool before slicing.
It’s believed that the Blue Lagoon cocktail was created by Andy MacElhone, the son of famed bartender Harry MacElhone, at Harry’s New York Bar in Paris in the 1960s or early 1970s. So, despite what most think, the drink predates the 1980 coming-of-age film, starring Brook Shields, of the same name.

Retro cocktails, as they’re called, are making a major comeback, and topping the list of feel-good drinks from the 70’s are, Mai Tais, Pina Coladas, and Blue Lagoons. Some attribute this trend to a post-pandemic desire for fun experiences. But I think it’s simpler than that and really about the lovely tropical flavors that made them famous from the start.
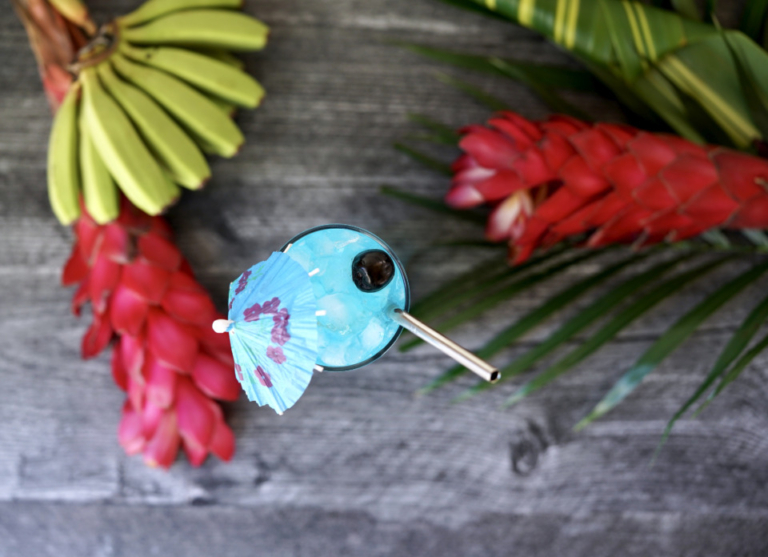
Like the blue Caribbean sky (and water) the magnificent Blue Lagoon has an appealing lure to it like no other. With a base of vodka, blue curaçao—a Caribbean liqueur made using the dried peel of the Laraha citrus fruit and then colored blue—adds sweet, zesty notes plus its beautiful signature blue hue. Lemonade mellows out this iconic drink even more making it a sipping favorite on these last few days of summer.

This unpretentious cocktail is appealing to many because of its mild flavor and amazing fruity aroma. I recently vacationed with my family in the South Pacific and the color of this drink is a reminder of that stunning, calming water I could not take my eyes off of. This is a wonderful, refreshing drink, that quenches one’s thirst and is deserving of a comeback if you ask me.
Blue Lagoon Cocktail
Ingredients:
- 2 ounces vodka
- 2 ounces Blue Curacao
- 4 ounces lemonade
- Crushed ice
- Luxardo cherry, for garnish
- Mini cocktail umbrella (optional)
Directions:
- Place a good amount of crushed ice in a tall cocktail glass. Set aside.
- In a cocktail shaker add a generous amount of ice. Add the vodka, Blue Curacao and lemonade and shake vigorously for 20 seconds.
- Strain into the prepared glass. Garnish with a cherry and a mini cocktail umbrella, if using.
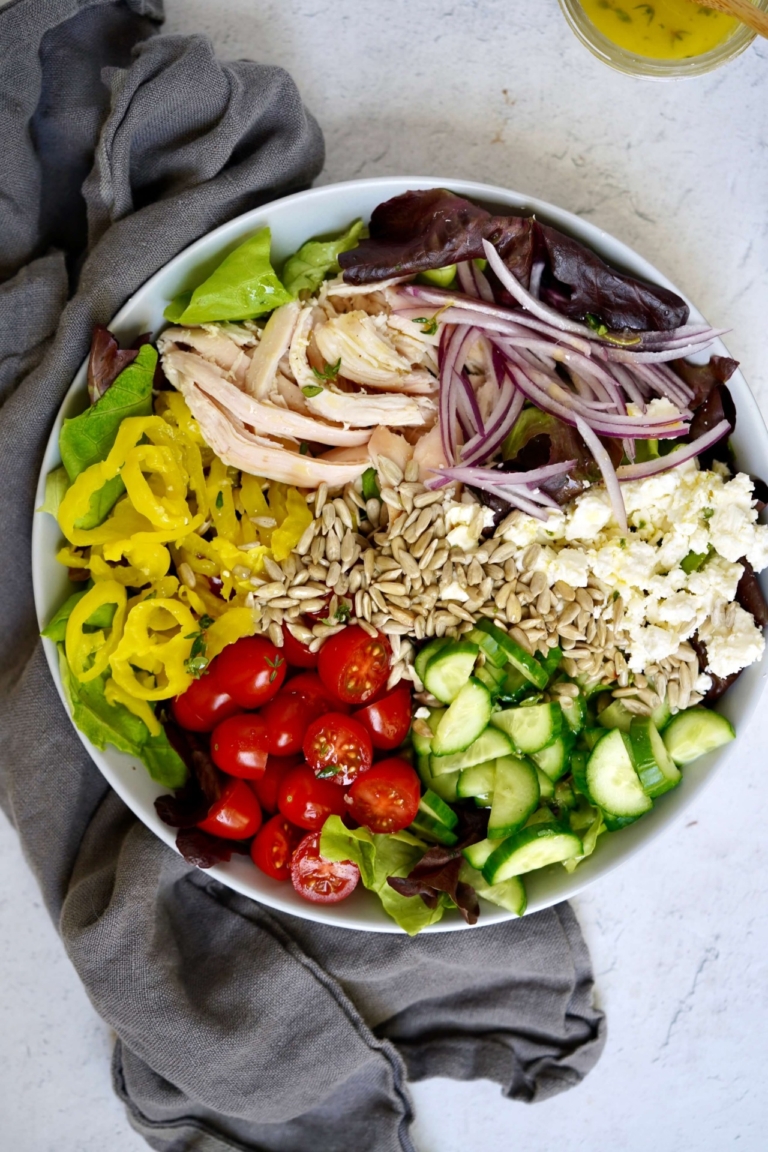
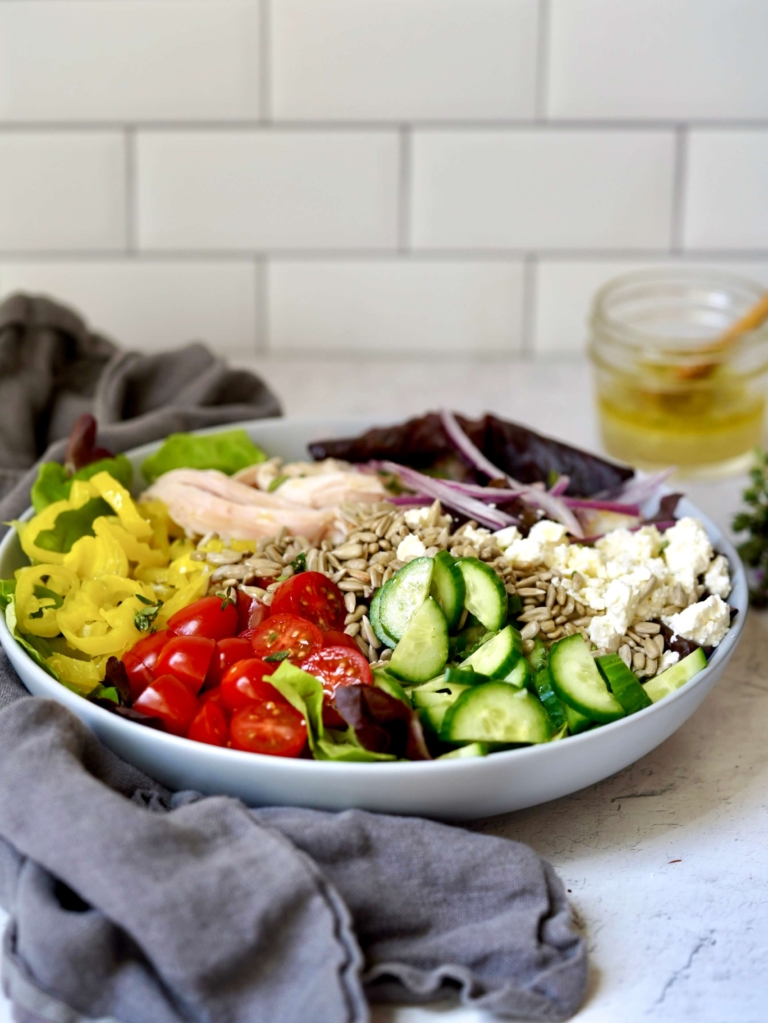
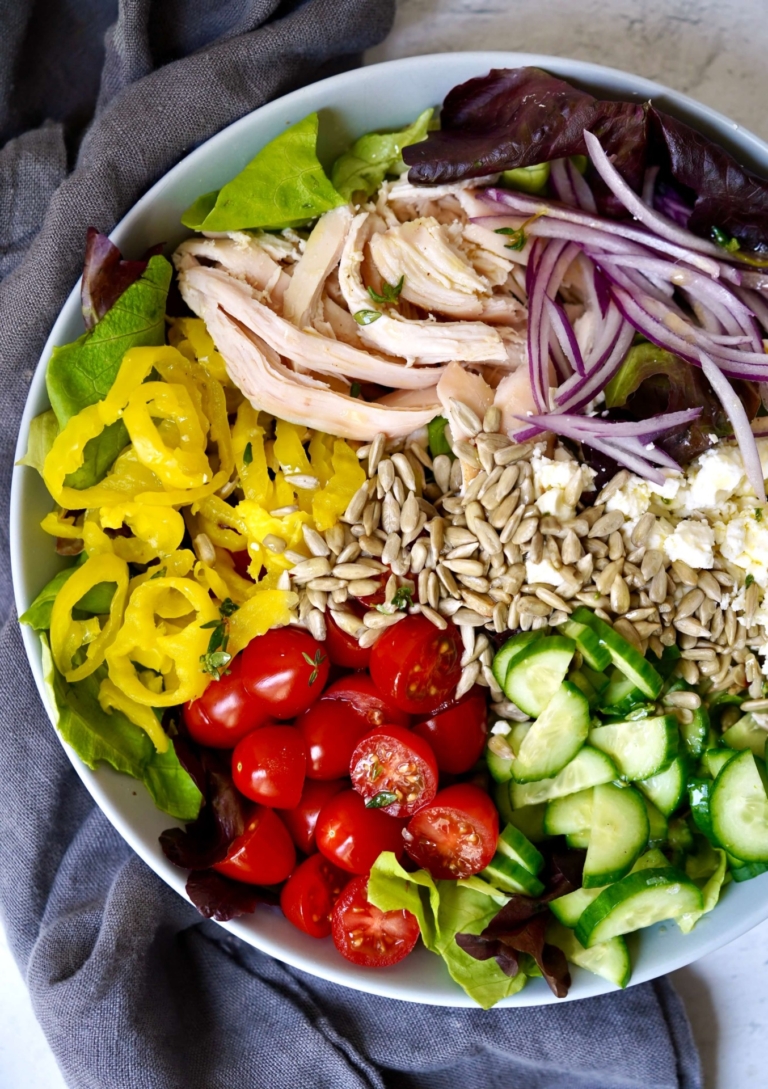
This is not a health blog, and not everything I eat is healthy. I can own that. Good health for me is all about moderation. I eat everything, but it’s balanced and I eat a lot of salads. I am a big believer in “eating the rainbow“. All those brightly colored vegetables offer amazing nutrients that honestly make me feel healthy just by preparing them.
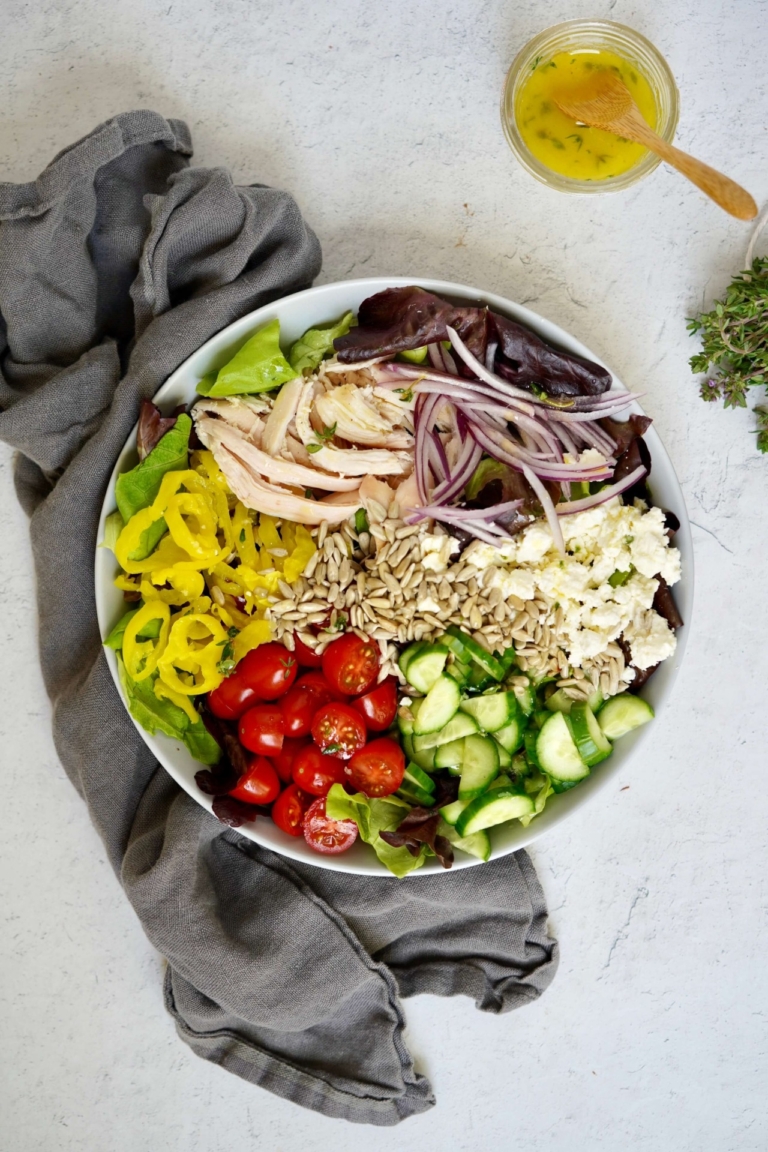
This is what I call a chopped chicken protein salad, and is a salad I make frequently at home when in a hurry. This simple salad is one of the most uncomplicated salads I make. And while I do make a homemade lemon-thyme vinaigrette, this salad is really about assembling nutritious ingredients that happen to be healthy and filling.
The Importance of Fiber
Salads are really a fantastic and easy way to add more vegetables and fiber to your diet, however, without a substantial amount of protein they can easily leave you unsatisfied and, even worse, hungry. Because protein is the most satiating macronutrient, including protein, of some kind, in every meal is a great way to balance your blood sugar, minimize cravings, and keep you feeling full for hours.
Protein Punch Options by Grams
- 3 ounce serving of cooked chicken breast = 26 grams
- 1/2 cup sunflower seeds = 15 grams
- 1 cup feta cheese = 21 grams
- 2 hard boiled eggs = 12.6 grams
- 2 slices of bacon = 6 grams
- 3 ounces crab meat = 16.4 grams
- 3 ounces of tofu = 8.4 grams
- 3 ounces of Tempeh = 15.3 ounces
- 3/4 cup cooked black beans = 11.4 grams
- 3/4 cups cooked lentils = 13.4 grams
- 1 cup quinoa = 8 grams
Protein aside, if health is your main focus, my best advice is to make your own salad dressing. A vinaigrette, even a homemade ranch, is substantially better for you, with significantly less sugar and calories than almost any store-bought one you can find. Believe it or not, store-bought salad dressings are actually considered processed foods, most people don’t even realize that. So the takeaway, is don’t skimp on yourself, because you’re worth it.
Chopped Chicken Protein Salad
Ingredients:
For the Lemon Thyme Vinaigrette:
- 1/4 cup Extra-virgin olive oil
- 3 tablespoons freshly squeezed lemon juice
- 1 garlic clove, grated
- 1/2 teaspoon sugar
- 1/4 teaspoon salt
- 1/4 teaspoon ground pepper
- 3 spring fresh thyme leaves, stem removed
For the Salad:
- 6-8 cups mixed greens
- 2 cups shredded roasted, grilled, or boiled chicken
- 1 cup grape tomatoes, halved
- 1 cup Persian cucumber, cut lengthwise and sliced
- 1/2 small red onion, thinly sliced
- 1/2 cup sliced pepperoncini
- 1/2 cup feta cheese, crumbled
- 1/4 cup sunflower seeds, lightly toasted
Directions:
- Preheat the oven to 350 degrees F.
- For the Vinaigrette: In a small bowl, add the olive oil, lemon juice, garlic, sugar, salt, pepper, and thyme leaves, whisk well to blend, and set aside.
- Place the sunflower seeds on a baking sheet, place in the oven, and bake until toasted about 5-7 minutes. Remove from the oven and cool slightly.
- For the Salad: to each serving bowl add: some mixed greens, chicken, tomatoes, cucumber, onion, pepperoncini, feta cheese, and toasted sunflower seeds. Drizzle with the lemon vinaigrette and serve
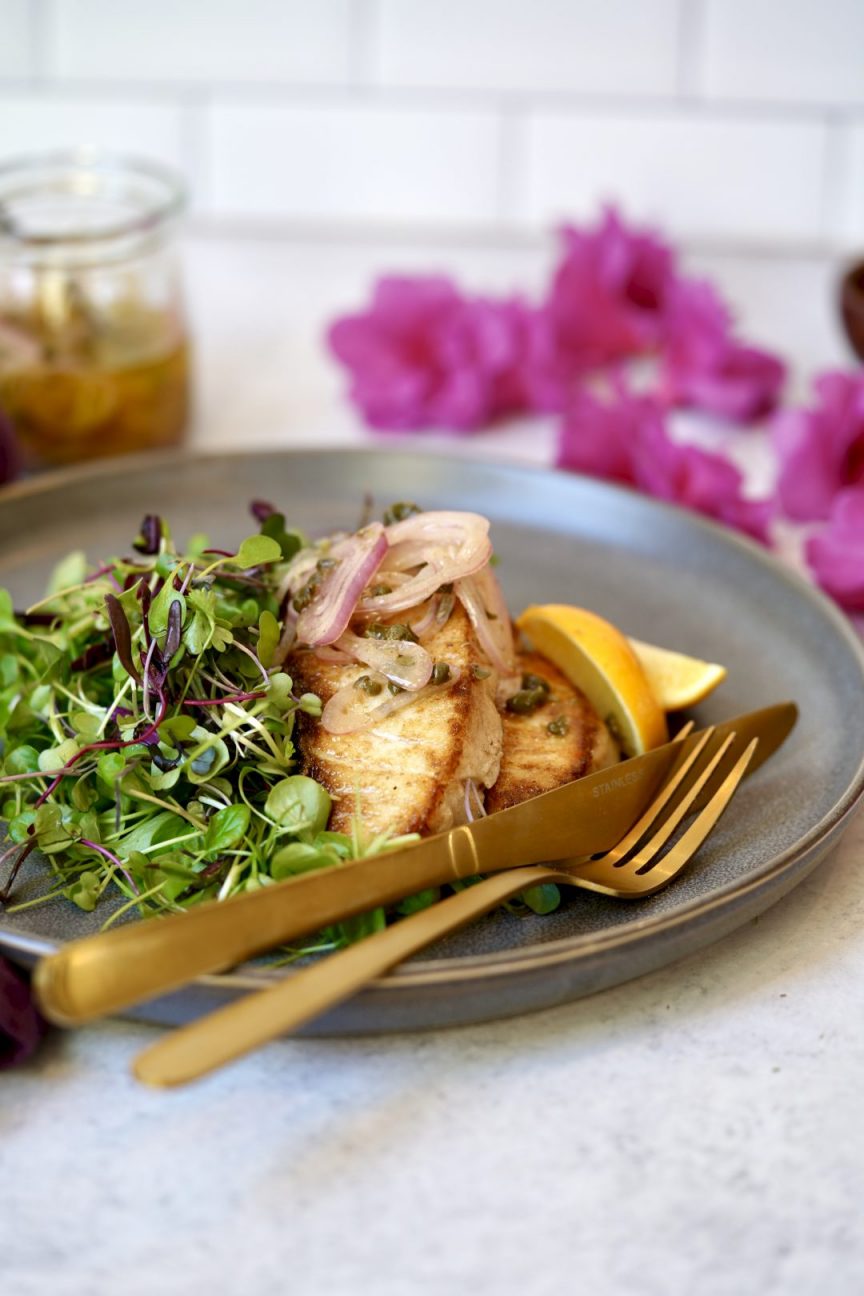
Summer is all about easy, often healthy(er) recipes and limited prep time. In warmer months most of us naturally gravitate to lighter meals with more fresh vegetables and often less carbs. I aspire to cook like this as much as possible, year-round because I honestly feel better, health-wise, doing so. But truthfully, this is easier said than done. So my motto is; do what you can, when you can—it does not have to be all or nothing. This seared sea bass with shallot vinaigrette, served with fresh greens, is a lovely, easy, go-to recipe for me in warmer months. The flaky, white fish sears up in minutes and is dressed with a subtle, yet flavorful, shallot dressing with salty capers.
Sustainability
When it comes to fish, sustainability matters. Research is always a good thing; downloadable buying charts, such as my go-to Monterey Bay Aquarium, are extremely accurate, but can also be a bit overwhelming. If you don’t use these types of tools, that’s fine, but know what your options are. Here are five great-tasting, sustainable fish, that you can always buy and eat without worry. In addition to these fish being plentiful, wild, and sustainably caught, they also tend to have lower levels of mercury as well.
- STRIPED BASS: A delicate, flavor similar to a snapper but cleaner and less oily. Its soft texture makes it well-suited for sautéing, roasting, or steaming. This fish does require a little attention when cooking because it can easily get overcooked. Striped bass pairs well with gentle flavors like leeks, shallots, and mushrooms, but can also hold up well with more assertive, spicy flavors.
- PACIFIC HALIBUT: With a subtle flavor and buttery texture, halibut is best when barely cooked through. If you overcook it, it will be very dry and flavorless. Halibut has a smooth texture that is slightly firm. Its subtle flavor should not be overpowered by aggressive sauces or marinades. Halibut pairs well with tarragon, chives, and any kind of green you can imagine.
- BLACK COD: Unlike the similarly textured Chilean sea bass, black cod is harvested from well-managed Alaskan fisheries, which impose strict catch limits to protect the species from depletion. Called sablefish in Europe, black cod is one of the richest-tasting fish around. It is buttery and luxurious and almost impossible to overcook. Black cod is extremely versatile and holds up well when steaming, braising, and roasting. This fish is wonderful with subtle preparations, but can also stand up to spicy, sauces and marinades.
- ARCTIC CHAR: Char is a distant cousin of salmon and trout. Char has a mild, salmon-like flavor and a beautiful pink color due to its natural diet, of tiny crustaceans, such as pink shrimp. You can cook char in numerous ways as it’s very hard to overcook because of its fatty texture which keeps it moist. Char can pair well with numerous flavors but goes exceptionally well with mushrooms, leeks, and fennel.
- ATLANTIC MACKEREL: This is a fish with a strong, robust flavor. The best way to cook mackerel is to sauté or roast it, as it is considered too oily for poaching or steaming. Mackerel’s assertiveness pairs very well with complex ingredients such as miso, soy, and citrus as well as flavorful vinaigrettes.

This healthy recipe is also easily adaptable and can be made with several types of fish. So, if you can’t find sea bass, go ahead and try it with halibut or black cod. And if you are looking for a a great starch to serve alongside it for a heartier meal, I strongly suggest my crispy leaf potatoes or my lentils and rice which are always big hits in my house.
Seared Sea Bass With Shallot Vinaigrette
Ingredients:
- 3 shallots, sliced into rings
- 1/2 cup, plus 3 tablespoons, Extra Virgin olive oil, divided
- 2 tablespoons capers, roughly chopped
- 1 tablespoon red wine vinegar
- Kosher salt and black pepper, to taste
- Four (6-ounce) pieces of striped bass or halibut
- 4 cups mixed greens or micro greens of your choosing
Directions:
- In a saucepan, add the shallots and 1/2 cup of olive oil, place over medium heat, and simmer the shallots until they are light golden brown, about 10-12 minutes.
- Transfer the shallots to a bowl and add the capers, vinegar, and about 1/4 teaspoon each of salt and pepper. Taste and adjust the seasoning as needed. Set aside.
- In a large skillet, add 1 tablespoon of the oil and heat over medium-high heat. Season the fish with salt and pepper. When the oil is hot, but not smoking, and the fish and sear until opaque, about 4 minutes per side. Divide among plates.
- Serve the sea bass with greens and the shallot vinaigrette drizzled over the top of the greens and fish.
Canning jam is an involved process, and although I don’t discourage it, I don’t enjoy doing it. But making jams and jellies is something I do enjoy. Sadly, people confuse the two and, as a result, avoid making them completely. That is a shame. The great news is that you can easily (and quickly) make jams and jellies without canning, so keep reading my friends. From strawberry-rhubarb quick jam to this delightful, sweet-spicy hot pepper jelly, there is a wonderful world of spreads out there for you to discover, and I hope you do.
Little did I know, that pepper jelly is considered a Southern favorite. The Southern version is often described as being somewhere between a jam and a relish texture-wise. Made up of just a few ingredients; peppers, sugar, vinegar, and pectin resulting in a very special, slightly unusual, preserve, I’m told Southerners love their pepper jelly so much, they will put it on just about anything. A well-known favorite is cream cheese served with a side of Ritz crackers. Interesting, but I’ve got to admit, not me at all.
That aside, I’m blogging about pepper jelly because it’s something one of my college besties was obsessed with. The Saturday morning farmers market near campus provided her with a steady supply which, just like a Southerner, (she is midwestern), she would put it on just about everything, but her favorite was pretzels. My roommate was the inspiration behind this jelly recipe and my husband has been the happy receiver of my developing it. Like my friend, he has yet to find something hot pepper jelly can’t be put on. And I’m very serious about that. From sandwiches to scrambled eggs, this sweet-and-spicy spread is a welcome pop to just about anything you can think up.
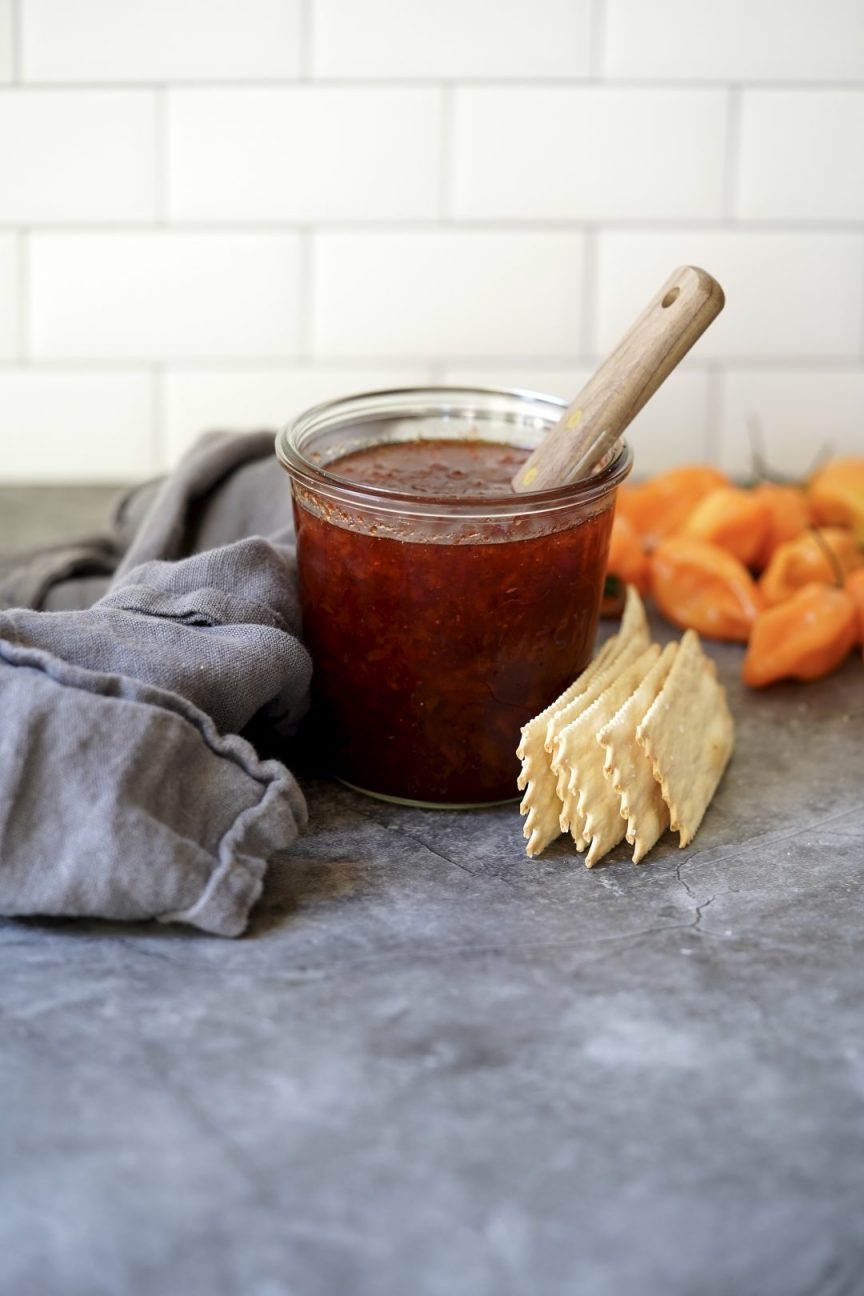
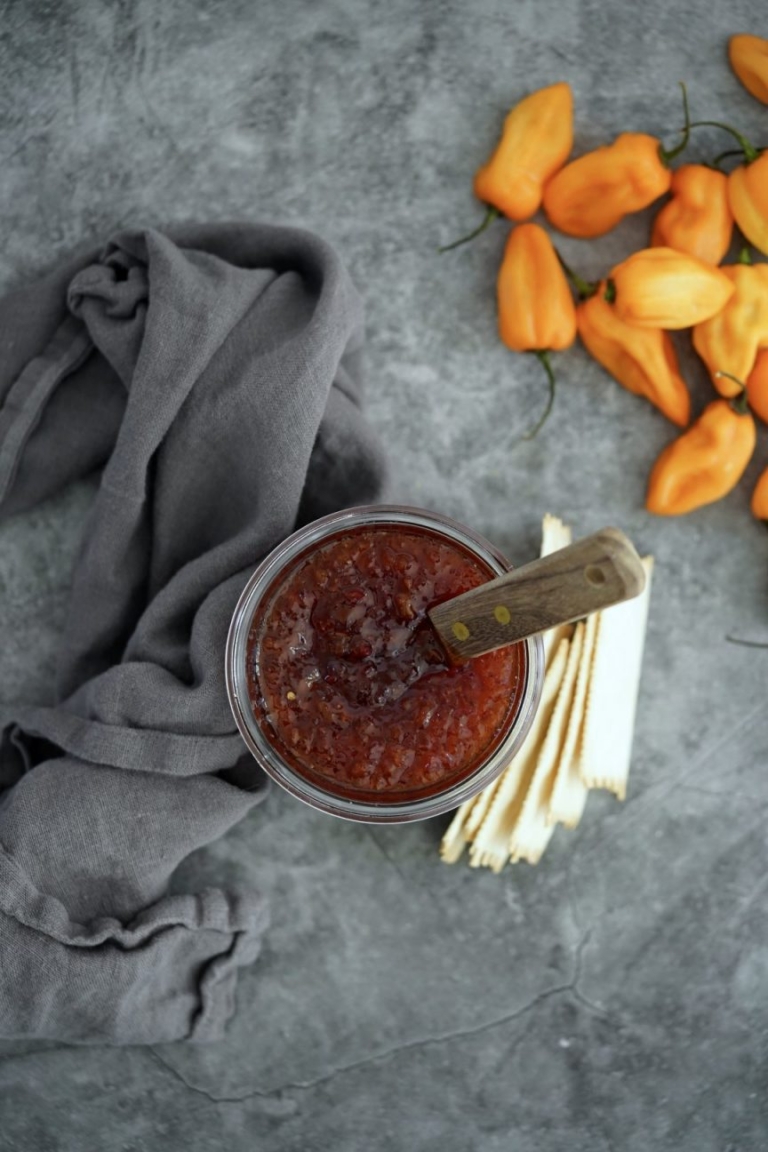
Unlike traditional Southern pepper jellies, I make mine without pectin and instead use dried apricots to help the jelly set. Although my jelly contains traditional red peppers, instead of jalapeño peppers, I use a combination of fresh habaneros as well as dried Aleppo pepper flakes for heat, which creates a unique sweetness and salty flavor with the perfect amount of heat.
Hot Pepper Jelly
Ingredients:
- 2 cups sugar
- 3/4 cup apple cider vinegar
- 1/4 cup white vinegar
- 1/2 cup dried apricots, roughly chopped
- 1/4 cup red onion, finely chopped
- 1/4 cup red bell pepper, seeded, finely chopped
- 3 tablespoons, fresh Habanero peppers, finely chopped
- 1 1/2 tablespoons Aleppo pepper flakes
Directions:
- In a medium saucepan add the sugar and both kinds of vinegar and stir to combine. Place the saucepan over high heat and bring to a boil. Add the dried apricots, onion, red pepper, Habanero pepper, and Aleppo pepper flakes. Reduce the heat to medium and simmer till slightly thickened about 25 minutes. Remove from the heat and allow to cool slightly.
- Once the jelly is cool enough to handle, transfer it to the bowl of a kitchen mixer, such as a Cuisinart, fitted with a blade attachment. Next pulse on/off till well blended.
- Spoon the jelly into a large glass jar and allow to cool completely on the counter. Once cool, place a lid on top and refrigerate. Stays fresh for about two weeks.